Integrating Enterprise SSO with Firebase
If you’re already using Firebase for authentication, but now need to support SAML or Enterprise-level Single Sign-On (SSO), this guide is for you! If you haven't already, make sure to check out our guide on getting your project ready for Enterprise SSO.
Firebase Configuration
Now that we have everything prepared on the PropelAuth side, let's add a provider to your Firebase account. This provider will then allow us to create a "Login With Enterprise SSO" button to your login page.
Add a new Sign-in Provider for Enterprise Customers
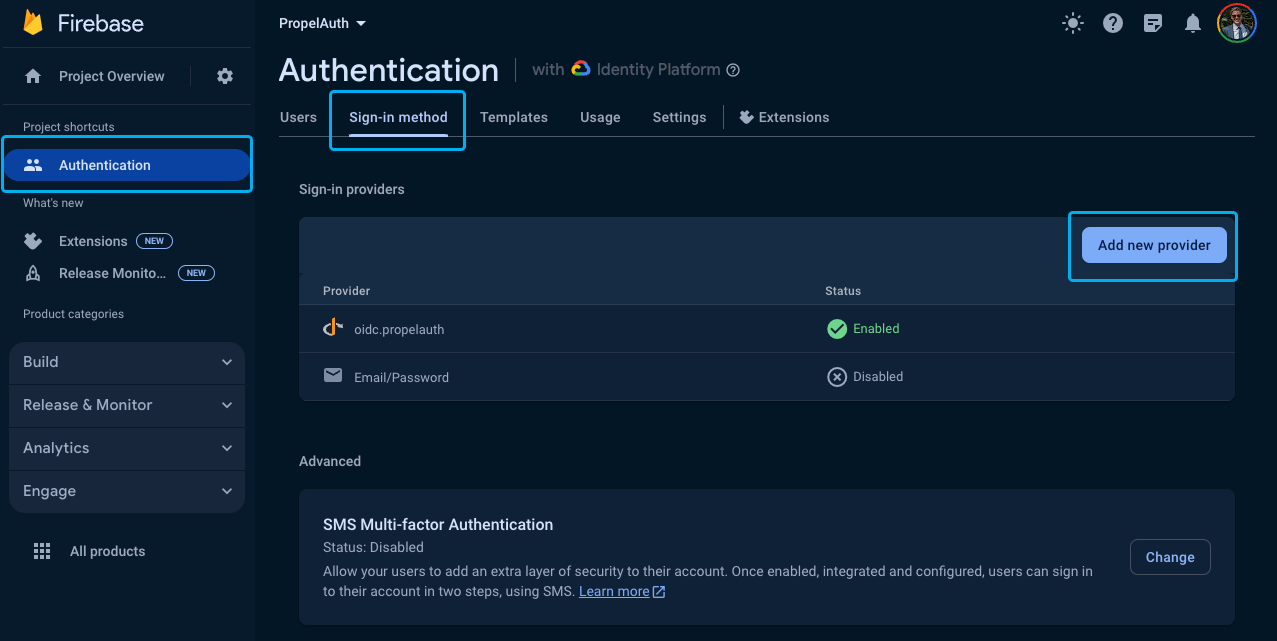
Go to your Firebase Project and click Authentication, followed by Sign-in method and then Add new provider.
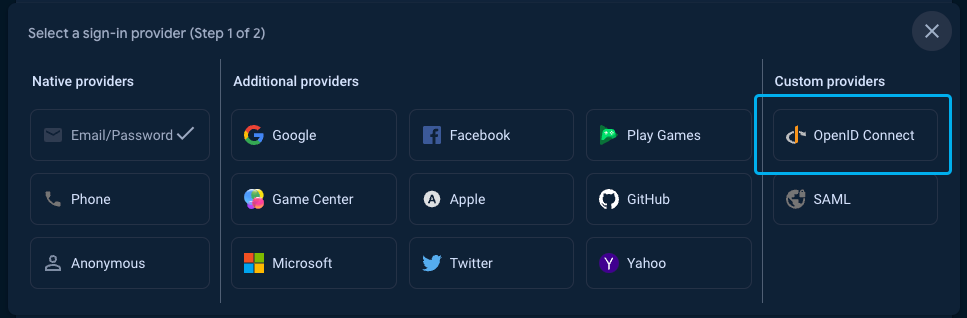
Then select OpenID Connect.
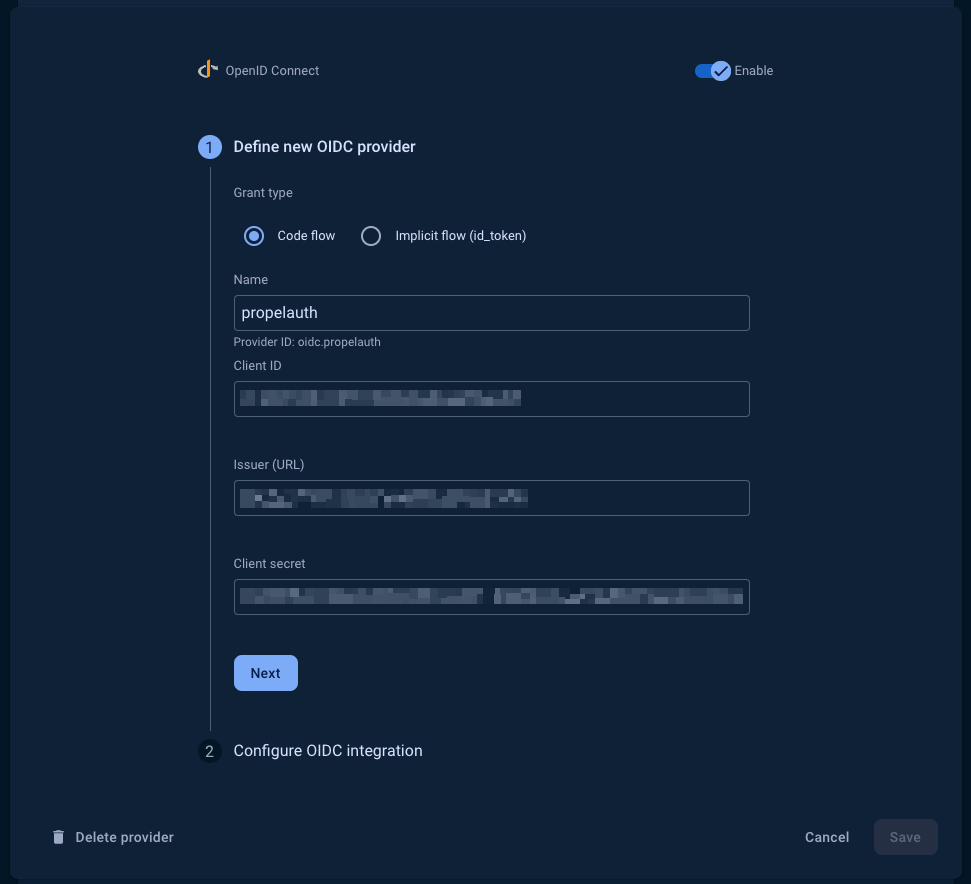
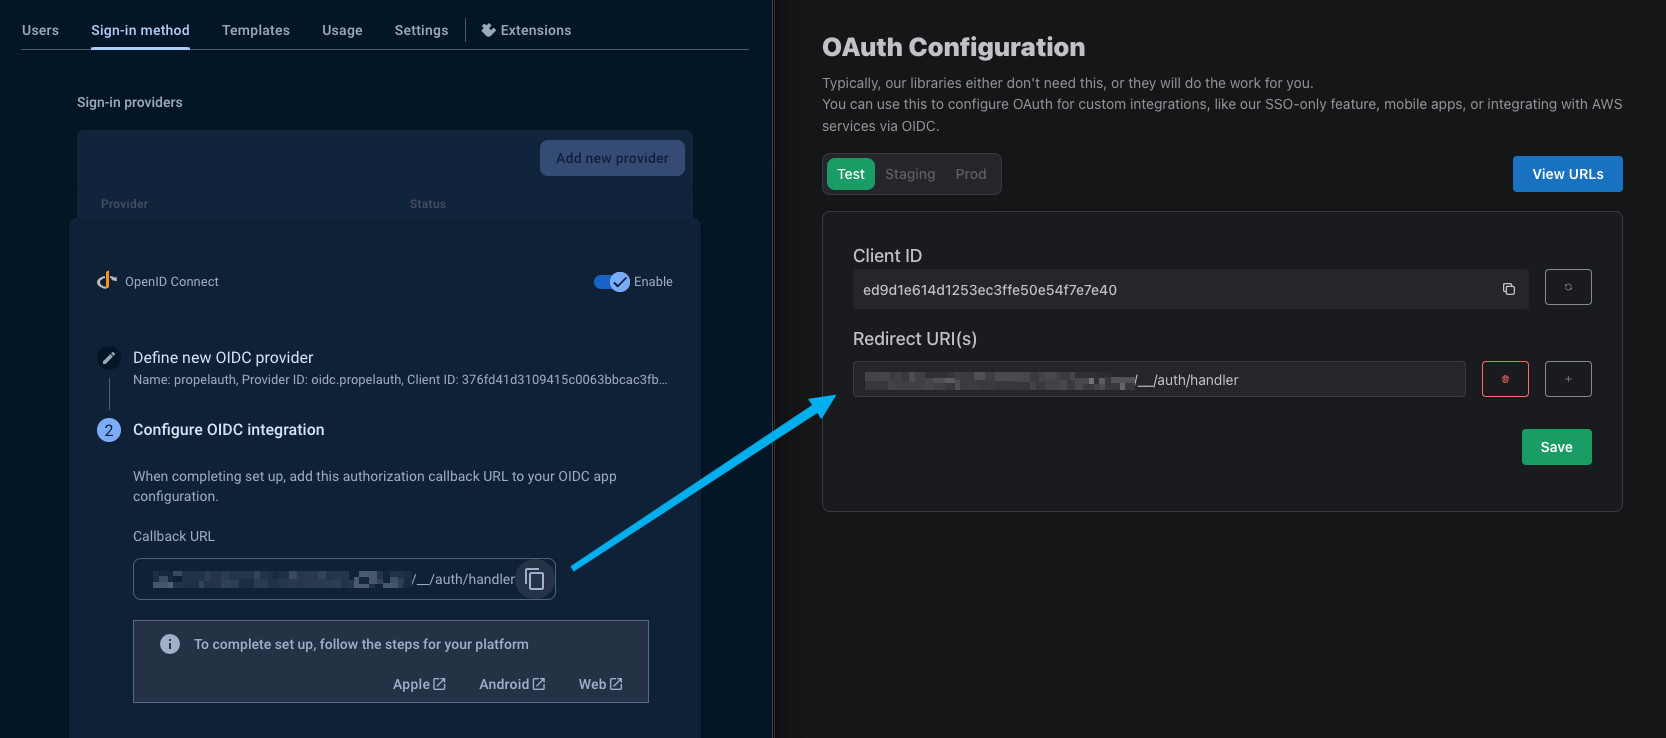
On the following screen, enter your Client ID, and Client secret. You can find these by heading over to the Frontend Integration page, clicking on Advanced Settings followed by Edit OAuth Config. Here, we can generate a Client ID and Client Secret. We'll be coming back to this soon to add a Redirect URI.
You can find your Issuer URL by navigating to the Backend Integrations page in PropelAuth.
In the next step, you’ll want to copy the Callback URL from Firebase and enter it into your PropelAuth dashboard, also in the Edit OAuth Config section.
And that’s all! We now have a provider that we can use for all of our Enterprise customers. Let’s now go and create our sign in page.
Firebase Setup
Initializing Firebase
If you don’t already, make sure to initialize Firebase. You can find the firebaseConfig in your Project settings in Firebase.
import firebase from 'firebase/compat/app';
import 'firebase/compat/auth';
import 'firebase/compat/firestore';

const firebaseConfig = {
  apiKey: "",
  authDomain: "",
  projectId: "",
  storageBucket: "",
  messagingSenderId: "",
  appId: ""
};

firebase.initializeApp(firebaseConfig);

const auth = firebase.auth();
Creating a Sign in With Enterprise SSO Login
Now that we have everything set up in PropelAuth as well as a provider in Firebase, let’s create a sign-in button in our login page.
Enterprise SSO is not as simple as a “Sign in with Google” (or Social SSO) option. You can’t just place a button that says “Sign in with Okta” because you need to know which Okta account they are signing in to.
Some common examples include:
- Ask for the user’s email address up front, see if an SSO connection exists for it, and if so, begin the login process. Otherwise, ask for their password.
- Adding a “Sign in with SSO” button - when the user presses it, we prompt them for their email address.
- Adding a “Sign in with SSO” button - when the user presses it, we prompt them for their organization’s name.
PropelAuth provides options that support all of these and more, but let’s look at the second example where we collect the user’s email address. We can check if an email address has a SAML connection by fetching the following endpoint:
{YOUR_AUTH_URL}/api/fe/v3/login/check?email={YOUR_USERS_EMAIL}
If the user has a SAML connection, the request will return a SAML login URL. If not, it will return a 404. Let’s create a button that checks if the user has a SAML connection:
function SignUpPage() {
  const [email, setEmail] = useState('')
  const [message, setMessage] = useState(null);

  const loginWithEnterpriseSSO = async () => {
    let response = await fetch(`{YOUR_AUTH_URL}/api/fe/v3/login/check?email=${email}`);
    if (response.status === 200) {
      // update with your providerId from Firebase
      handleOIDCLogin("oidc.propelauth")
    } else if (response.status === 404) {
      setMessage("User does not belong to an org")
    }
  };

  const handleOIDCLogin = async (providerId) => {
    // TODO: implement
    setMessage("The user belongs to an org")
  }

  return (
    <div>
      <input
        type="email"
        placeholder="Enter your email"
        value={email}
        onChange={(e) => setEmail(e.target.value)}
      />
      <button onClick={loginWithEnterpriseSSO}>
        Login With Enterprise SSO
      </button>
      {message && <div>{message}</div>}
    </div>
  );
}

export default SignUpPage
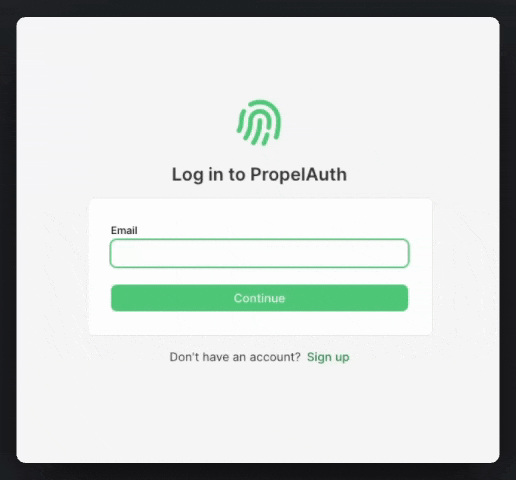
When we test this out with a user who belongs to an org with a SAML connection, we should see this as a result:

Let’s now update the handleOIDCLogin function to handle the Firebase OIDC login and call it when our SAML check succeeds. Here’s some additional documentation on the OAuthProvider function that we’ll be using.
const handleOIDCLogin = async (providerId) => {
  try {
    const provider = new OAuthProvider(providerId);
    // You can also use org_name, org_id, or domain instead of email
    provider.setCustomParameters({
        email: email
    })
   await auth.signInWithRedirect(provider);
  } catch (err) {
    setError(err.message);
  }
};
This login flow will direct the user to login through their IdP, such as Okta or Entra. But what happens after they login? How do we get the user information? Once the user has completed the login flow we can use Firebase's getRedirectResult to retrieve a PropelAuth access token. Using that we can hit PropelAuth's /oauth/userinfo endpoint.
const getUserOAuthDetails = async (accessToken) => {
  try {
    let response = await fetch(`{YOUR_AUTH_URL}/propelauth/oauth/userinfo`, {
      headers: {
        Authorization: `Bearer ${accessToken}`
      }
    });
    const jsonData = await response.json()
    return jsonData
  } catch (err) {
    console.log(err)
  }
}

useEffect(() => {
  auth.getRedirectResult().then((result) => {
    // TODO: Replace with your providerId
    // This is how you can check if the user logged in with PropelAuth
    if (result.credential && result.providerData[0].providerId === "oidc.propelauth") {
      const accessToken = result.credential.accessToken
      getUserOAuthDetails(accessToken).then((userDetails) => {
        console.log(userDetails)
        // {
        //   "can_create_orgs": false,
        //   "created_at": 1711127287,
        //   "email": "test@propelauth.com",
        //   "email_confirmed": true,
        //   "enabled": true,
        //   "first_name": "Anthony",
        //   "has_password": true,
        //   "last_active_at": 1712277786,
        //   "last_name": "Edwards",
        //   "locked": false,
        //   "metadata": null,
        //   "mfa_enabled": false,
        //   "org_member_info": {
        //       "org_id": "35905720-f22a-4f36-b082-7f35bb32463f",
        //       "org_name": "PropelAuth",
        //       "url_safe_org_name": "propelauth",
        //       "user_role": "Owner",
        //       "inherited_user_roles_plus_current_role": [
        //           "Owner",
        //           "Admin",
        //           "Member"
        //       ],
        //       "org_metadata": {},
        //       "user_permissions": [
        //           "propelauth::can_invite",
        //           "propelauth::can_change_roles",
        //           "propelauth::can_remove_users",
        //           "propelauth::can_setup_saml",
        //           "propelauth::can_manage_api_keys"
        //       ]
        //   },
        //   "picture_url": "https://img.propelauth.com/2a27d237-db8c-4f82-84fb-5824dfaedc87.png",
        //   "properties": {
        //      "favoriteSport": "Basketball"
        //   },
        //   "sub": "0497bbe6-49c1-4bc7-9e9c-c75846722c73",
        //   "update_password_required": false,
        //   "user_id": "0497bbe6-49c1-4bc7-9e9c-c75846722c73"
        // }
      })
      }
    })
}, []);
And that’s it! Your users can now:
- Setup SAML
- Login via SAML
- Show up with org details, roles, and user properties when they login
You’re now all set and ready to managing your users with Enterprise SSO!