Integrating Enterprise SSO

If you already have an auth provider, but now need to support SAML or Enterprise-level Single Sign-On (SSO), this guide is for you. We also provide auth provider specific guides for:

  1. Firebase
  2. NextAuth
  3. Cognito

PropelAuth Configuration

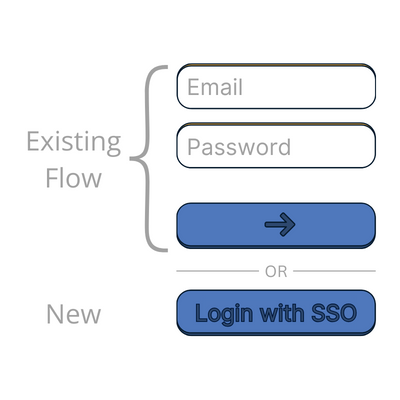
Since you're already integrated with an auth provder, we're assuming you already have a login page. In this guide, we’ll be extending your current auth provider to allow enterprise customers to sign in with their IdP via your login page.

Login page example

We’ll start with making some changes in the PropelAuth dashboard.

  1. Update Login Methods - Let’s navigate to the Signup / Login page. Here we can enable SAML but, since you already have other login methods enabled through your auth provider, we can disable every other login method. While we’re here, let’s disable the Allow public signups setting by navigating to the Settings tab.

Disabling login methods

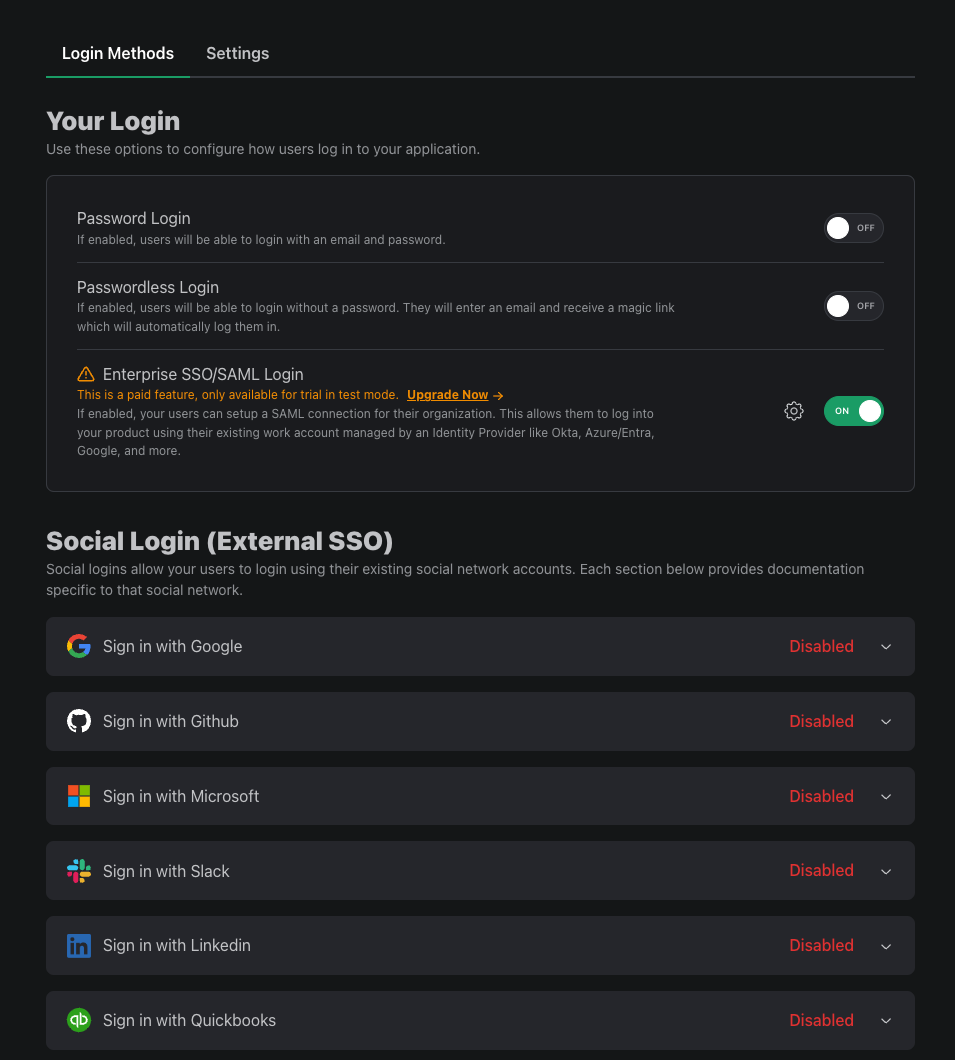
  1. Organization Settings - Head over to the Organization Settings page and disable the Users can create their own orgs setting.

  2. (Optional) Setup User Properties - If you have user properties such as name, username, and profile picture that you would like to collect from the IdP, head over to the User Properties page to enable them. You can also create a Custom User Property if you don’t see what you’re looking for.

  3. (Optional) Map Roles - If you already have orgs, you likely have roles as well. If you setup that same role structure with us, then your users will be able to show up with role information once they login with SAML. If you’re wanting to use roles, navigate to the Roles & Permissions page and edit or create roles to match your own.

Creating Orgs for your Users

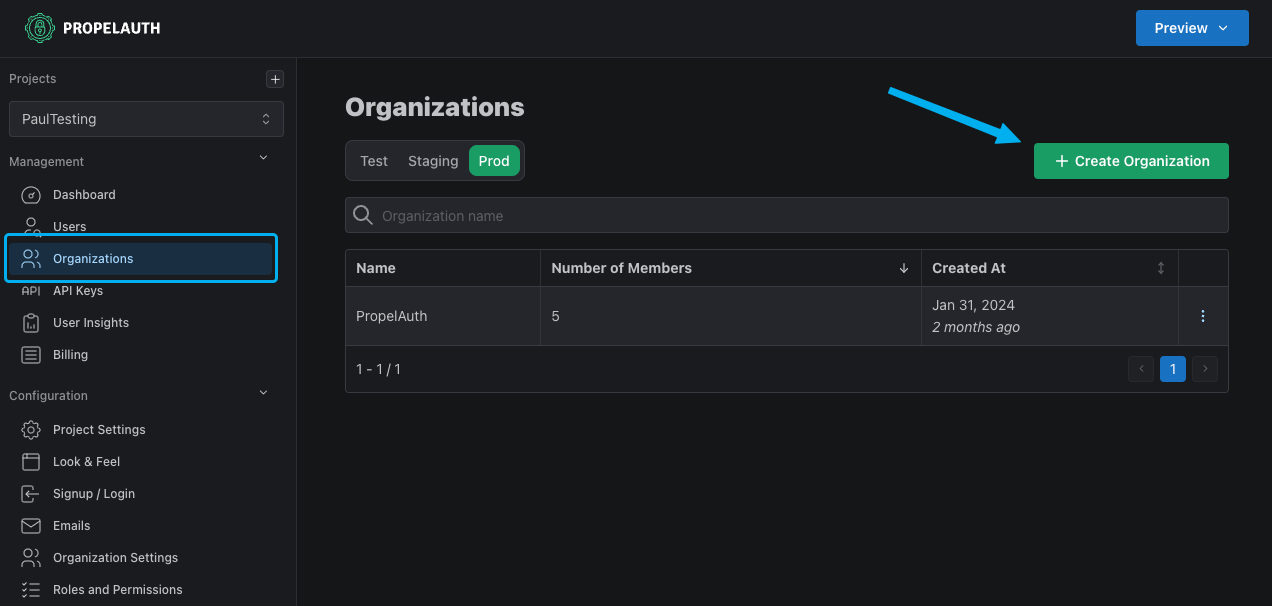
Since SAML is setup on an org to org basis, we need to make sure each user belongs to an org. This can be done manually through the PropelAuth dashboard (via the Organizations page) or programmatically through the PropelAuth API.

When creating an org, it’s essential that we also set the org’s domain (for example, “acme.com”).

creating an org

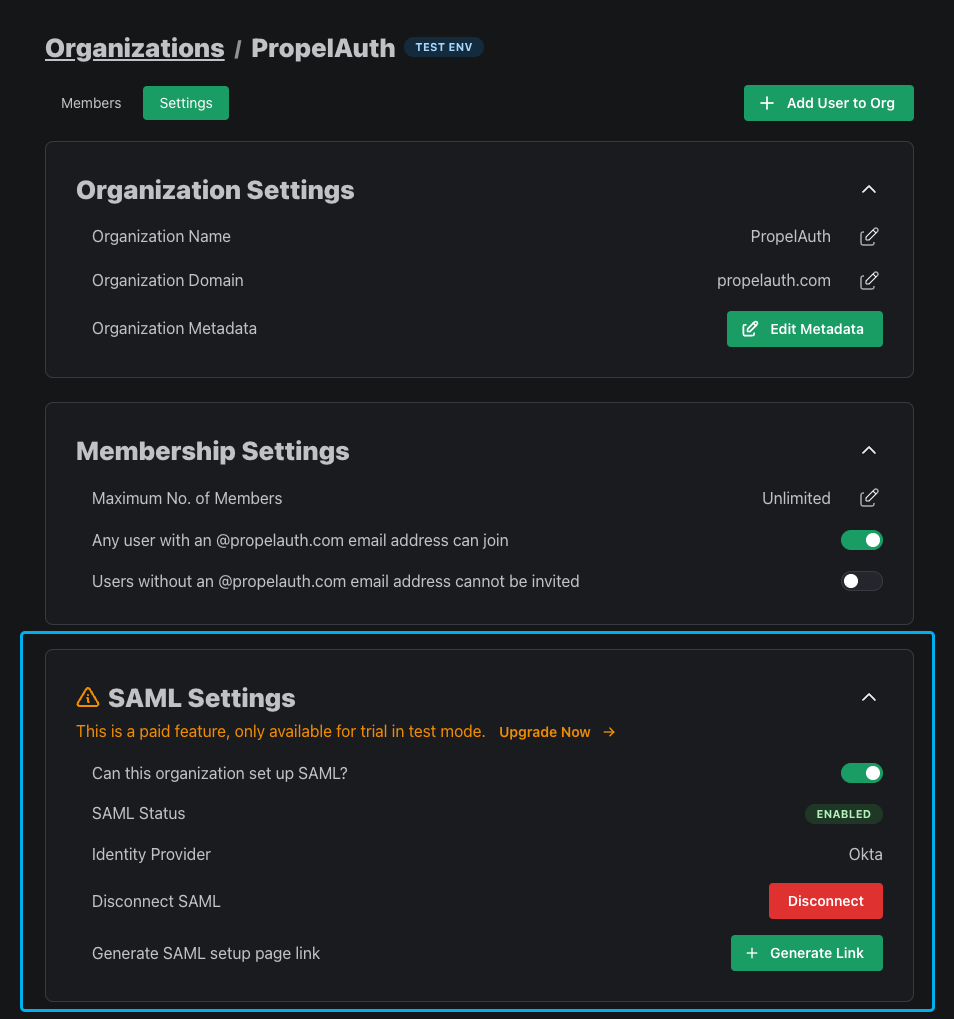
We can then enable SAML for the org. We can do this either in the org’s Settings page or through the API.

enabling saml for an org

Allowing your users to set up their SAML connection

Since SAML is the only enabled login method, we need a way for employees of an organization to set up their SAML connection. To do this, navigate to the Organizations page in your PropelAuth dashboard, find the org, click Settings, and click on the Generate Link button.

This button will generate a link to allow an employee of an organization to set up SAML. This link does not require authentication to access and is intended to be used by an employee of the org, such as a member of their IT team.

OAuth Integration

Let's now create an OAuth integration that we'll use to log users in with SAML. This part could be drastically different depending on your auth provider, so we'll try to provide as much information as possible so you can track down everything you need. Check out your auth provider's documentation for connecting to a OpenID Connect (OIDC) Provider for more information.

Start by heading over to the Frontend Integration page, clicking on Advanced Settings followed by Edit OAuth Config.

accessing oauth settings

Here, we can generate a Client ID and Client Secret.

OAuth Settings

While we're here, let's also add a Redirect URI. This is the URL that PropelAuth will redirect to after the user logs in. This could be the URL to your app, but more likely a URL provided by your auth provider.

You might need to provide some URLs to your auth provider so it knows where to retrieve authorization, an access token, and more.

  1. Issuer URL: {YOUR_AUTH_URL} (found in the Backend Integration page in your PropelAuth dashboard)
  2. Authorization endpoint: GET {YOUR_ISSUER_URL}/propelauth/oauth/authorize
  3. Token endpoint: POST {YOUR_ISSUER_URL}/propelauth/oauth/token
  4. UserInfo endpoint: GET {YOUR_ISSUER_URL}/propelauth/oauth/userinfo
    • Expects an access token to be passed in via an Authorization header like so:
    Bearer {ACCESS_TOKEN}
    
  5. Jwks endpoint: GET {YOUR_ISSUER_URL}/.well-known/jwks.json

Mapping Attributes

PropelAuth provides your auth provider with a JSON object which includes user details, orgs, and roles via the UserInfo endpoint.

{
  "can_create_orgs": false,
  "created_at": 1711127287,
  "email": "test@propelauth.com",
  "email_confirmed": true,
  "enabled": true,
  "first_name": "Anthony",
  "has_password": true,
  "last_active_at": 1712328977,
  "last_name": "Edwards",
  "locked": false,
  "metadata": null,
  "mfa_enabled": false,
  "org_member_info": {
    "org_id": "35905720-f22a-4f36-b082-7f35bb32463f",
    "org_metadata": {},
    "org_name": "PropelAuth",
    "url_safe_org_name": "propelauth",
    "inherited_user_roles_plus_current_role": [
        "Owner",
        "Admin",
        "Member"
    ],
    "user_permissions": [
        "propelauth::can_invite",
        "propelauth::can_change_roles",
        "propelauth::can_remove_users",
        "propelauth::can_setup_saml",
        "propelauth::can_manage_api_keys"
    ],
    "user_role": "Owner"
  },
  "picture_url": "https://img.propelauth.com/2a27d237-db8c-4f82-84fb-5824dfaedc87.png",
  "properties": {
    "favoriteSport": "Basketball"
  },
  "sub": "0497bbe6-49c1-4bc7-9e9c-c75846722c73",
  "update_password_required": false,
  "user_id": "0497bbe6-49c1-4bc7-9e9c-c75846722c73"
}

Creating a Sign in With Enterprise SSO Login

Now that we have a provider set up, let’s create a sign-in button in our login page.

Enterprise SSO is not as simple as a “Sign in with Google” (or Social SSO) option. You can’t just place a button that says “Sign in with Okta” because you need to know which Okta account they are signing in to.

Some common examples include:

  • Ask for the user’s email address up front, see if an SSO connection exists for it, and if so, begin the login process. Otherwise, ask for their password.

The user belongs to an org result

  • Adding a “Sign in with SSO” button - when the user presses it, we prompt them for their email address.
  • Adding a “Sign in with SSO” button - when the user presses it, we prompt them for their organization’s name.

PropelAuth provides options that support all of these and more, but let’s look at the second example where we collect the user’s email address. We can check if an email address has a SAML connection by fetching the following endpoint:

{YOUR_AUTH_URL}/api/fe/v3/login/check?email={YOUR_USERS_EMAIL}

If the user has a SAML connection, the request will return a SAML login URL. If not, it will return a 404. Let’s create a button that checks if the user has a SAML connection:


function SignUpPage() {
  const [email, setEmail] = useState('')
  const [message, setMessage] = useState(null);
  
  const loginWithEnterpriseSSO = async () => {
    let response = await fetch(`{YOUR_AUTH_URL}/api/fe/v3/login/check?email=${email}`);
    if (response.status === 200) {
      handleProviderLogin()
    } else if (response.status === 404) {
      setMessage("User does not belong to an org")
    }
  };
  
  const handleProviderLogin = async () => {
    // TODO: kick off an OAuth flow, this will vary based on your setup. 
    // Feel free to reach out to us at support@propelauth.com if you need any help
    setMessage("The user belongs to an org")
  }
 
  return (
    <div>
      <input
        type="email"
        placeholder="Enter your email"
        value={email}
        onChange={(e) => setEmail(e.target.value)}
      />
      <button onClick={loginWithEnterpriseSSO}>
        Login With Enterprise SSO
      </button>
      {message && <div>{message}</div>}
    </div>
  );
}
  
export default SignUpPage

When we test this out with a user who belongs to an org with a SAML connection, we should see this as a result:

The user belongs to an org result

If you're handling the OAuth flow yourself, start it by directing the user to PropelAuth's /propelauth/oauth/authorize endpoint. We'll need to include a redirect_uri and client_id values from the OAuth Config page in PropelAuth.

If you include an org_name, org_id, domain, or email parameter your user will automatically be redirected to their IdP.

curl --location '{YOUR_AUTH_URL}/propelauth/oauth/authorize?
state={STATE}
&redirect_uri={YOUR_REDIRECT_URI}
&client_id={YOUR_CLIENT_ID}
&response_type=code
&domain={YOUR_USERS_DOMAIN}'

This will return a code as a query parameter which we'll use for our next request, a POST request to the /propelauth/oauth/token endpoint to retrieve an access token.

The Authorization header uses basic auth with client_id as the username and client_secret as the password.

curl --location '{YOUR_AUTH_URL}/propelauth/oauth/token' \
--header 'Content-Type: application/x-www-form-urlencoded' \
--header 'Authorization: Basic {base64 encoded {YOUR_CLIENT_ID} : {YOUR_CLIENT_SECRET}}' \
--data-urlencode 'redirect_uri={YOUR_REDIRECT_URI}' \
--data-urlencode 'grant_type=authorization_code' \
--data-urlencode 'code={CODE_FROM_PREVIOUS_STEP}'

This will return a json object:

{
    "access_token": "eyJ0eXA...",
    "token_type": "bearer",
    "expires_in": 1800,
    "refresh_token": "0e04d63...",
    "id_token": "eyJ0eXAi..."
}

We can now use the access_token as a bearer token to retrieve the user's details via a fetch to the /propelauth/oauth/userinfo endpoint.

curl --location '{YOUR_AUTH_URL}/propelauth/oauth/userinfo' \
--header 'Authorization: Bearer eyJ0eXAi...' \

This will return the user's information as well as organization and role.

{
  "sub": "813a8a12-eecc-4629-a36e-16e73d094b54",
  "user_id": "813a8a12-eecc-4629-a36e-16e73d094b54",
  "email": "test@propelauth.com",
  "email_confirmed": true,
  "has_password": false,
  "first_name": "Anthony",
  "last_name": "Edwards",
  "picture_url": "https://img.propelauth.com/2a27d237-db8c-4f82-84fb-5824dfaedc87.png",
  "properties": {
      "favoriteSport": "Basketball",
      "tos": true
  },
  "metadata": null,
  "locked": false,
  "enabled": true,
  "mfa_enabled": false,
  "can_create_orgs": false,
  "created_at": 1712783690,
  "last_active_at": 1712785416,
  "org_member_info": {
    "org_id": "4896c602-7c67-4d32-a25d-5adb9a15a60e",
    "org_name": "PropelAuth",
    "org_metadata": {},
    "url_safe_org_name": "propelauth",
    "user_role": "Member",
    "inherited_user_roles_plus_current_role": [
        "Member"
    ],
    "user_permissions": []
  },
  "update_password_required": false
}

And that’s it! Your users can now:

  • Setup SAML
  • Login via SAML
  • Show up with org details, roles, and user properties when they login

You’re now all set and ready to managing your users with Enterprise SSO!