Salesforce - Social login (SSO) configuration
Enabling Sign in with Salesforce only requires two fields: Client ID and
Client Secret. Both of these are provided by Salesforce, and these steps will help you
create them.
Users that sign up via Salesforce look the same as users that sign up via any other method. Your code will handle both automatically.
Step-by-step Instructions
-
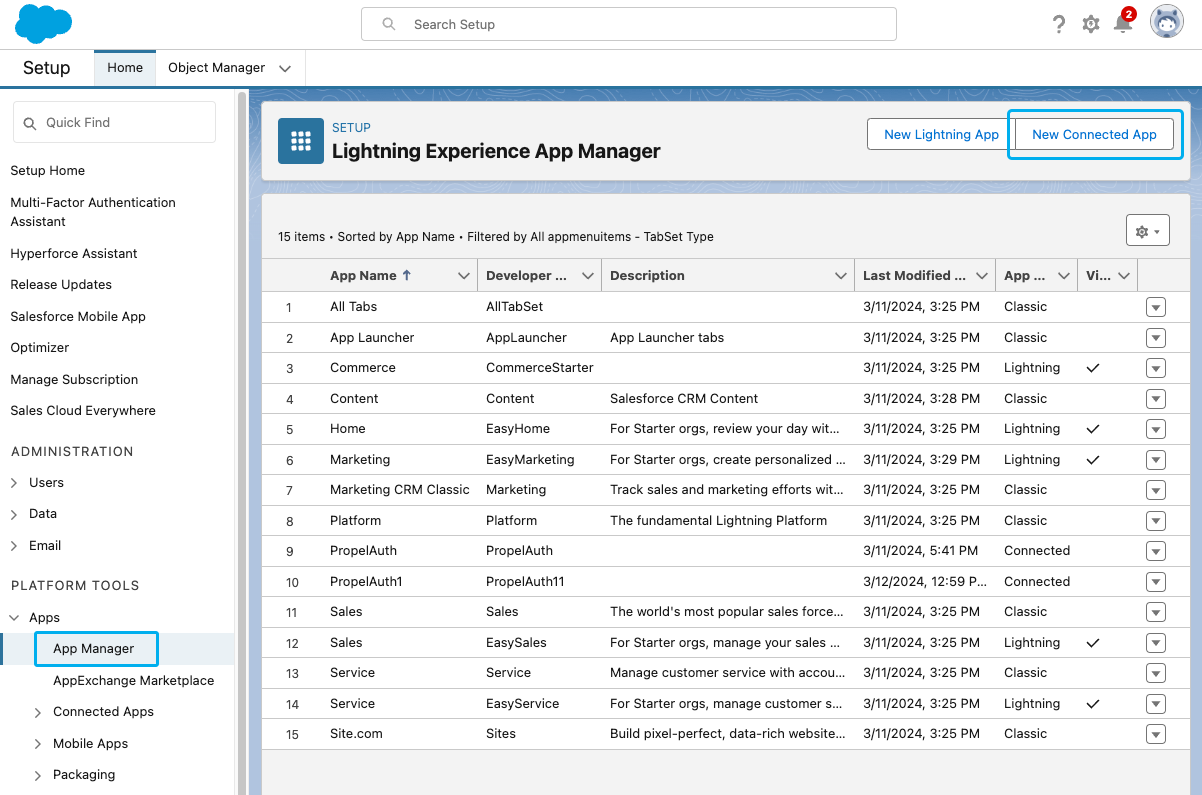
Log into your Salesforce account and navigate to Setup.
-
In the menu on the left side, locate the App dropdown and then click on App Manager.
-
Towards the top right, click on New Connected App.
-
Fill out Connected App Name, API Name, and Contact Email
-
Click on the Enable OAuth Settings checkbox which will expand additional settings.
-
Copy and paste the Redirect URIs from PropelAuth into the Callback URL text box in Salesforce.
-
Under Selected OAuth Scopes, add the following:
-
Access the identity URL service (id, profile, email, address, phone)
-
Access unique user identifiers (openid)
-
-
Disable Require Proof Key for Code Exchange (PKCE) Extension for Supported Authorization Flows.
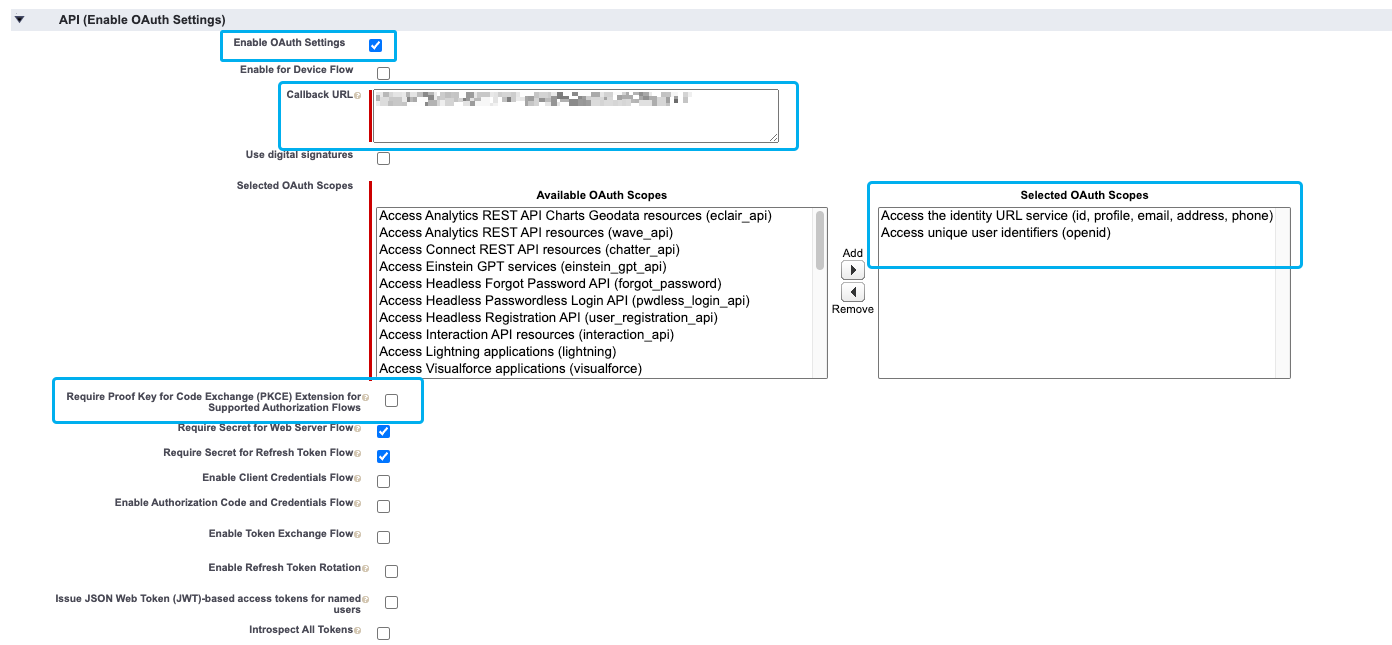
- Click on Save.
It can take about 10 minutes for Salesforce to sync these settings.
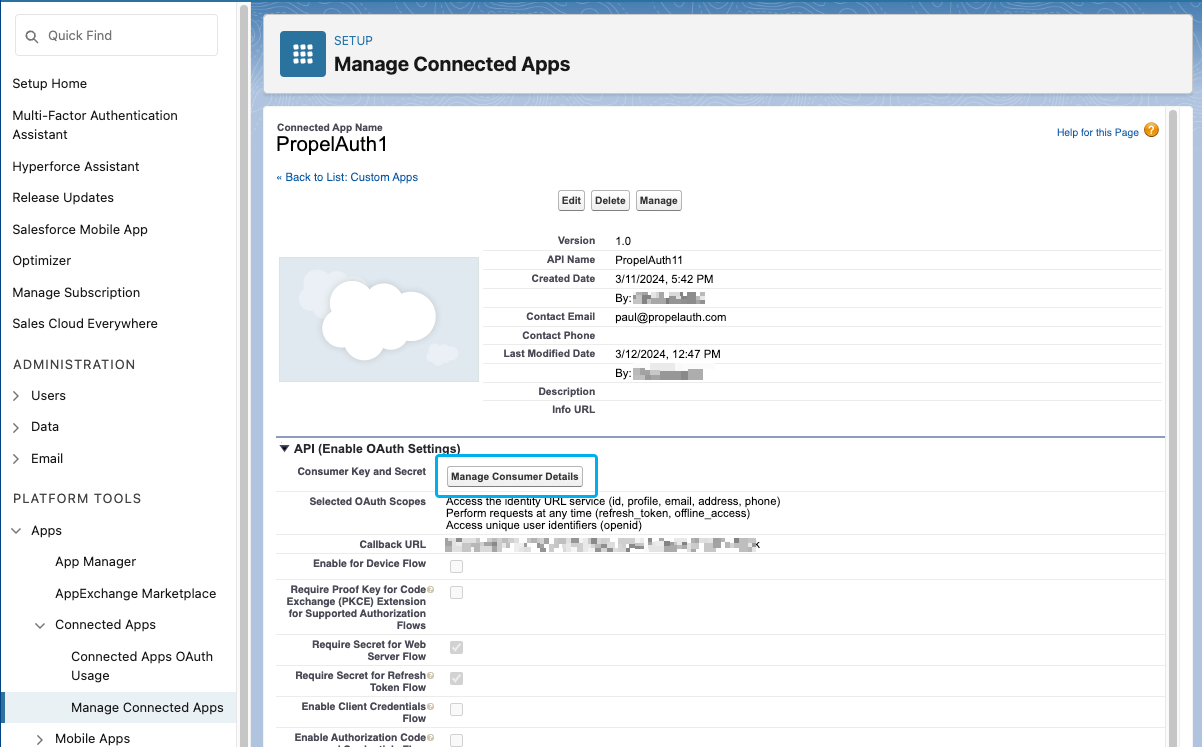
- Under API (Enable OAuth Settings) click on Manage Consumer Details.
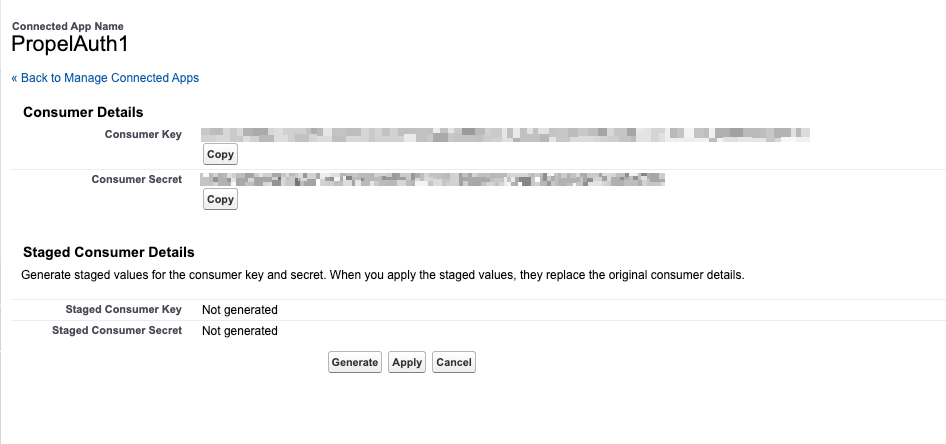
- Under Consumer Details, locate the Consumer Key (Client ID) and Consumer Secret (Client Secret). Copy and paste these values into PropelAuth.
And that's it! When you go to your hosted authentication pages, you should see
the Sign in with Salesforce button.