Integrating Enterprise SSO with Cognito
If you’re already using Cognito for authentication, but now need to support SAML or Enterprise-level Single Sign-On (SSO), this guide is for you! If you haven't already, make sure to check out our guide on getting your project ready for Enterprise SSO.
Cognito Configuration
Now that we have everything prepared on the PropelAuth side, let's add a provider to your Cognito account. This provider will then allow us to create a "Login With Enterprise SSO" button to your login page.
Create a New User Pool
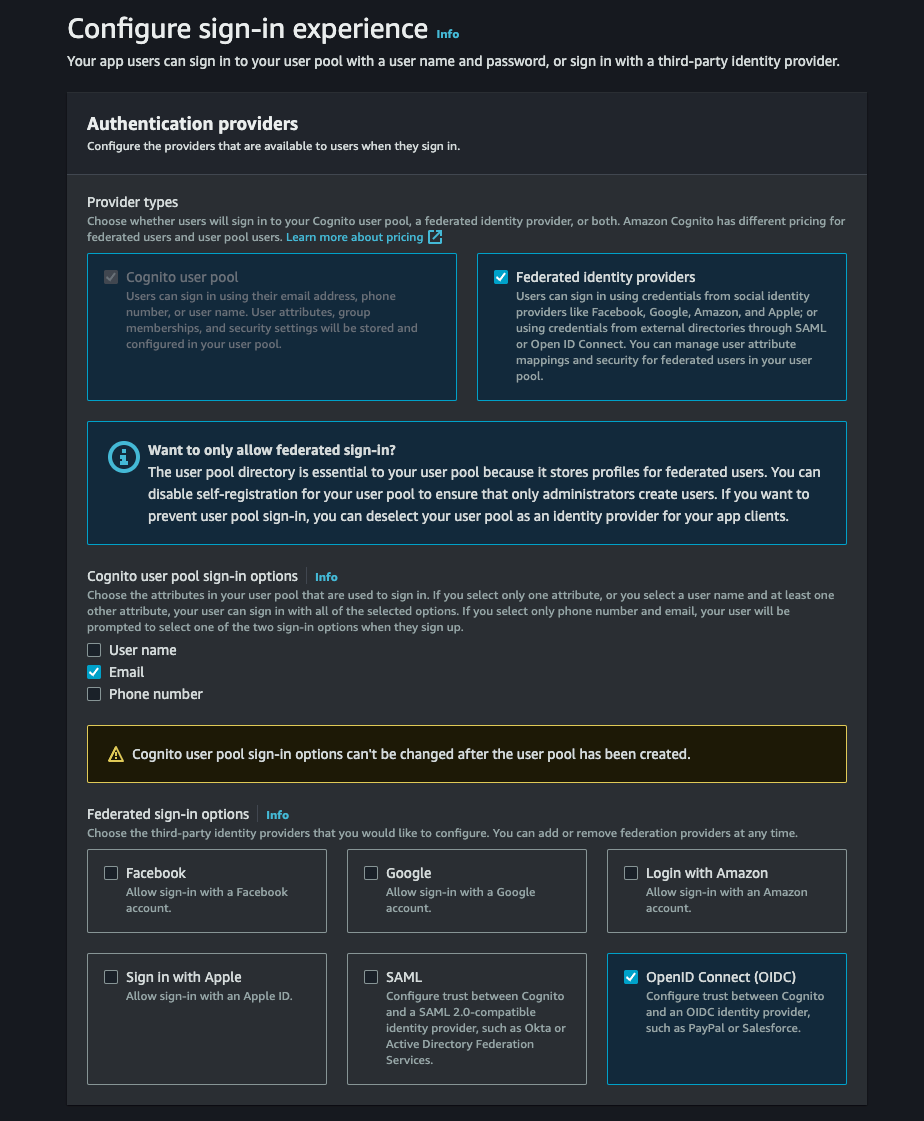
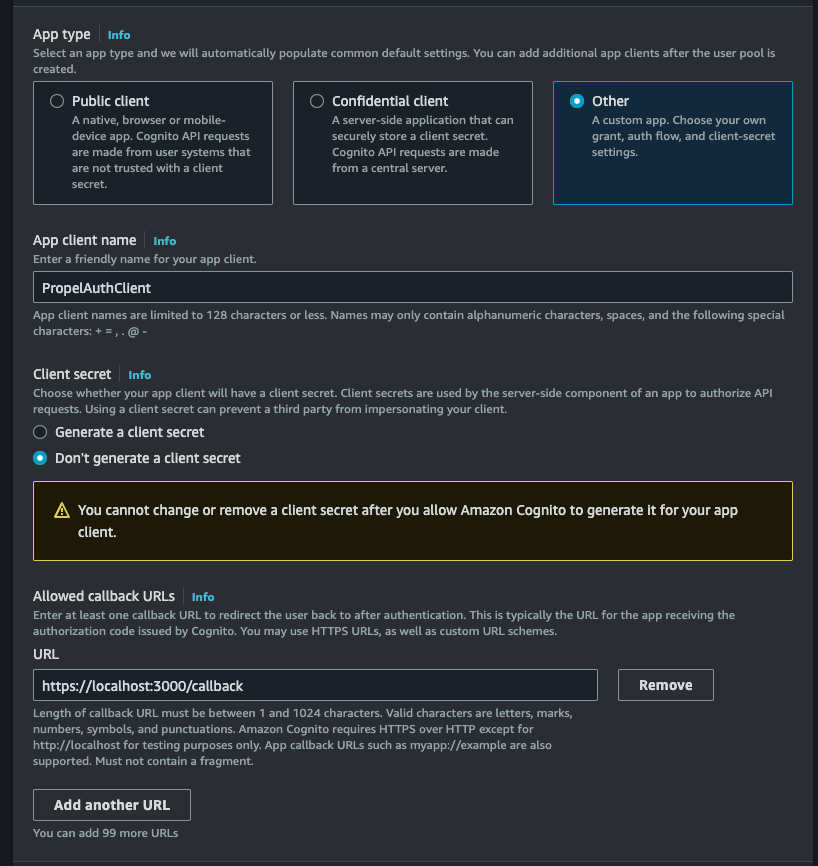
Head over to your Cognito account and click on Create user pool. On the next menu, select your application type, name the application, and then select Email under Options for sign-in identifiers.

After you are done creating the user pool, navigate to it and then click on Social and external providers in the side navigation menu. Here we'll be adding our own identity provider.
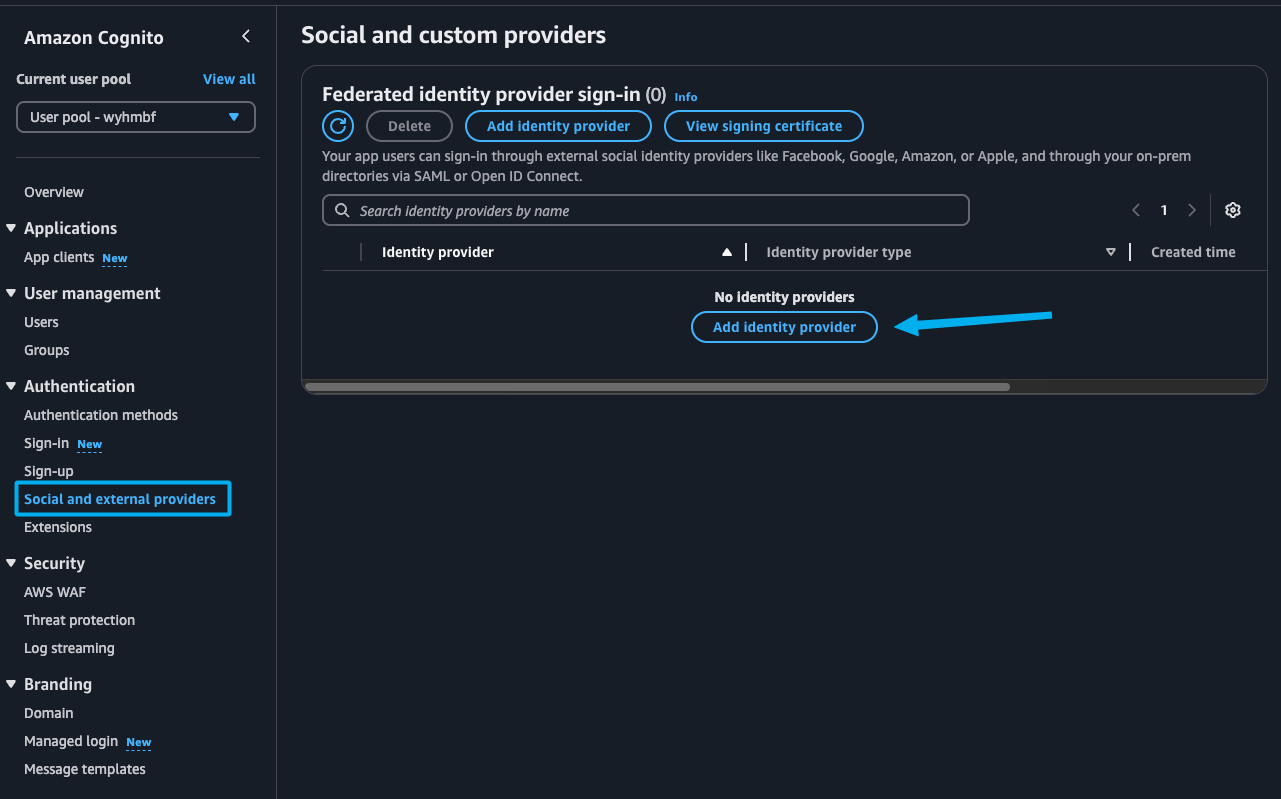
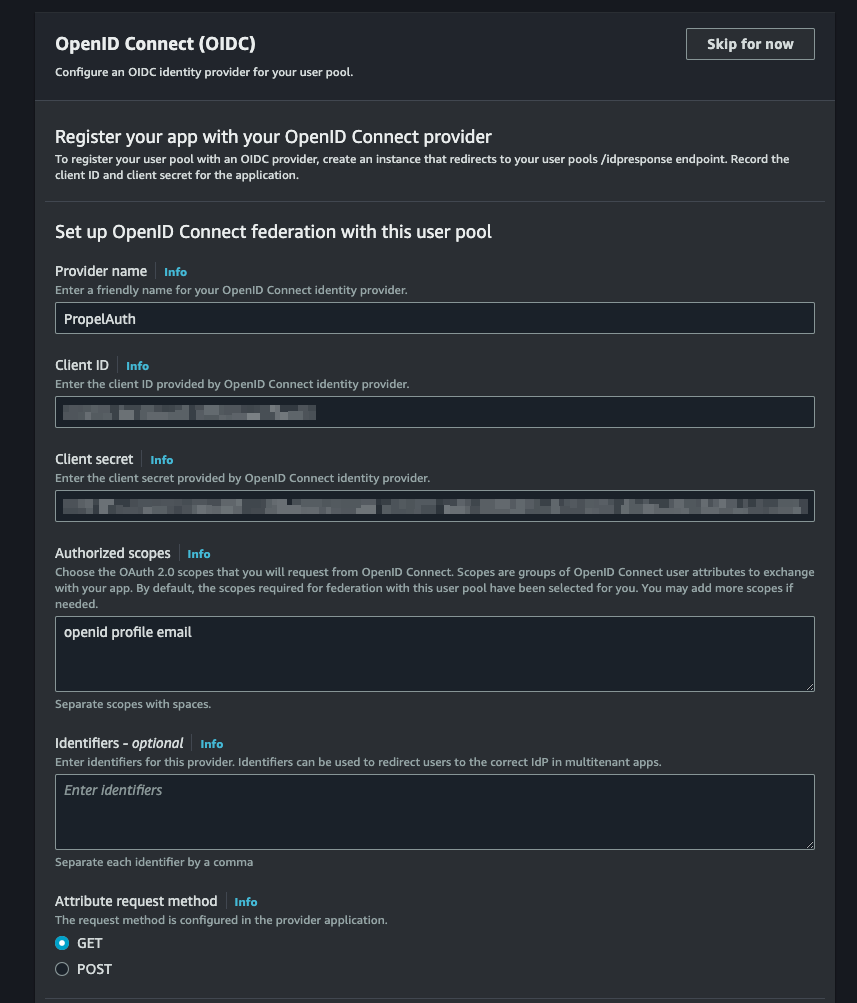
Select OpenID Connect (OIDC) as the Identity Provider type.
Name your provider and then navigate to PropelAuth to get your Client ID and Client Secret.
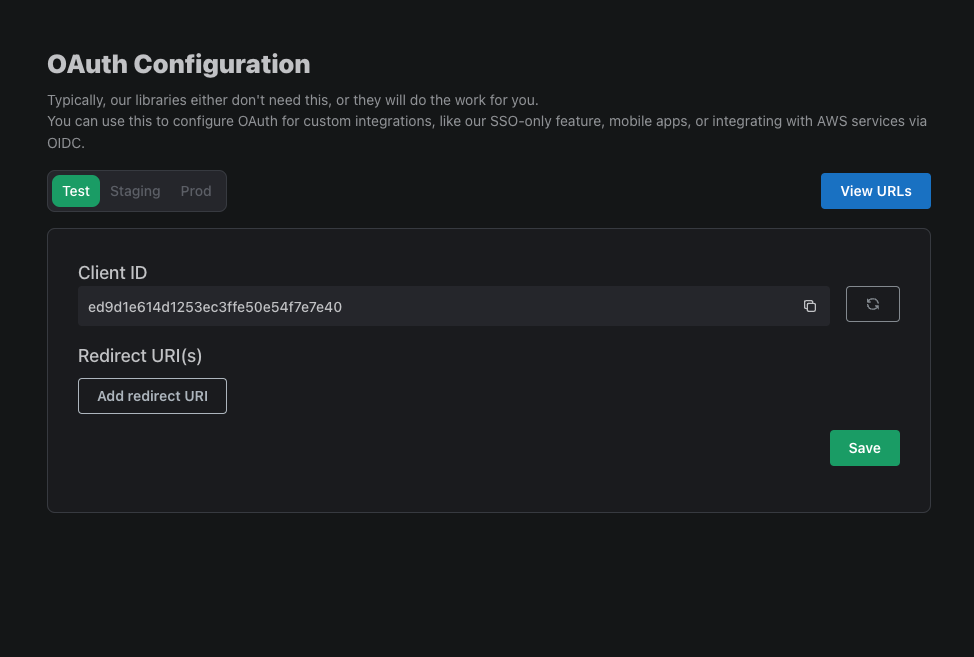
You can find the Client ID and Client Secret by heading over to the Frontend Integration page, clicking on Advanced Settings followed by Edit OAuth Config. Here, we can generate a Client ID and Client Secret. We'll soon come back here to enter a Redirect URI.
In the Authorized Scopes section type openid profile email.
In the Retrieve OIDC endpoints section, select Manual input. We'll then be prompted to populate five fields. Each URL will start with your Issuer URL, which can be found in the Backend Integration page in your PropelAuth dashboard.
- Issuer URL:
{YOUR_ISSUER_URL} - Authorization endpoint:
{YOUR_ISSUER_URL}/propelauth/oauth/authorize - Token endpoint:
{YOUR_ISSUER_URL}/propelauth/oauth/token - UserInfo endpoint:
{YOUR_ISSUER_URL}/propelauth/oauth/userinfo - Jwks_uri endpoint:
{YOUR_ISSUER_URL}/.well-known/jwks.json

When mapping attributes, make sure to match the user pool attribute email field to email in the Open ID Connect attribute section. You can also map other attributes as you'd like. For example, we recommend creating a custom attribute called orgs where you can store your org and role information, like so:
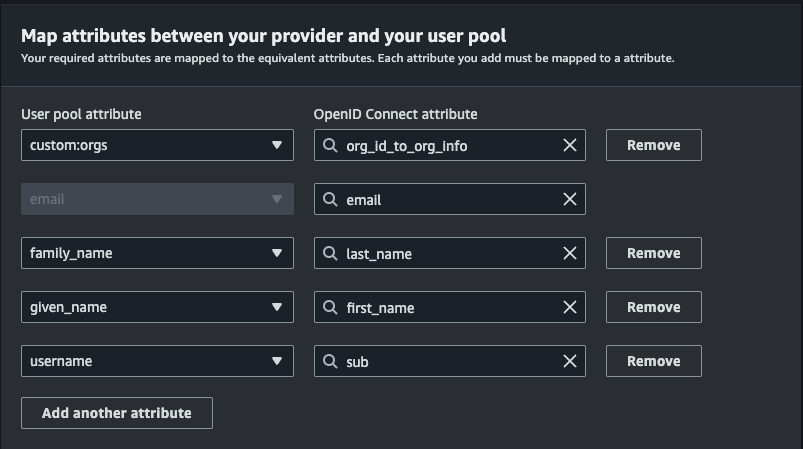
Refer to the example user object below for guidance:
{
  "can_create_orgs": false,
  "created_at": 1711127287,
  "email": "test@propelauth.com",
  "email_confirmed": true,
  "enabled": true,
  "first_name": "Anthony",
  "has_password": true,
  "last_active_at": 1712328977,
  "last_name": "Edwards",
  "locked": false,
  "metadata": null,
  "mfa_enabled": false,
  "org_id_to_org_info": {
      "35905720-f22a-4f36-b082-7f35bb32463f": {
          "org_id": "35905720-f22a-4f36-b082-7f35bb32463f",
          "org_name": "PropelAuth",
          "url_safe_org_name": "propelauth",
          "user_role": "Owner",
          "inherited_user_roles_plus_current_role": [
              "Owner",
              "Admin",
              "Member"
          ],
          "org_metadata": {},
          "user_permissions": [
              "propelauth::can_invite",
              "propelauth::can_change_roles",
              "propelauth::can_remove_users",
              "propelauth::can_setup_saml",
              "propelauth::can_manage_api_keys"
          ]
      }
  },
  "picture_url": "https://img.propelauth.com/2a27d237-db8c-4f82-84fb-5824dfaedc87.png",
  "properties": {
    "favoriteSport": "Basketball"
  },
  "sub": "0497bbe6-49c1-4bc7-9e9c-c75846722c73",
  "update_password_required": false,
  "user_id": "0497bbe6-49c1-4bc7-9e9c-c75846722c73"
}
Head back to the App clients page found in your Cognito side navigation menu, click on your app, click on Login pages followed by Edit.
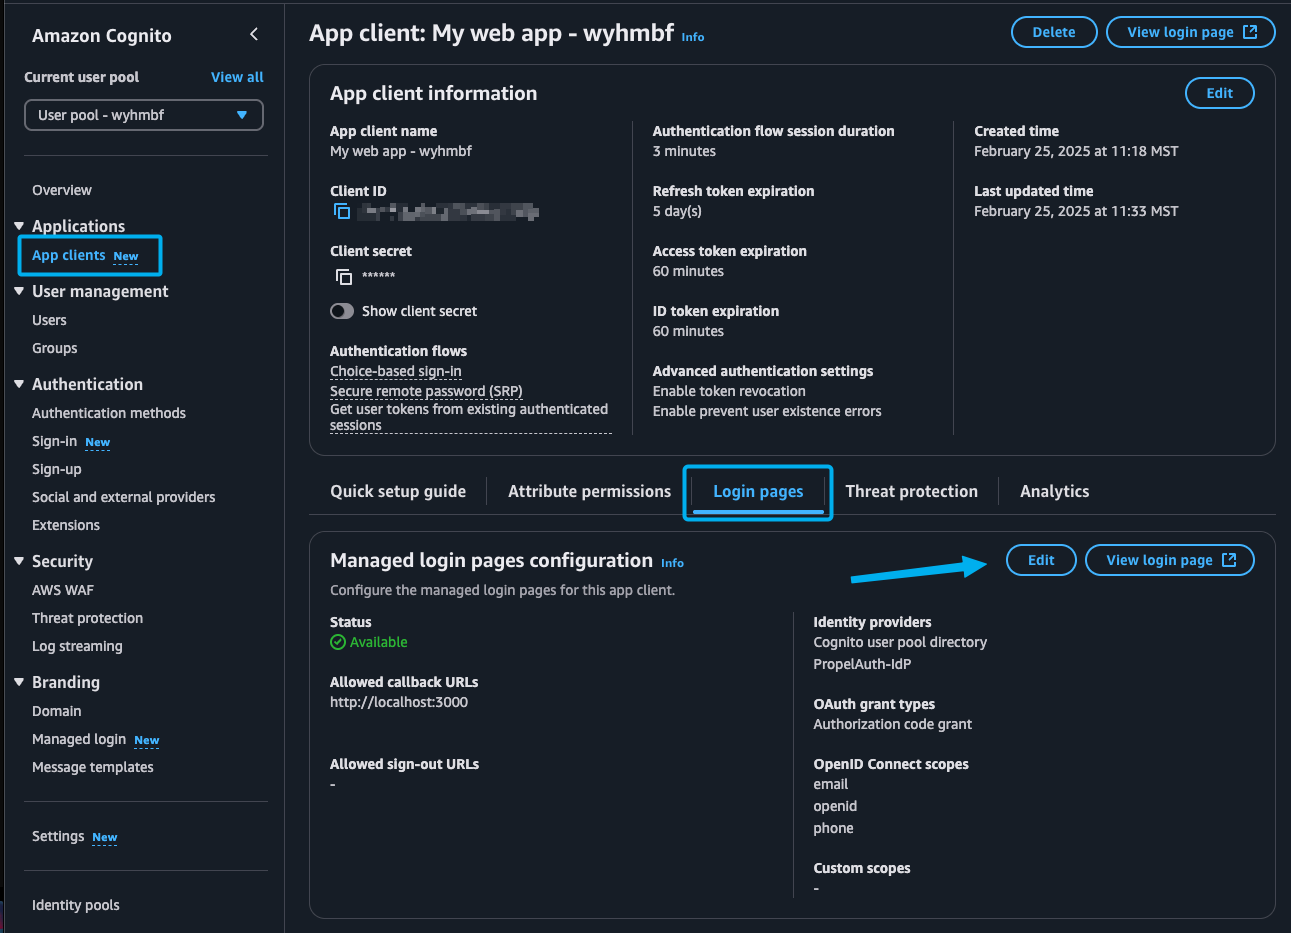
Here we'll set a Callback URL. This will be the URL that Cognito redirects to after the user logs in. We'll use this URL to exchange the code for an access_token. For now, you can set it to http://localhost:3000/callback.
We also want to add the identity provider we just created as an Identity provider.
While we're here, you might want to add the pre-populated Allowed callback URL as a Redirect URI in PropelAuth as a Redirect URI.

Installation
There are a lot of different ways to integrate with Cognito. We'll walk through a version where we create a new button in your custom login page. However, if you use Cognito's hosted UI, you should now see a button like so:
Creating a Sign in Page
If you're not using Cognito's hosted pages, you can create a button that redirects the user straight to PropelAuth's SAML login flow. The URL will use the Cognito Domain from the previous step as well as your App Client's Client ID found in Cognito.
{YOUR_COGNITO_DOMAIN}/oauth2/authorize?client_id={YOUR_APP_CLIENT_CLIENT_ID}&response_type=code&scope=email+openid+profile&redirect_uri={YOUR_CALLBACK_URL}
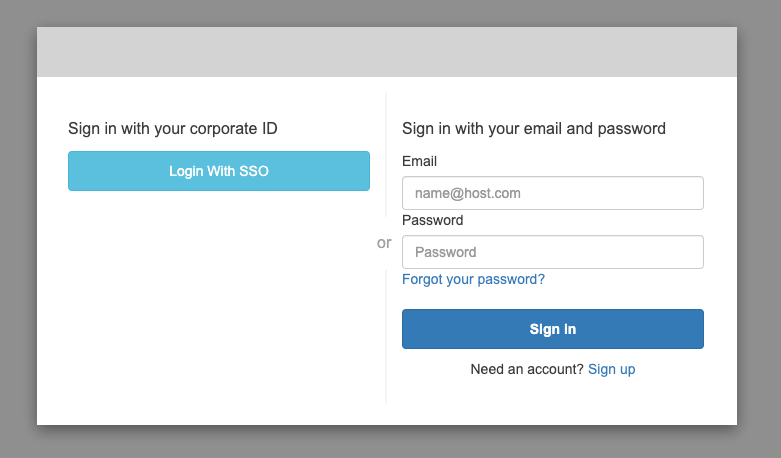
Whether the user clicks this button or navigates to PropelAuth from the Cognito hosted page, they'll see the following:
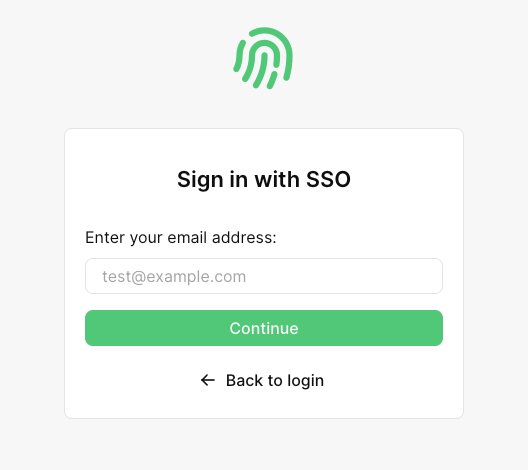
If they enter an email that has a domain linked to an org with SAML enabled, they'll automatically be redirected to login via their IdP. Once they complete the login process, they'll be redirected to your app with a code query parameter, like so:
https://localhost:3000/callback?code=0c2a4743-a6c6-47fb-af28-5305a812d605
You can then exchange that code for a Cognito Access Token via the Token Endpoint. Here's an example:
curl --location '{YOUR_COGNITO_DOMAIN}/oauth2/token' \
--header 'Content-Type: application/x-www-form-urlencoded' \
--data-urlencode 'redirect_uri={YOUR_CALLBACK_URL}' \
--data-urlencode 'grant_type=authorization_code' \
--data-urlencode 'code={CODE_FROM_QUERY_PARAMETER}' \
--data-urlencode 'client_id={YOUR_APP_CLIENT_CLIENT_ID}'
This will then return an access_token which you can use to get the user's information, such as the userInfo endpoint which will contain the user and org information we mapped in Cognito.
And that’s it! Your users can now:
- Setup SAML
- Login via SAML
- Show up with org details, roles, and user properties when they login
You’re now all set and ready to managing your users with Enterprise SSO!