Integrating Enterprise SSO with Laravel
While PropelAuth does offer full authentication support with Laravel, you might already have your own authorization setup and now need to support SAML or Enterprise-level Single Sign-On (SSO). If you haven't already, make sure to check out our guide on getting your project ready for Enterprise SSO.
Socialite Provider Setup
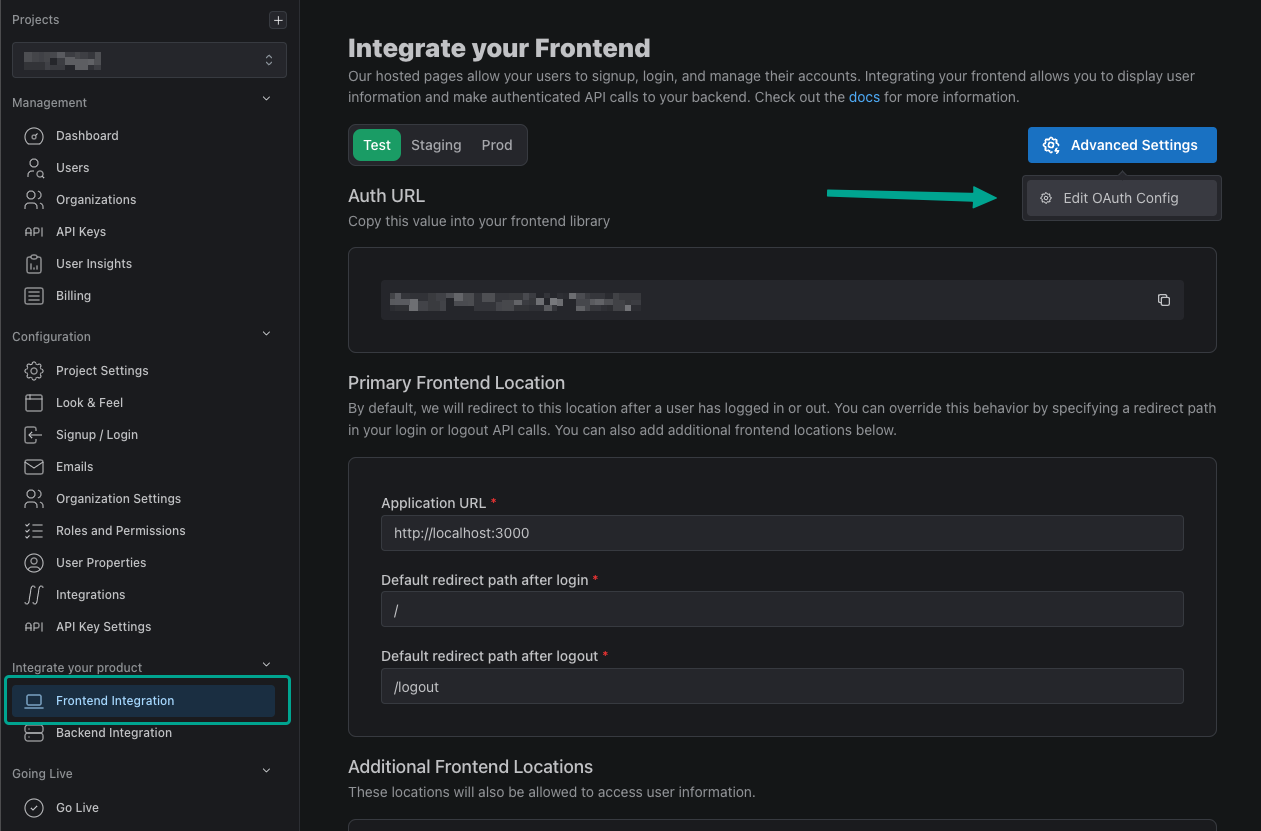
Now that we have everything prepared on the PropelAuth side, let's add PropelAuth as a Socialite Provider to your Laravel app that we'll use to log users in with SAML. Start by heading over to the Frontend Integration page, clicking on Advanced Settings followed by Edit OAuth Config. Here, we can generate a Client ID and Client Secret. We'll be using these in the next step.
Create a New OAuth Client and copy down your Client ID and Client Secret. We'll be needing these for later.
While we're here, let's also add a Redirect URI. In this guide we'll be using http://localhost:8000/auth/callback.

The last variable we need is our Auth URL. You can find this back in the Frontend Integration page.
Socialite Provider Installation
Start by installing the PropelAuth Socialite provider in your Laravel project:
composer require socialiteproviders/propelauth
Let's now add some environment variables to your .env. All four of these variables were retrieved in the previous step.
PROPELAUTH_CLIENT_ID=0166...
PROPELAUTH_CLIENT_SECRET=f92ac31...
PROPELAUTH_CALLBACK_URL=http://localhost:8000/auth/callback
PROPELAUTH_AUTH_URL=https://auth.example.com
Next, head over to config/services.php and add the PropelAuth provider.
'propelauth' => [
  'client_id' => env('PROPELAUTH_CLIENT_ID'),
  'client_secret' => env('PROPELAUTH_CLIENT_SECRET'),
  'redirect' => env('PROPELAUTH_CALLBACK_URL'),
  'auth_url' => env('PROPELAUTH_AUTH_URL'),
],
We now need to register an event listener to extend Socialite with the PropelAuth provider. This will allow us to authenticate users via PropelAuth in the same ways you can with any other Socialite provider.
// /app/Providers/AppServiceProvider.php

namespace App\Providers;

use Illuminate\Support\ServiceProvider;
use Illuminate\Support\Facades\Event;

class AppServiceProvider extends ServiceProvider
{
    public function register(): void
    {
    }

    public function boot(): void
    {
        Event::listen(function (\SocialiteProviders\Manager\SocialiteWasCalled $event) {
            $event->extendSocialite('propelauth', \SocialiteProviders\PropelAuth\Provider::class);
        });
    }
}
Routing
To authenticate users using PropelAuth's OAuth2 provider we first need to create two routes. The first is for redirecting unauthenticated users to login and the other is for handling the OAuth callback after authentication.
The /auth/callback endpoint is also responsible for saving the user to your database or saving the user's information in the session. This part is up to you, but in this example we'll assume that you're saving your users to a database and authenticating the user using Laravel's Auth facade.
If you would like to customize how user information is mapped in the /auth/callback route see the User Array for more information on what user information is available.
use Illuminate\Support\Facades\Route;
use Laravel\Socialite\Facades\Socialite;
use App\Models\User;
use Illuminate\Support\Facades\Auth;

Route::get('/auth/redirect', function (\Illuminate\Http\Request $request) {
    $email = $request->query('email');
    $queryParams = ['email' => $email];
    return Socialite::driver('propelauth')->with($queryParams)->redirect();
});

Route::get('/auth/callback', function (Request $request) {
    $propelauth_user = Socialite::driver('propelauth')->user();
    $rawUser = $propelauth_user->getRaw(); // get additional user information
    $user = User::updateOrCreate([
      // search for user based on email from PropelAuth
      'email' => $propelauth_user->email,
    ], [
        'name' => trim($propelauth_user->first_name . ' ' . $propelauth_user->last_name),
        'email' => $propelauth_user->email,
        'orgMemberInfo' => $rawUser['org_member_info'] // user's org info
    ]);
    Auth::login($user);
    return redirect('/');
});
Adding Enterprise SSO to Login Page
There are a number of ways you can add Enterprise SSO to your existing login flow, the simplest being a new login page just for SSO users.
Before we redirect the user to PropelAuth to login via their IdP, we first want to make sure that they belong to an organization that has SAML enabled. We can check if an email address has a SAML connection by fetching the following endpoint:
{YOUR_AUTH_URL}/api/fe/v3/login/check?email={YOUR_USERS_EMAIL}
If the user has a SAML connection the request will return a 200 success response. If not, it will return a 404. Let’s create a button that checks if the user has a SAML connection:
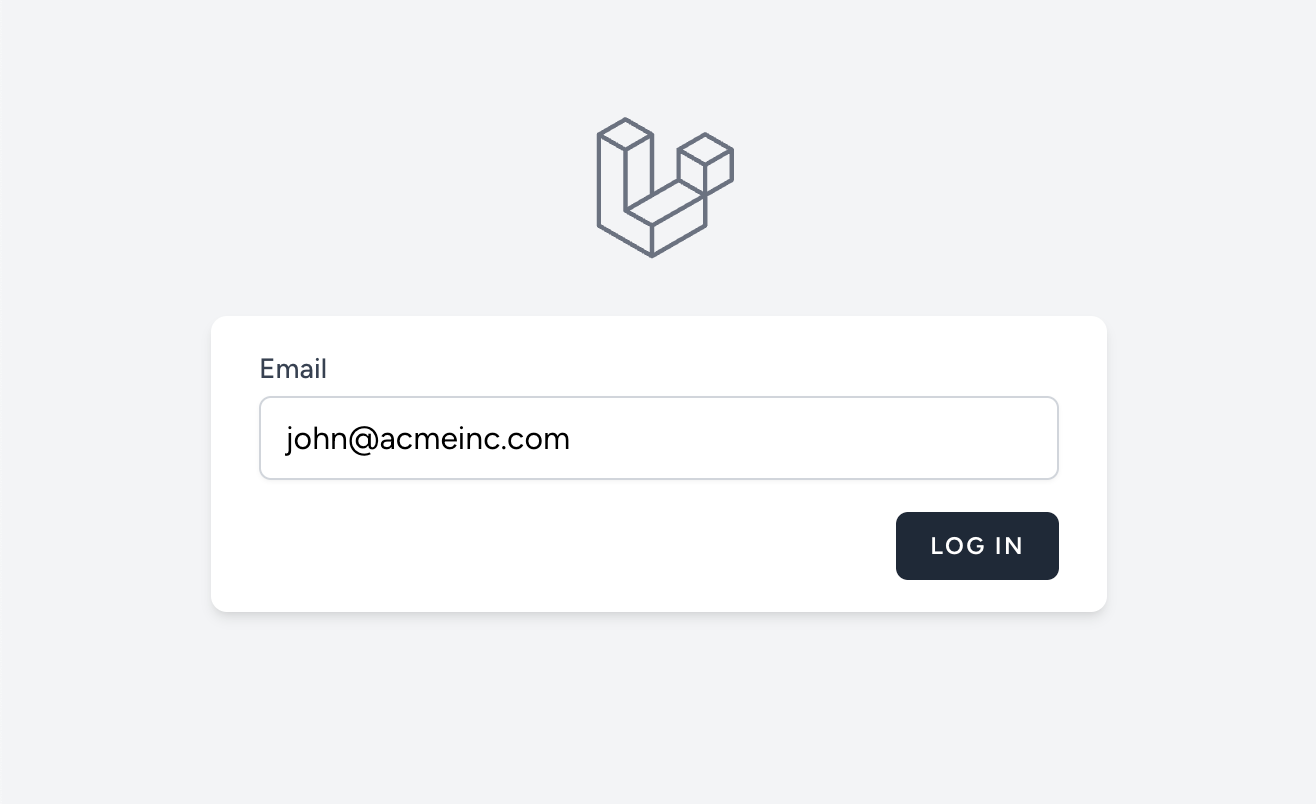
function LoginPage() {
const [email, setEmail] = useState('')
const [message, setMessage] = useState(null);
const loginWithEnterpriseSSO = async () => {
let response = await fetch(
`{YOUR_AUTH_URL}/api/fe/v3/login/check?email=${email}`
);
if (response.status === 200) {
// TODO: redirect the user to login via OAuth2 flow
setMessage("You belong to an org with SAML enabled");
} else if (response.status === 404) {
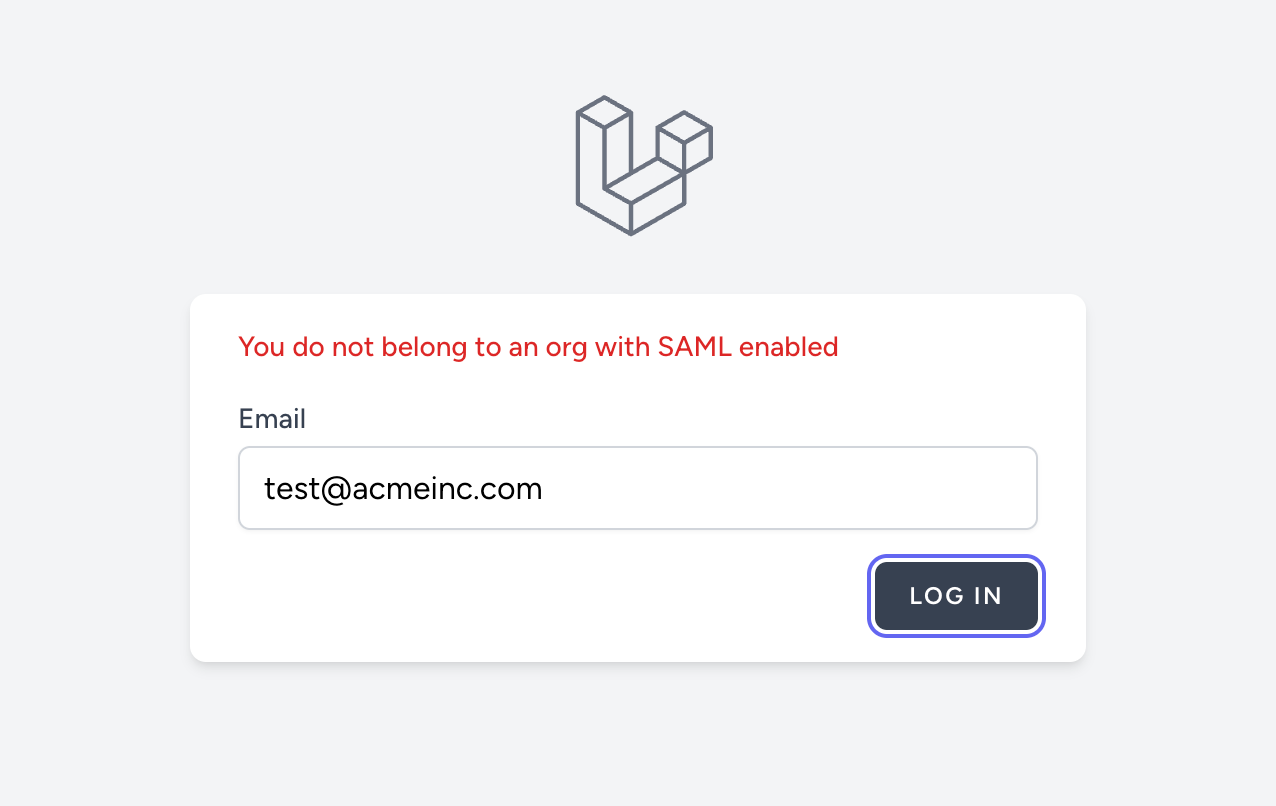
setMessage("You do not belong to an org with SAML enabled");
}
};
return (
<div>
{message && <div>{message}</div>}
<input
type="email"
placeholder="Enter your email"
value={email}
onChange={(e) => setEmail(e.target.value)}
/>
<button onClick={loginWithEnterpriseSSO}>
Log In
</button>
</div>
);
}
When we test this out with a user who does not belong to an org with a SAML connection, we should see this as a result:
If the user does belong to an org with SAML enabled, all you have to do is redirect the user to /auth/redirect?email={email} where {email} is the user's email address. This will start the OAuth2 flow and automatically redirect the user to their IdP to login. Let's update the loginWithEnterpriseSSO function to handle this.
const loginWithEnterpriseSSO = async () => {
    let response = await fetch(
        `{YOUR_AUTH_URL}/api/fe/v3/login/check?email=${email}`
    );
    if (response.status === 200) {
        window.location.href = `/auth/redirect?email=${email}`;
    } else if (response.status === 404) {
        setMessage("You do not belong to an org with SAML enabled");
    }
};
Once they complete the login process, they'll be redirected back to your app and authenticated in the /auth/callback route.
And that’s it! Your users can now:
- Setup SAML
- Login via SAML
- Show up with org details, roles, and user properties when they login
You’re now all set and ready to managing your users with Enterprise SSO!