Apple - Social login (SSO) configuration
Enabling Sign in with Apple only requires two fields: Client ID and
Client Secret. These steps will help you create them.
Users that sign up via Apple look the same as users that sign up via any other method. Your code will handle both automatically.
Step-by-step Instructions
-
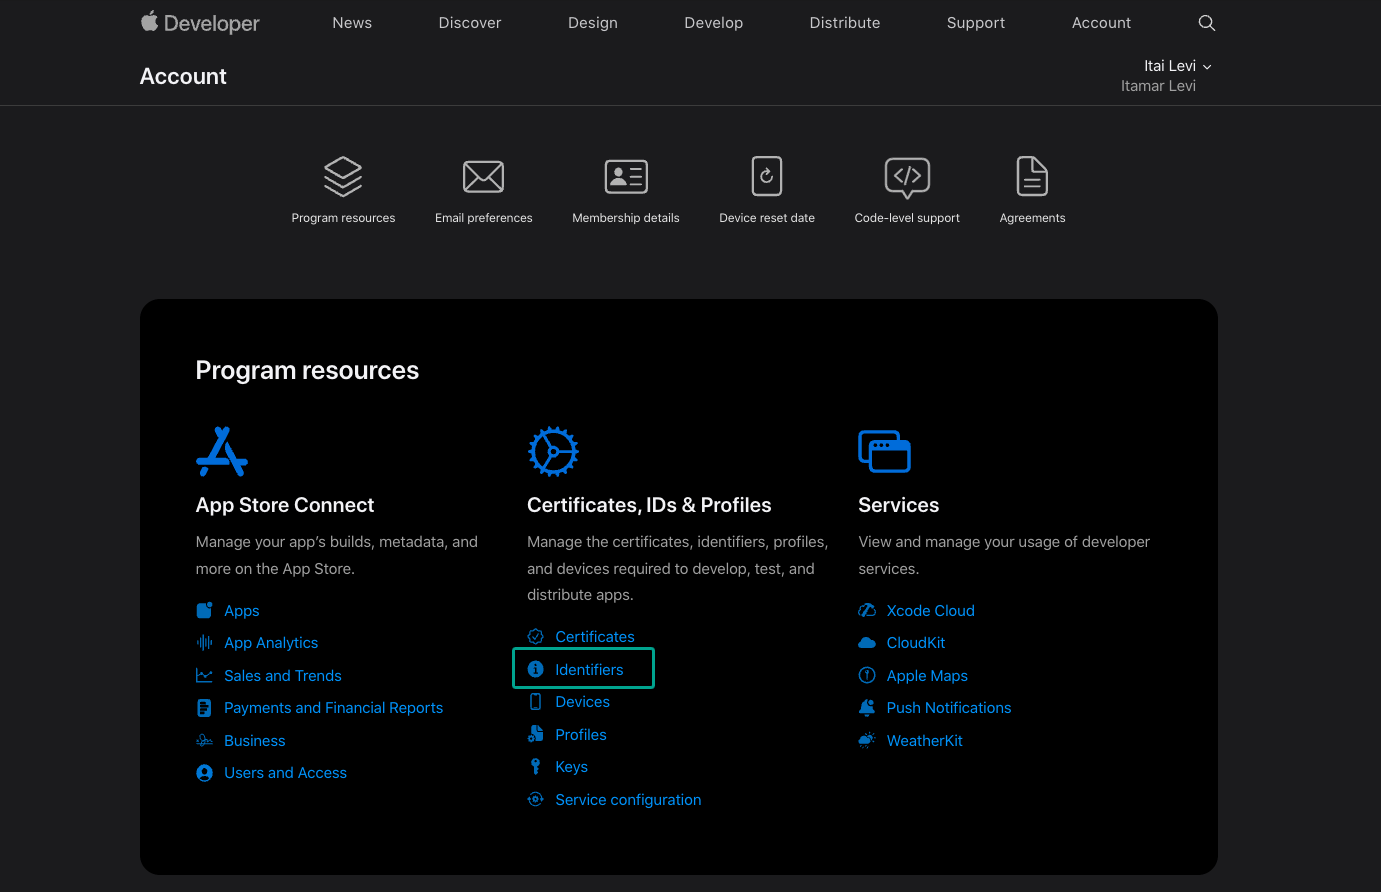
Navigate to the Apple Developer Console and create an account if you do not have one already. You will have to sign up for a developer membership which requires payment. Once you're all set, a Program Resources menu appears.
-
Under Certificates, IDs & Profiles, select Identifiers.
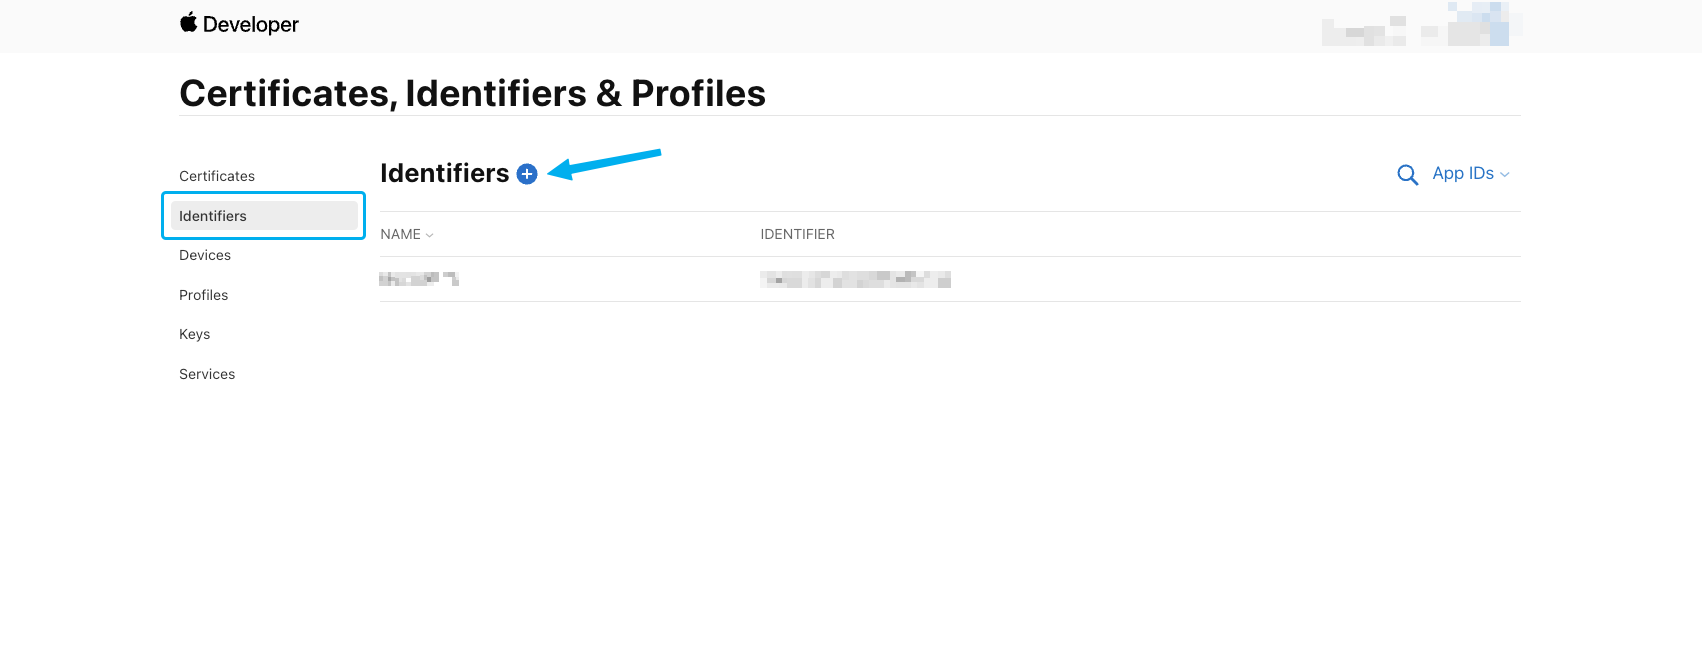
- On the left side, click on Identifiers. Then, click on the + symbol next to Identifiers towards the top.
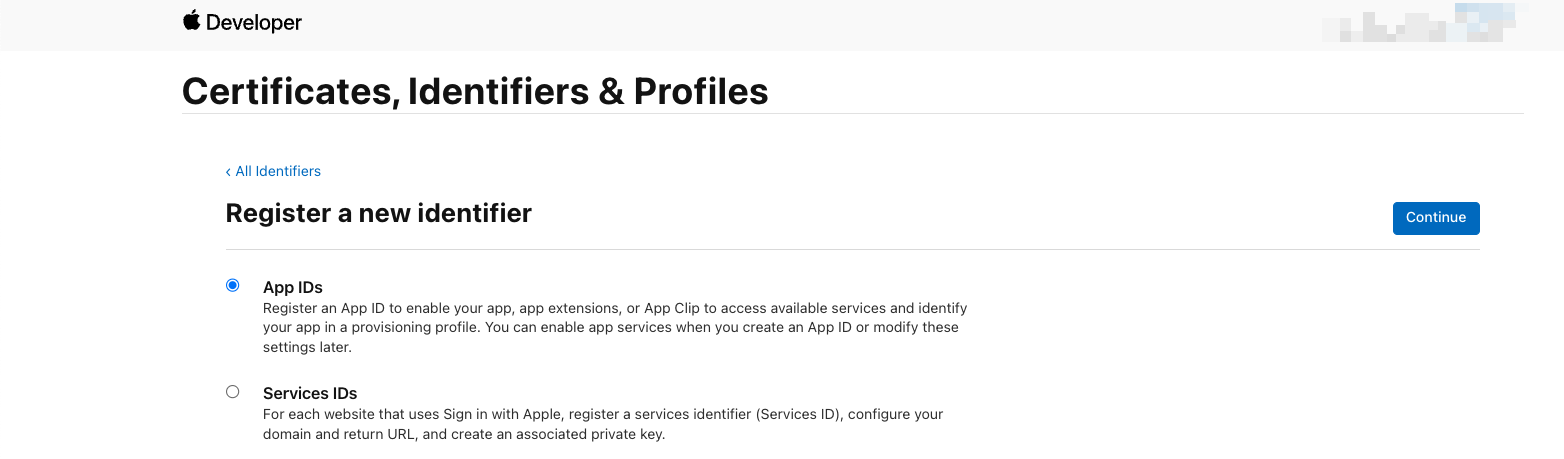
- Select App IDs followed by Continue. Select App again then press Continue.
-
Scroll down and check the box next to Sign in With Apple.
-
Towards the top, enter a Bundle ID and Description. Click Continue followed by Register.
-
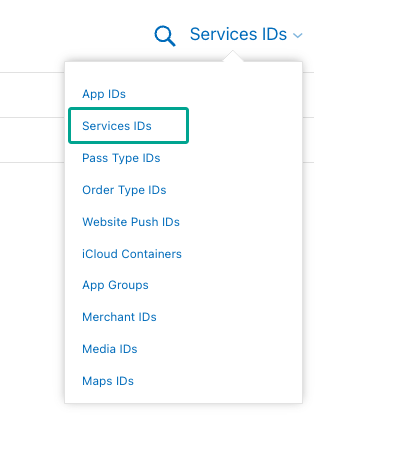
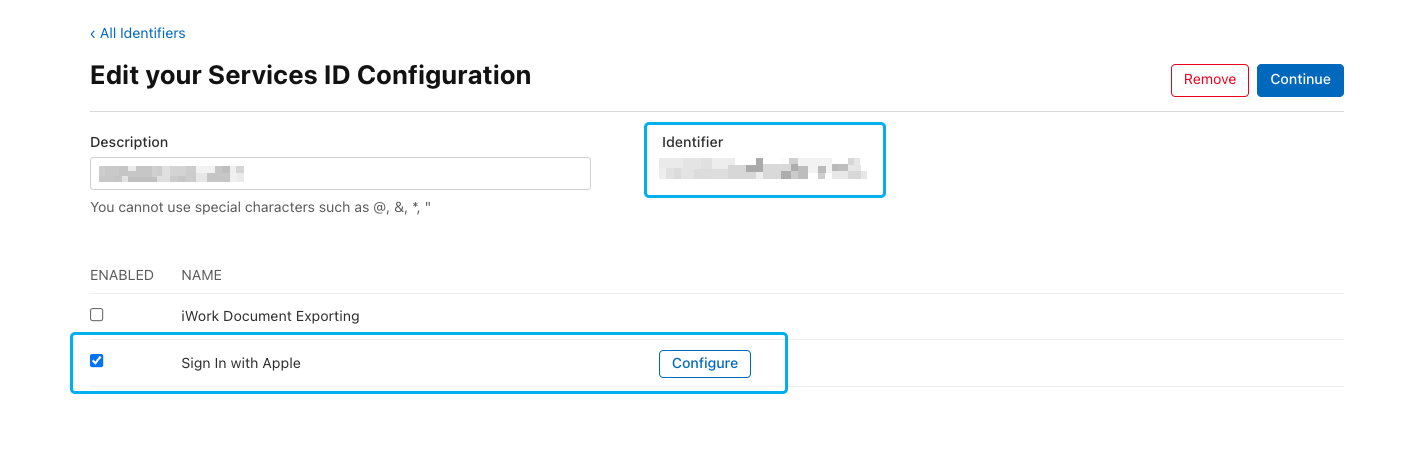
Next we'll create a new service. Towards the top right, select the dropdown and select Services IDs.
-
Enter a Description and an Identifier. Click Continue and then Register.
-
Click on the Services ID again and select Sign in With Apple followed by Configure. The Identifier is the value for the Client ID that you can copy/paste into PropelAuth. Keep this around because we'll be using it again.
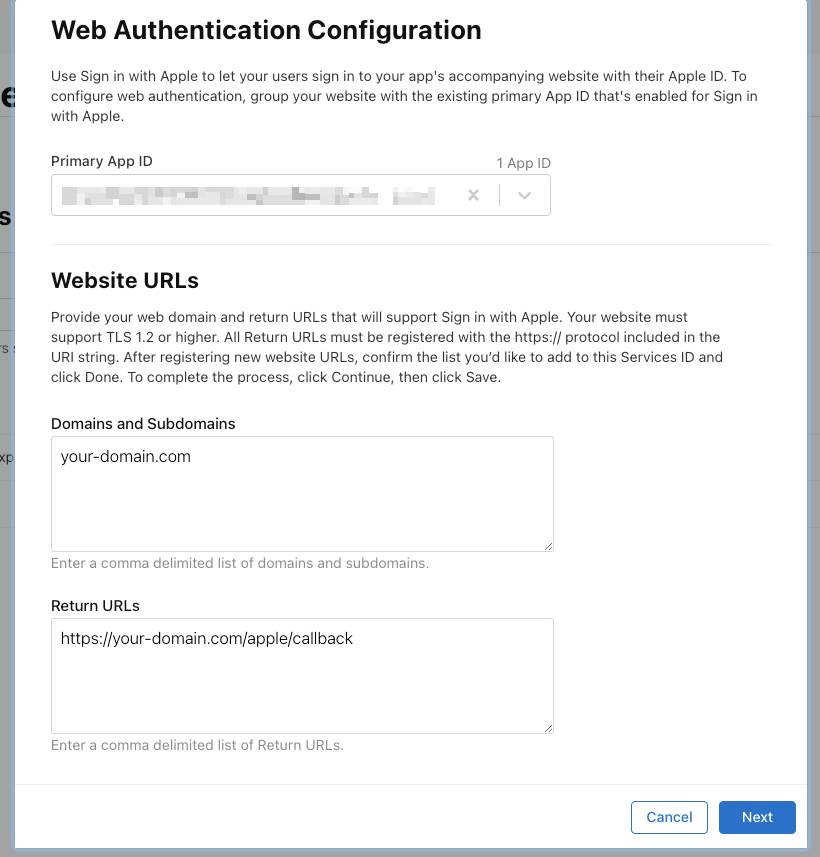
- In the modal that pops up, make sure to select the Identifier we created earlier. Then enter in the domain of your app under Domains and Subdomains. In the Return URLs section, copy/paste the Authorized Redirect URLs from PropelAuth. Click Next when done.
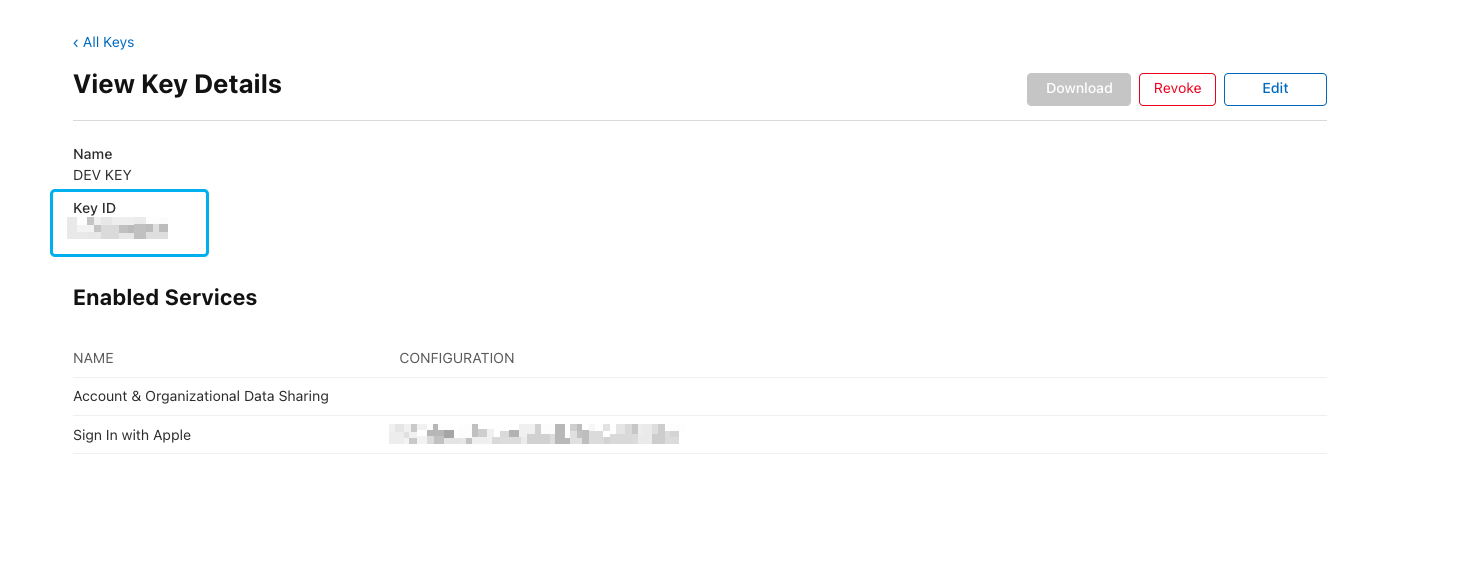
- Back on the main menu, click on Keys on the left.
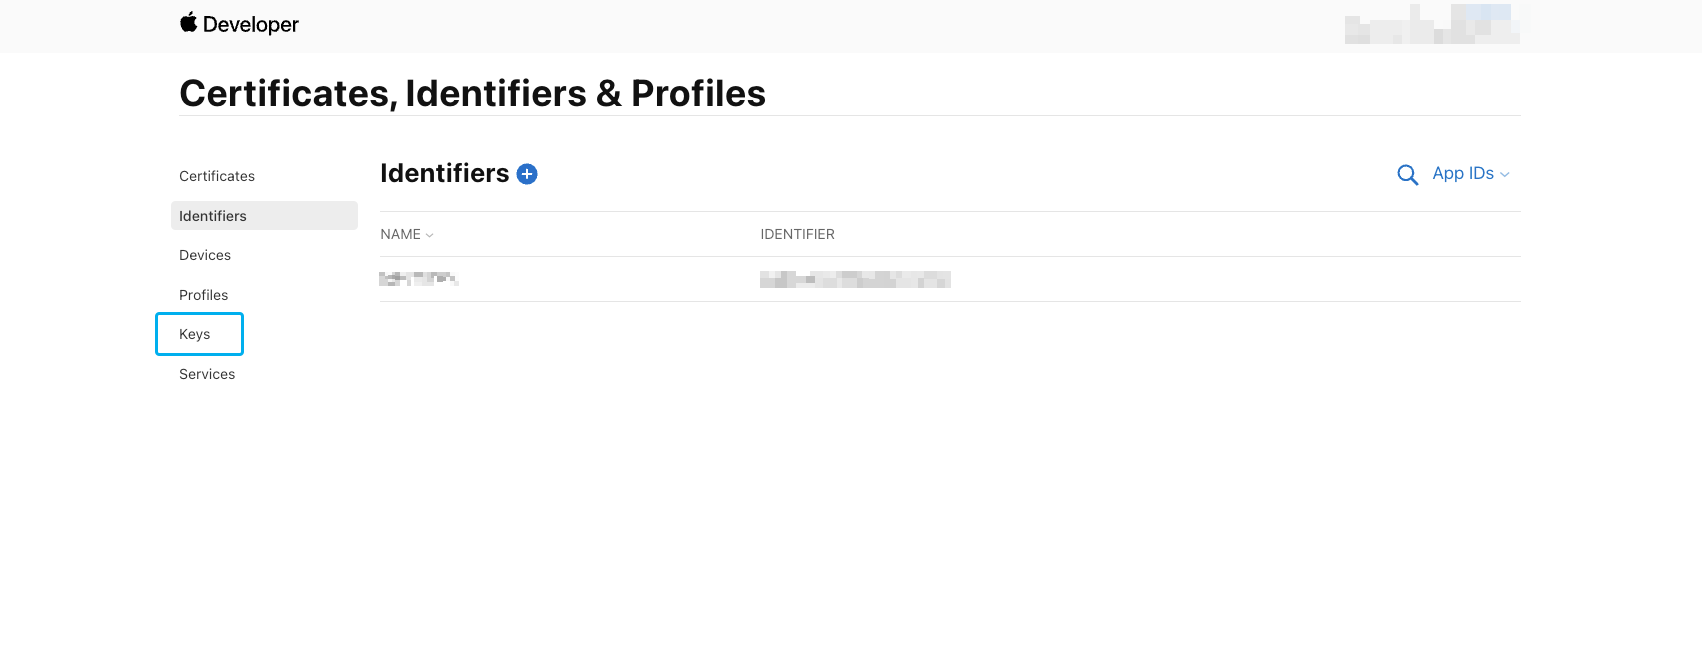
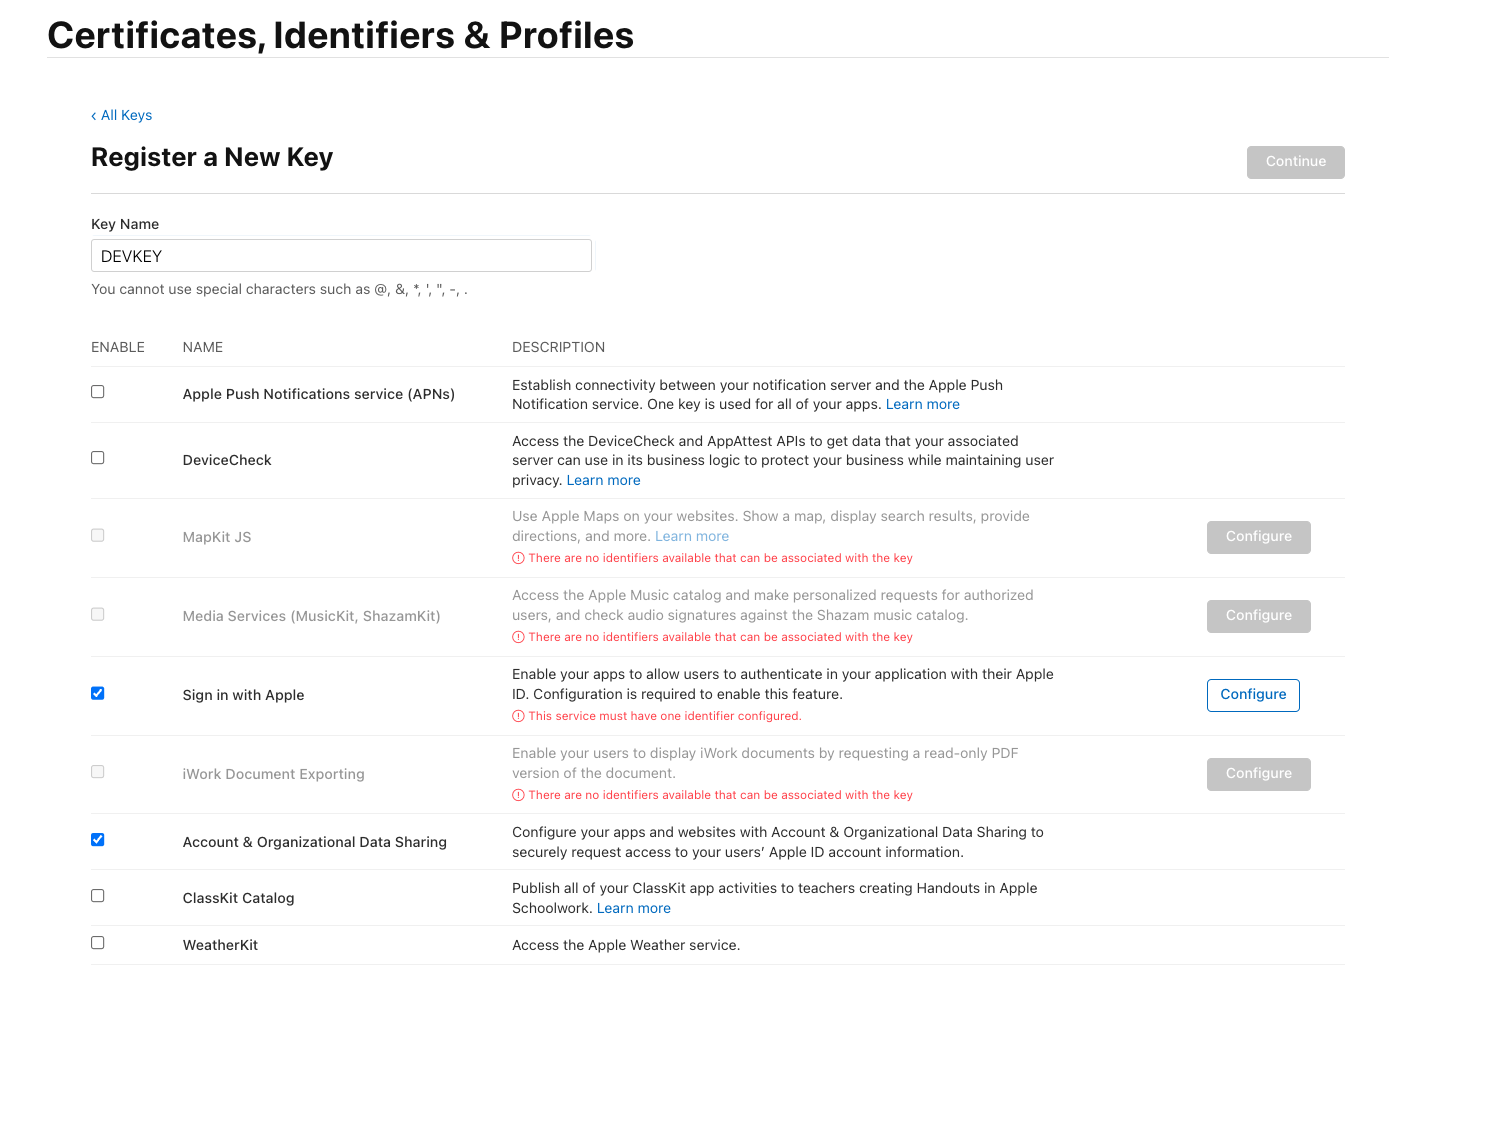
- Create a new Key. Name it and select the Sign in With Apple as well as Account & Organizational Data Sharing checkboxes. Next to Sign in With Apple, select Configure and make sure to select the app we created earlier. Click Continue followed by Register.
-
Next, click the Download button to download the key. Make sure to save this as you'll be needing it again. Click Done.
-
Copy the Key ID so we can use it in the next step.
-
We now need to build the Client Secret. Head over to jwt.io.
-
Paste this object into the Header box on the right side, replacing
{KEY_ID}with the Key ID we generated in step 14.
{
  "alg": "ES256",
  "kid": "{KEY_ID}"
}
- In the Payload box on the right side, copy and paste this object. We'll need to replace each value besides
aud:
{
  "sub": "{CLIENT ID}",
  "aud": "https://appleid.apple.com",
  "iat": 1719417654,
  "exp": 1720022454,
  "iss": "{TEAM ID}"
}
sub: The Client ID from step 9.aud: Set to "https://appleid.apple.com".iat: The current UNIX time. Head to unixtimestamp.com to find the current time.exp: The UNIX time for the secret to expire. The expiration must be within 6 months (15777000 seconds) of the value set foriat. You can use unixtimestamp.com for help or add 15777000 to theiatvalue. This also means you will have to go through steps 15 - 19 of this guide every 6 months to generate a new Client Secret.iss: Your App ID Prefix / Team ID. Can be found by navigating to the Apple Developer Console

- Copy the Key that you downloaded in step 13 into the Private Key box located in th the Verify Signature section. Make sure the Public Key section is empty.
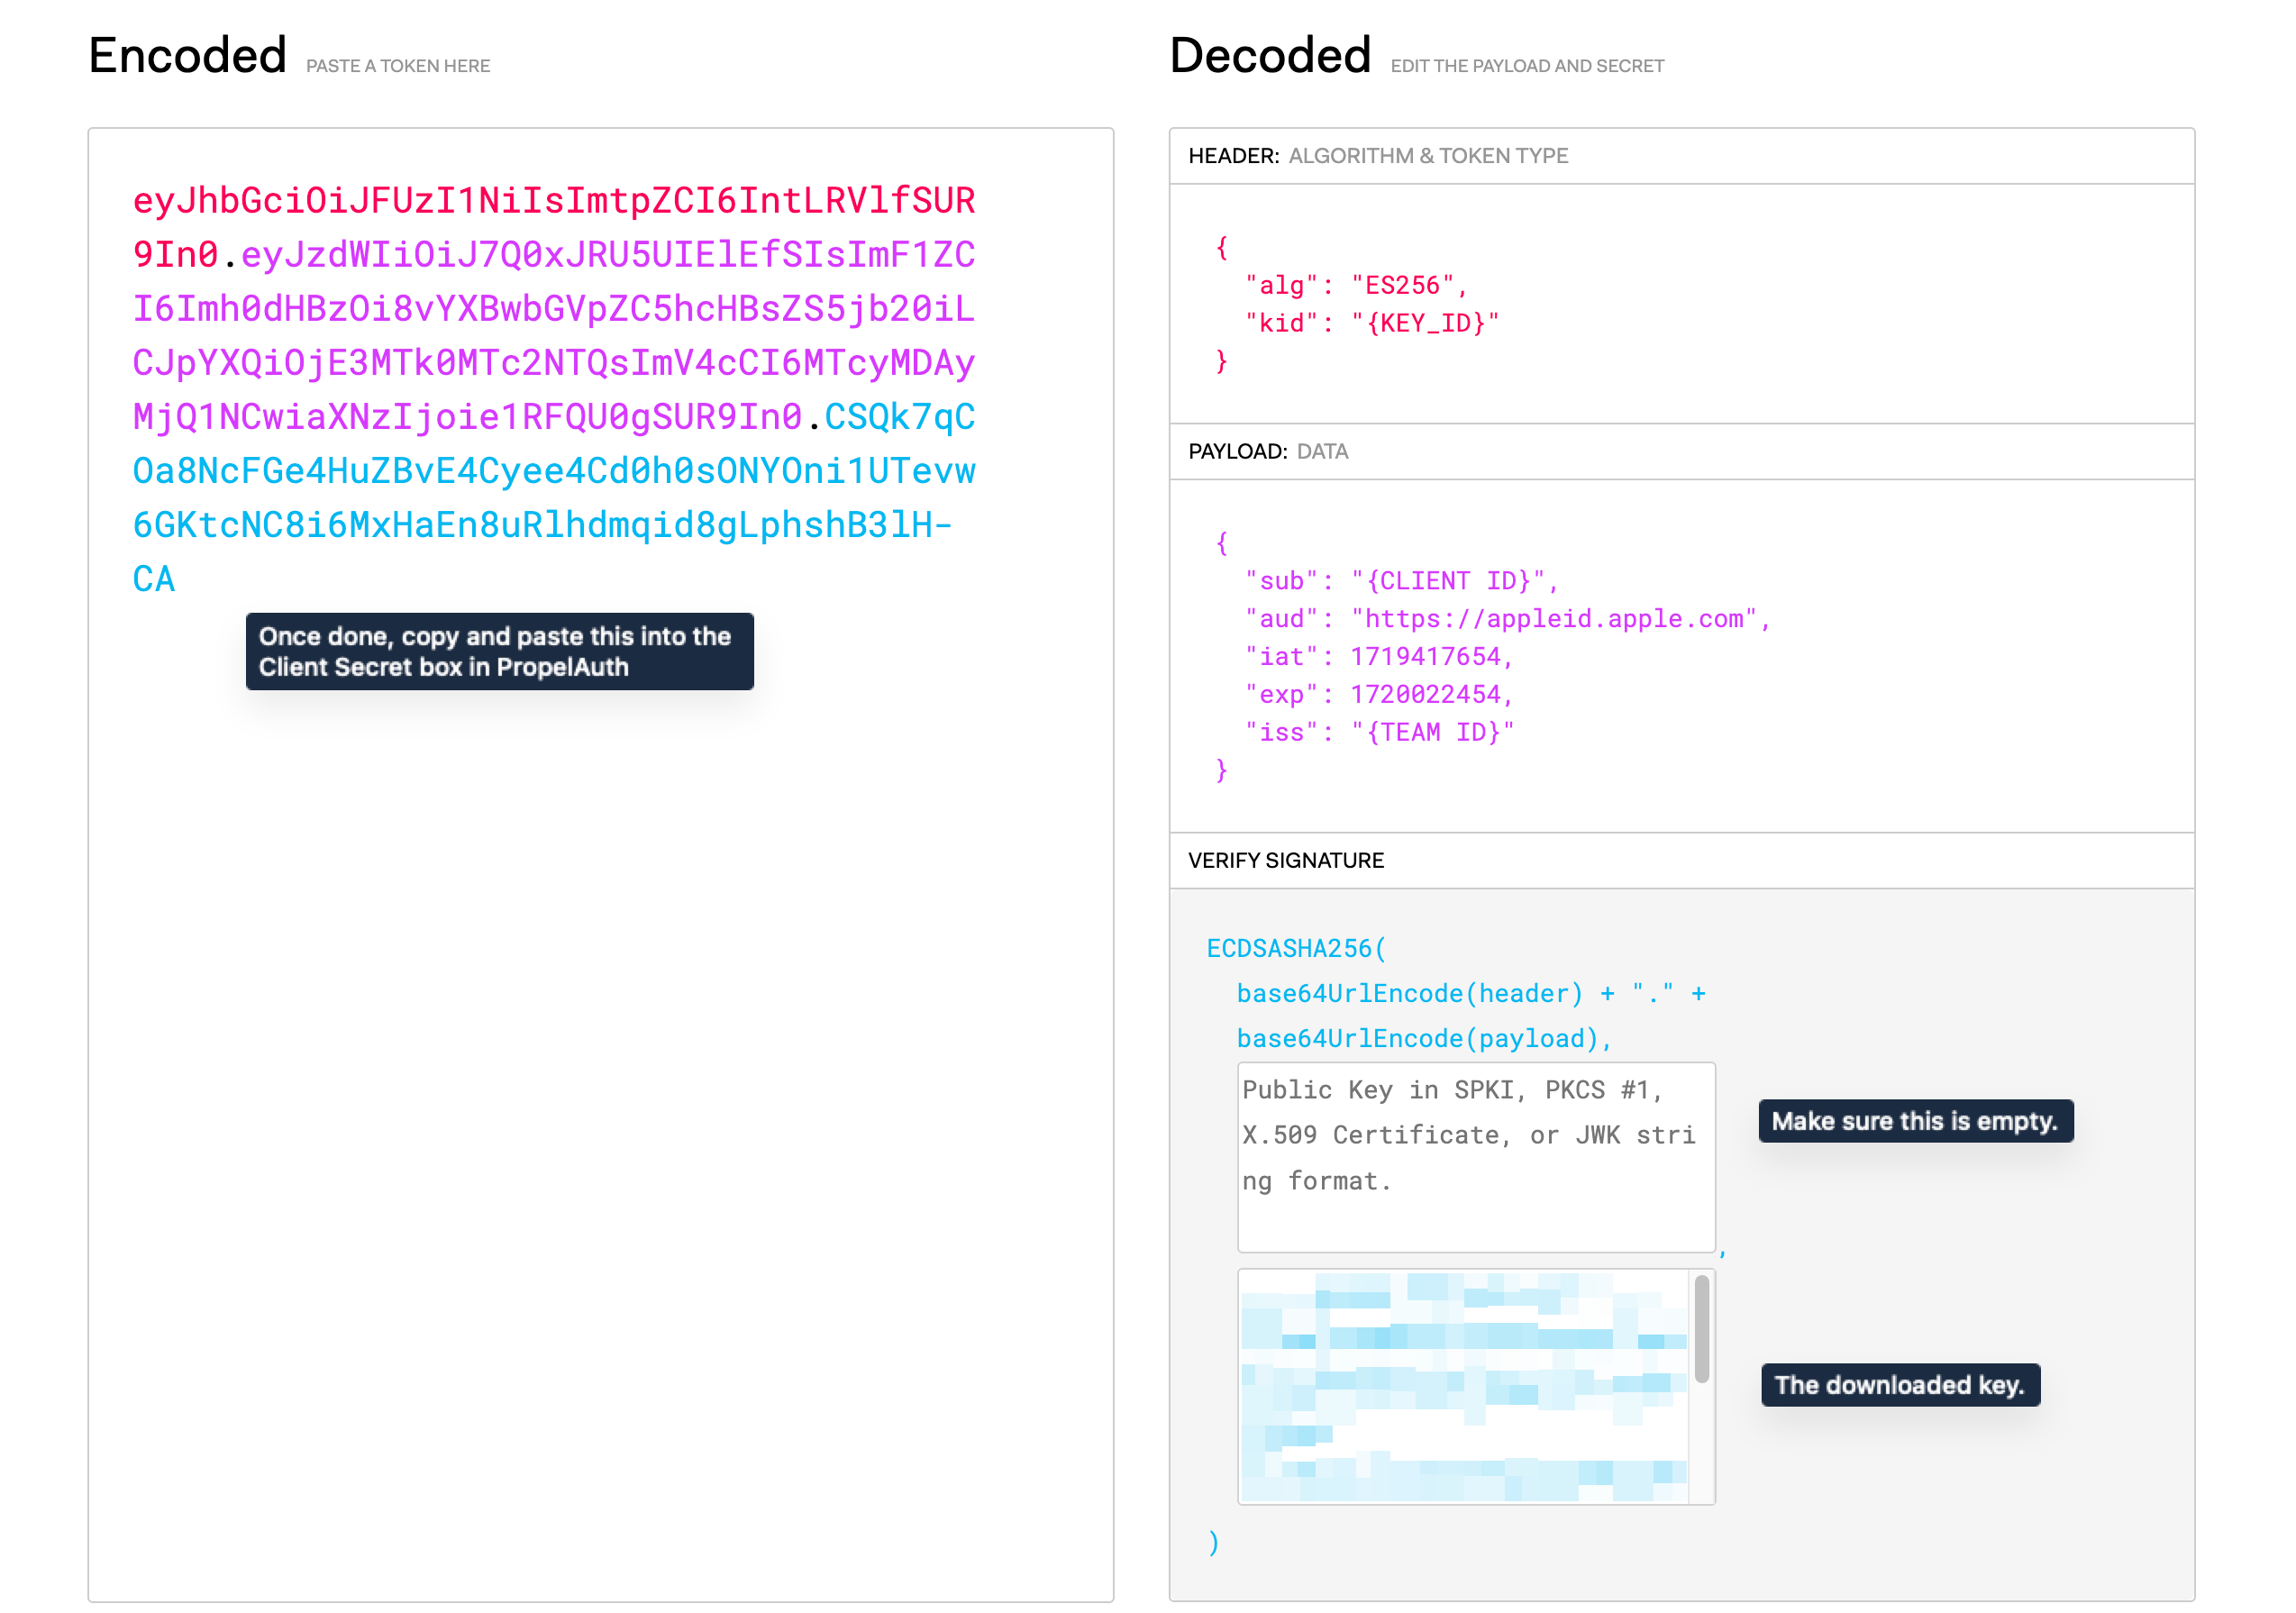
- Once you have populated and edited each field, copy and paste the Encoded value on the left side into the Client Secret field in PropelAuth.
And that's it! When you go to your hosted authentication pages, you should see
the Sign in with Apple button.