Atlassian - Social login (SSO) configuration
Enabling Sign in with Atlassian only requires two fields: Client ID and
Client Secret. Both of these are provided by Atlassian, and these steps will help you
create them.
Users that sign up via Atlassian look the same as users that sign up via any other method. Your code will handle both automatically.
Step-by-step Instructions
-
Navigate to the Atlassian Developer Console and create an account if you do not have one already.
-
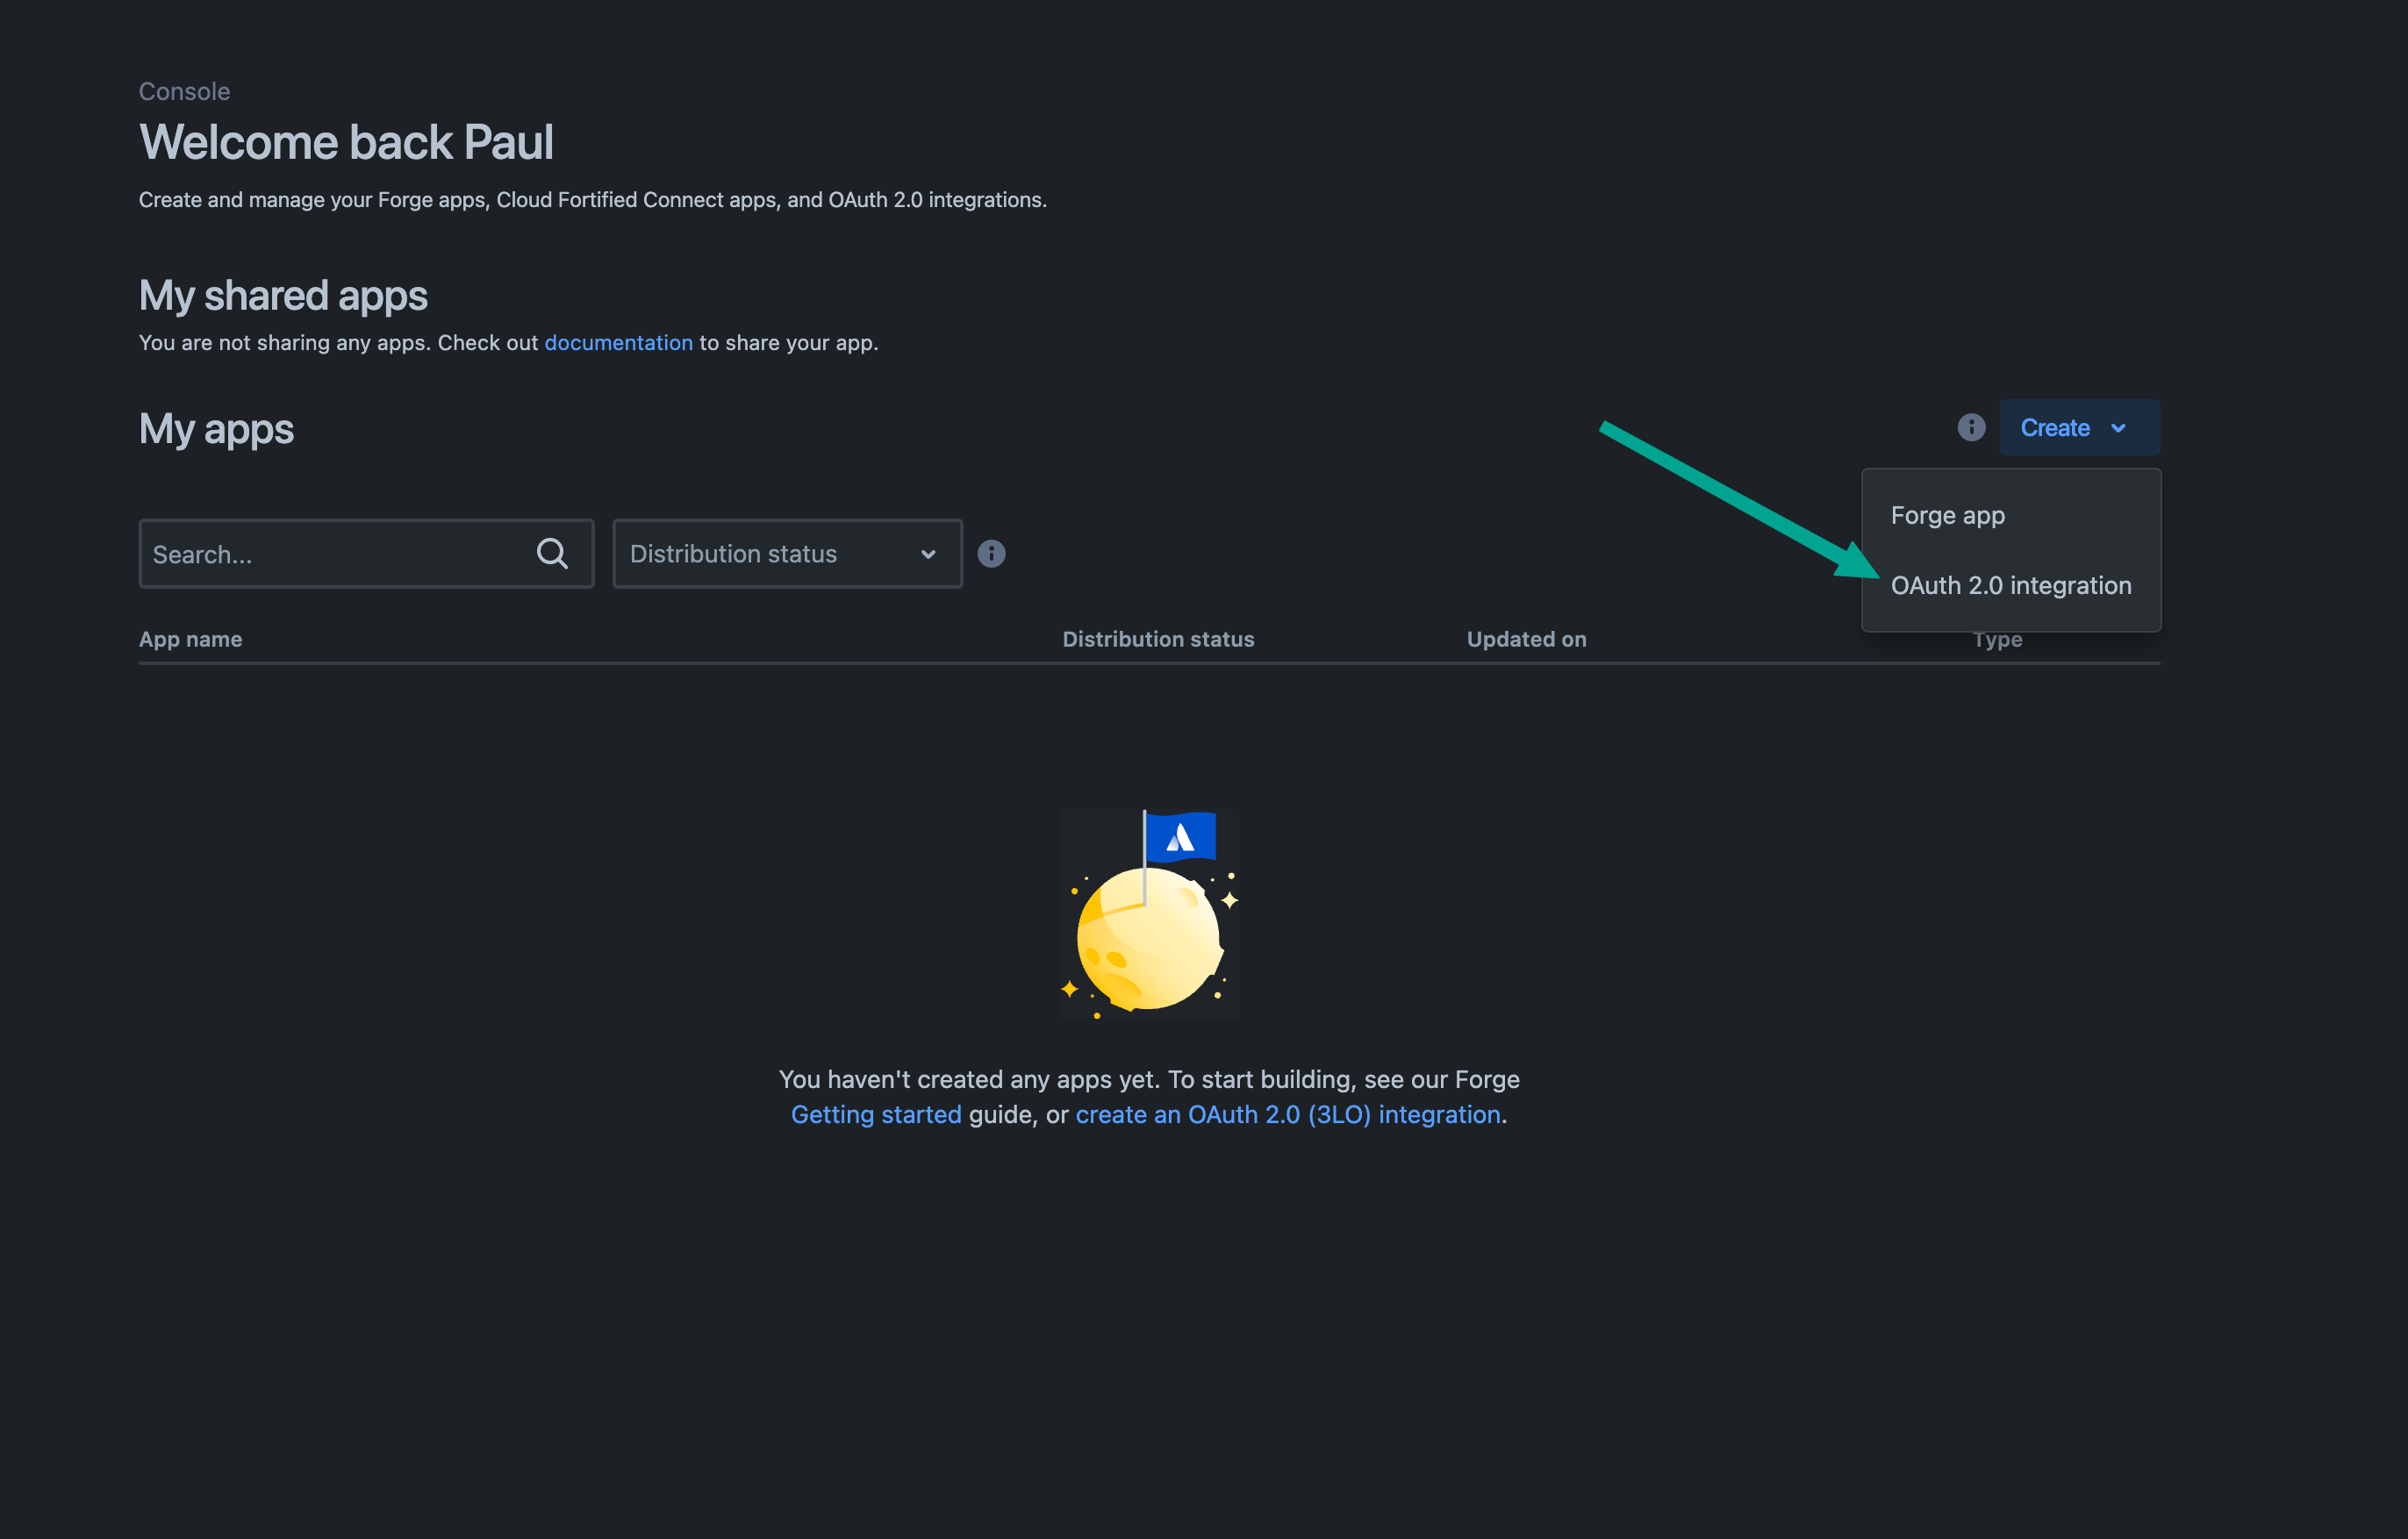
Click on Create and select OAuth 2.0 Integration.
-
Name your app and click Create.
-
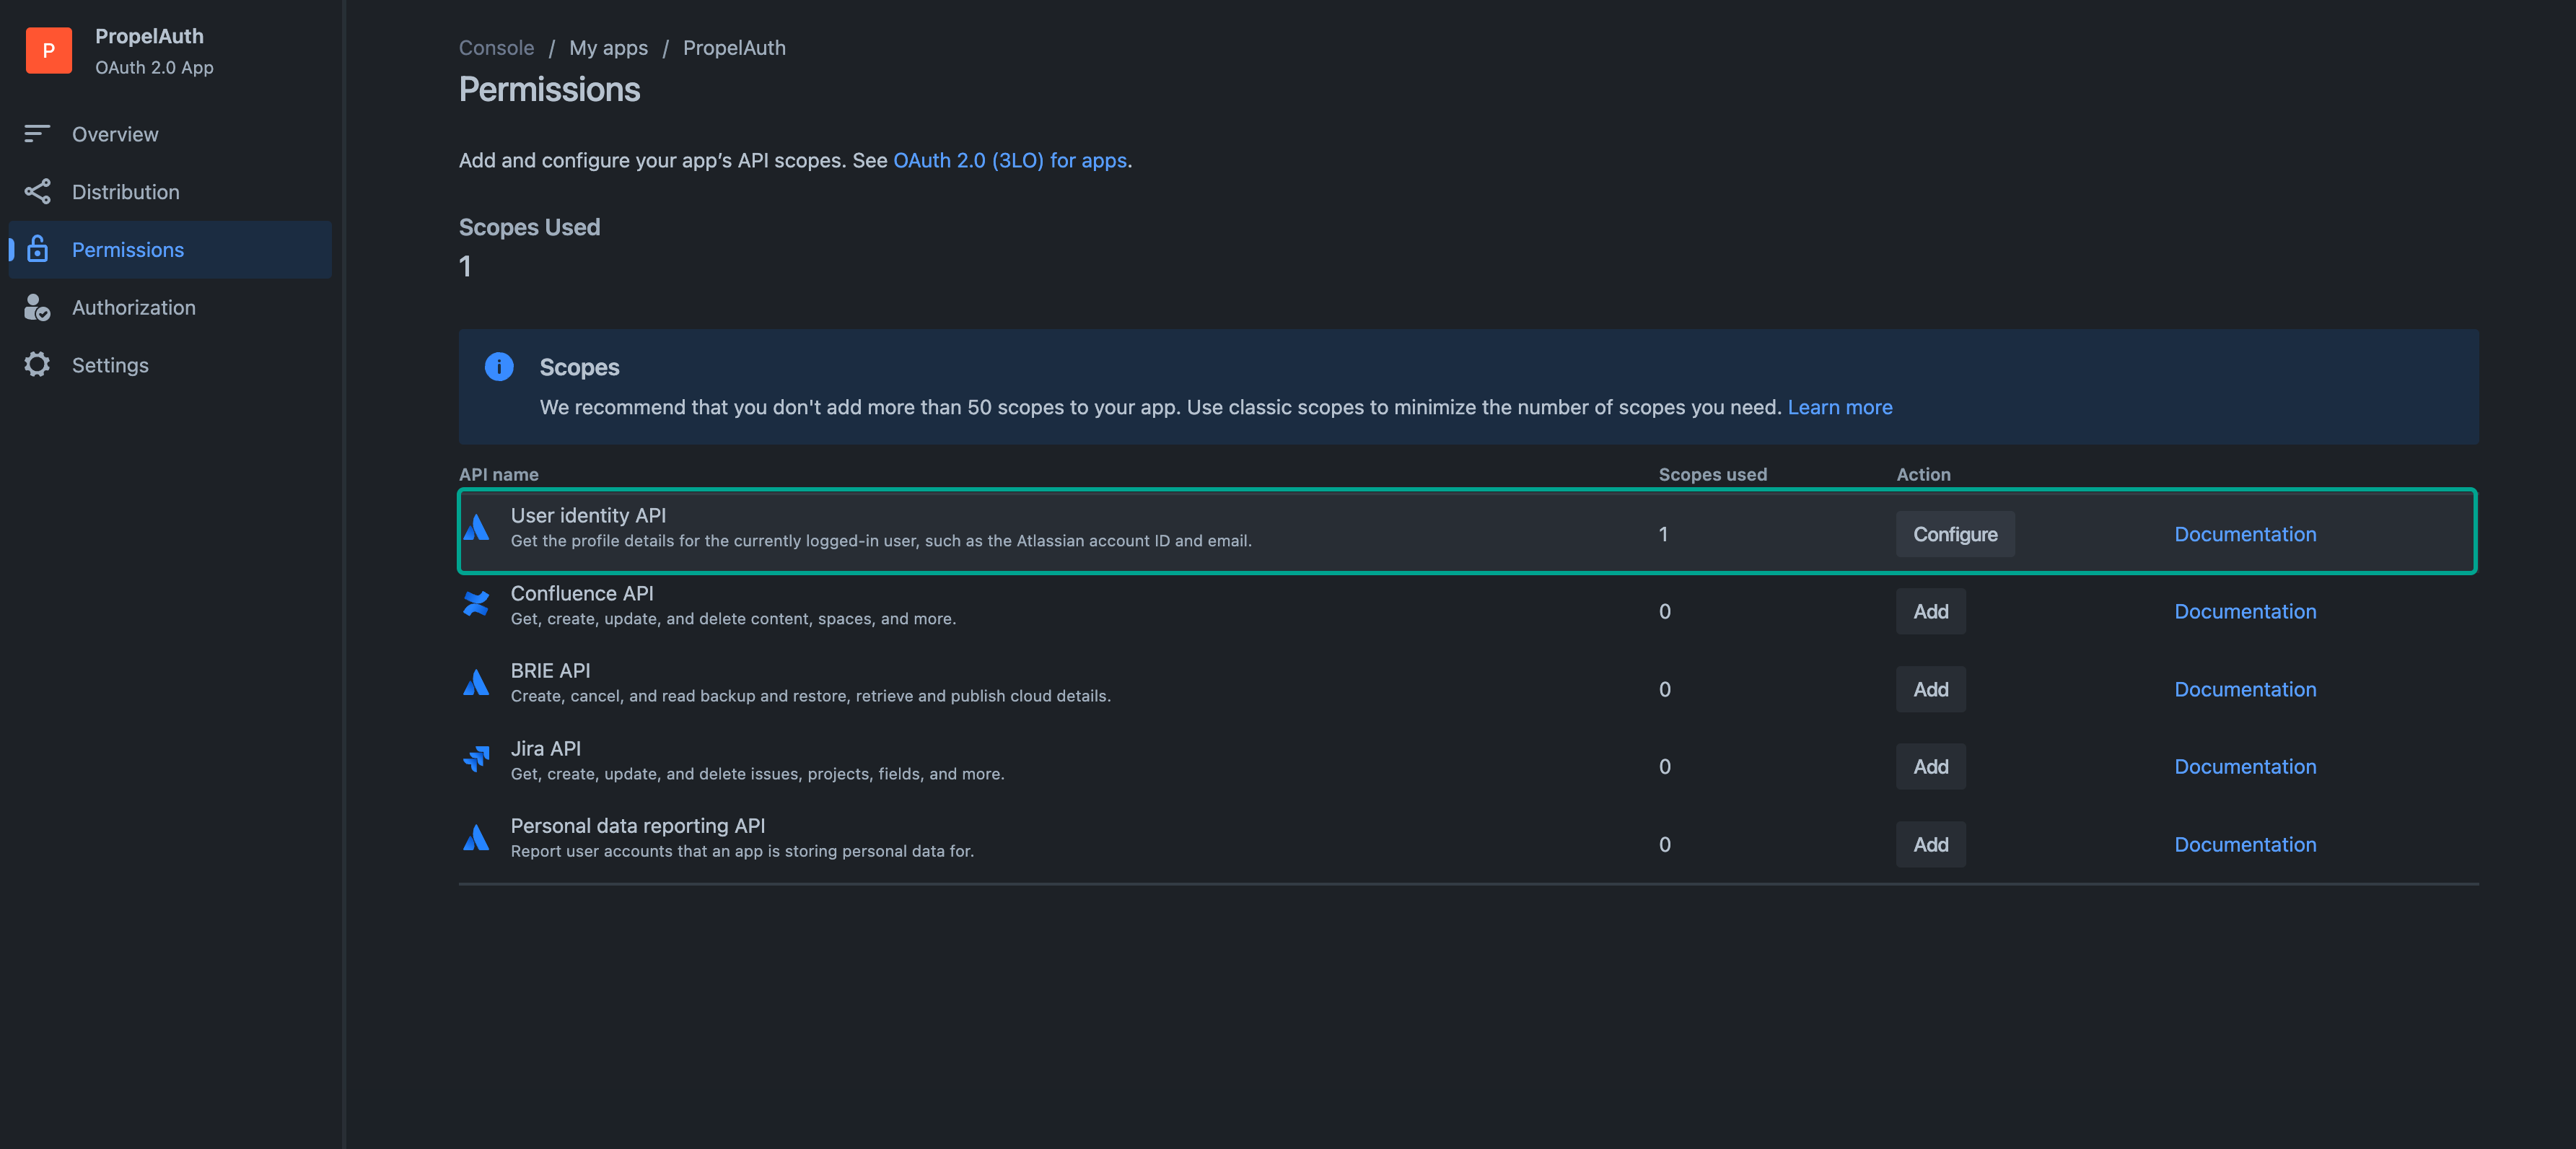
Navigate to the Permissions page and click Add for the User identity API.
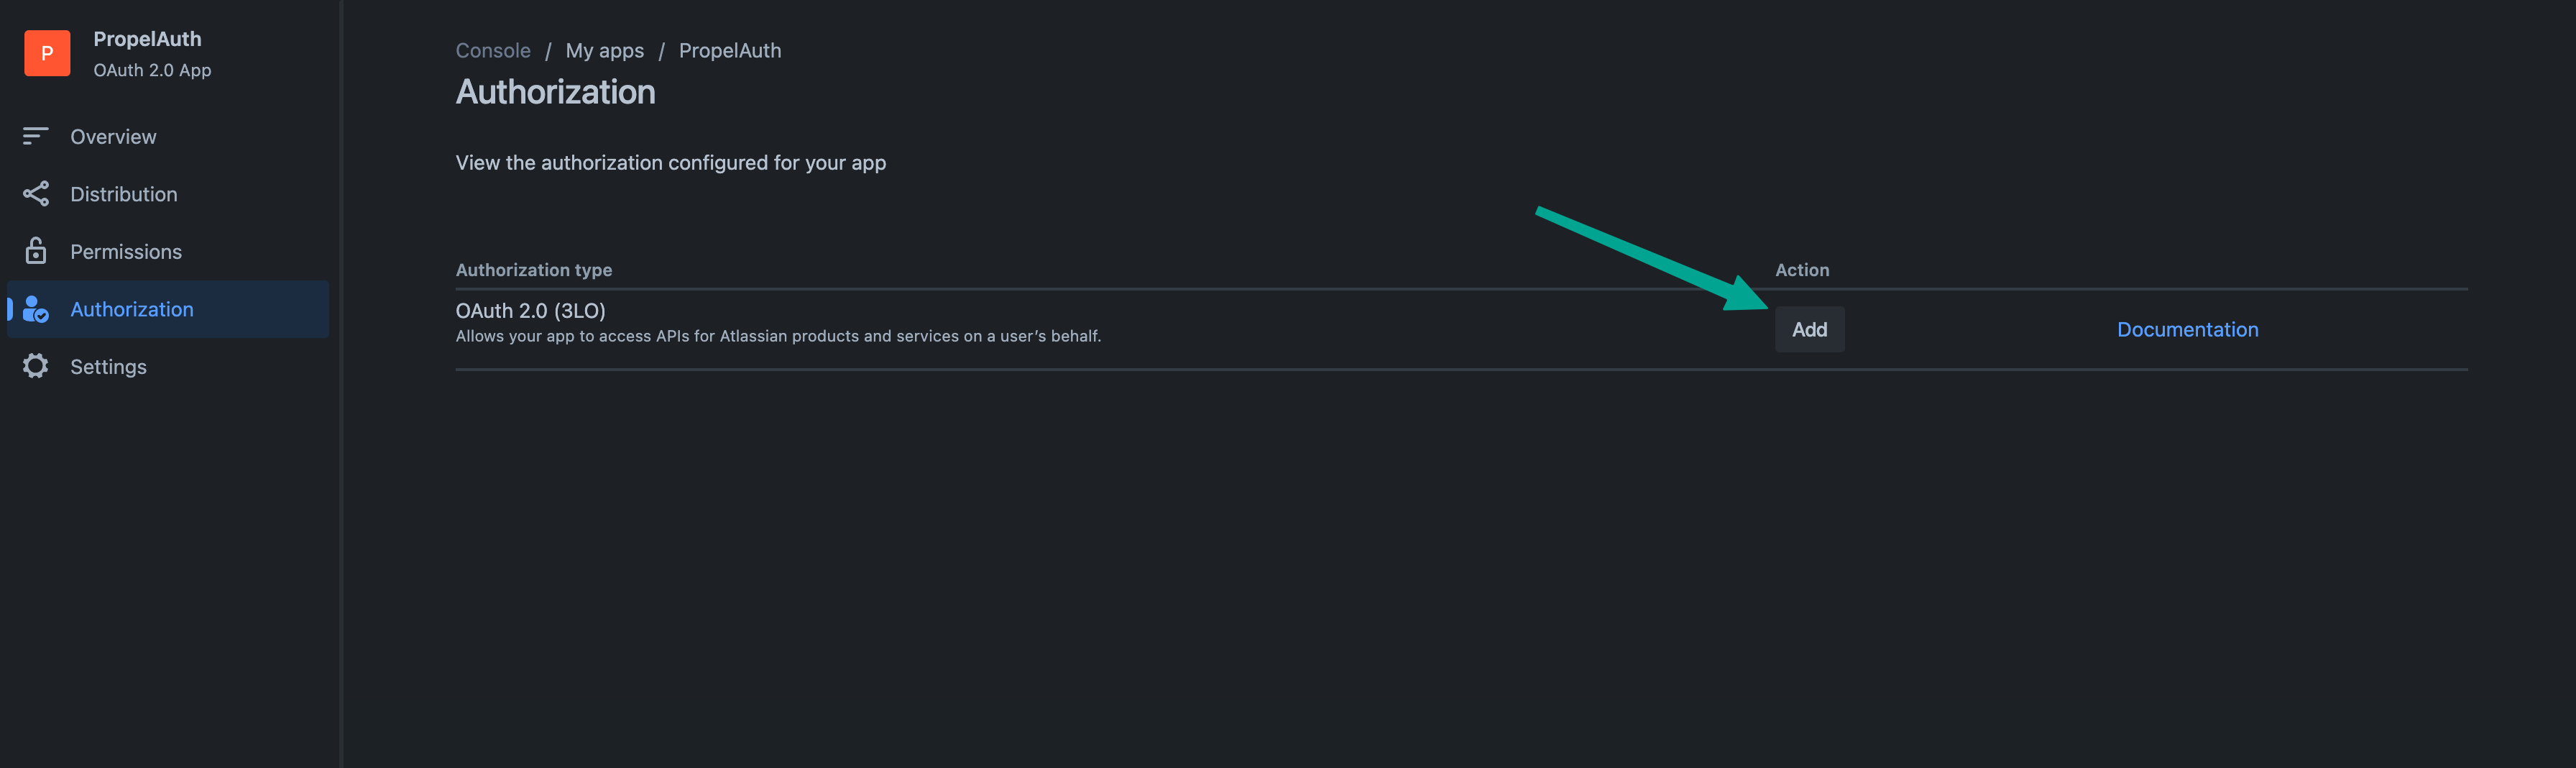
- Navigate to the Authorization page and add the OAuth 2.0 (3LO) Authorization type.
- Here, add one of the Authorized redirect URLs found in your PropelAuth dashboard. Atlassian only accepts one callback URL, so make sure to update this when you're done testing and ready to go live.
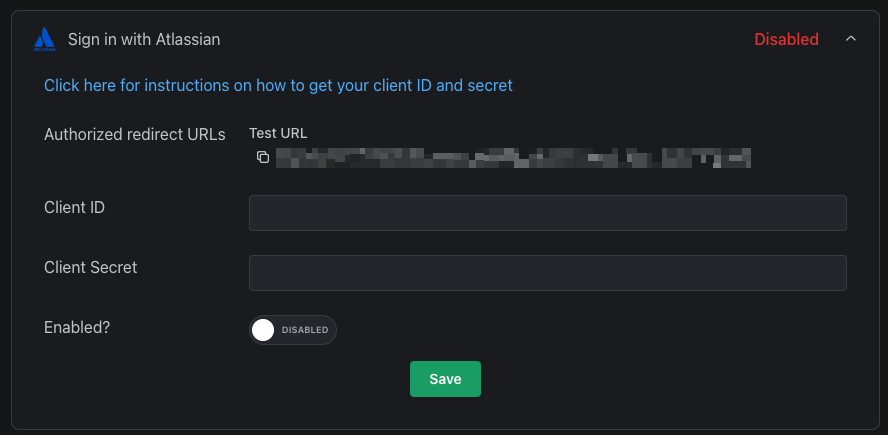
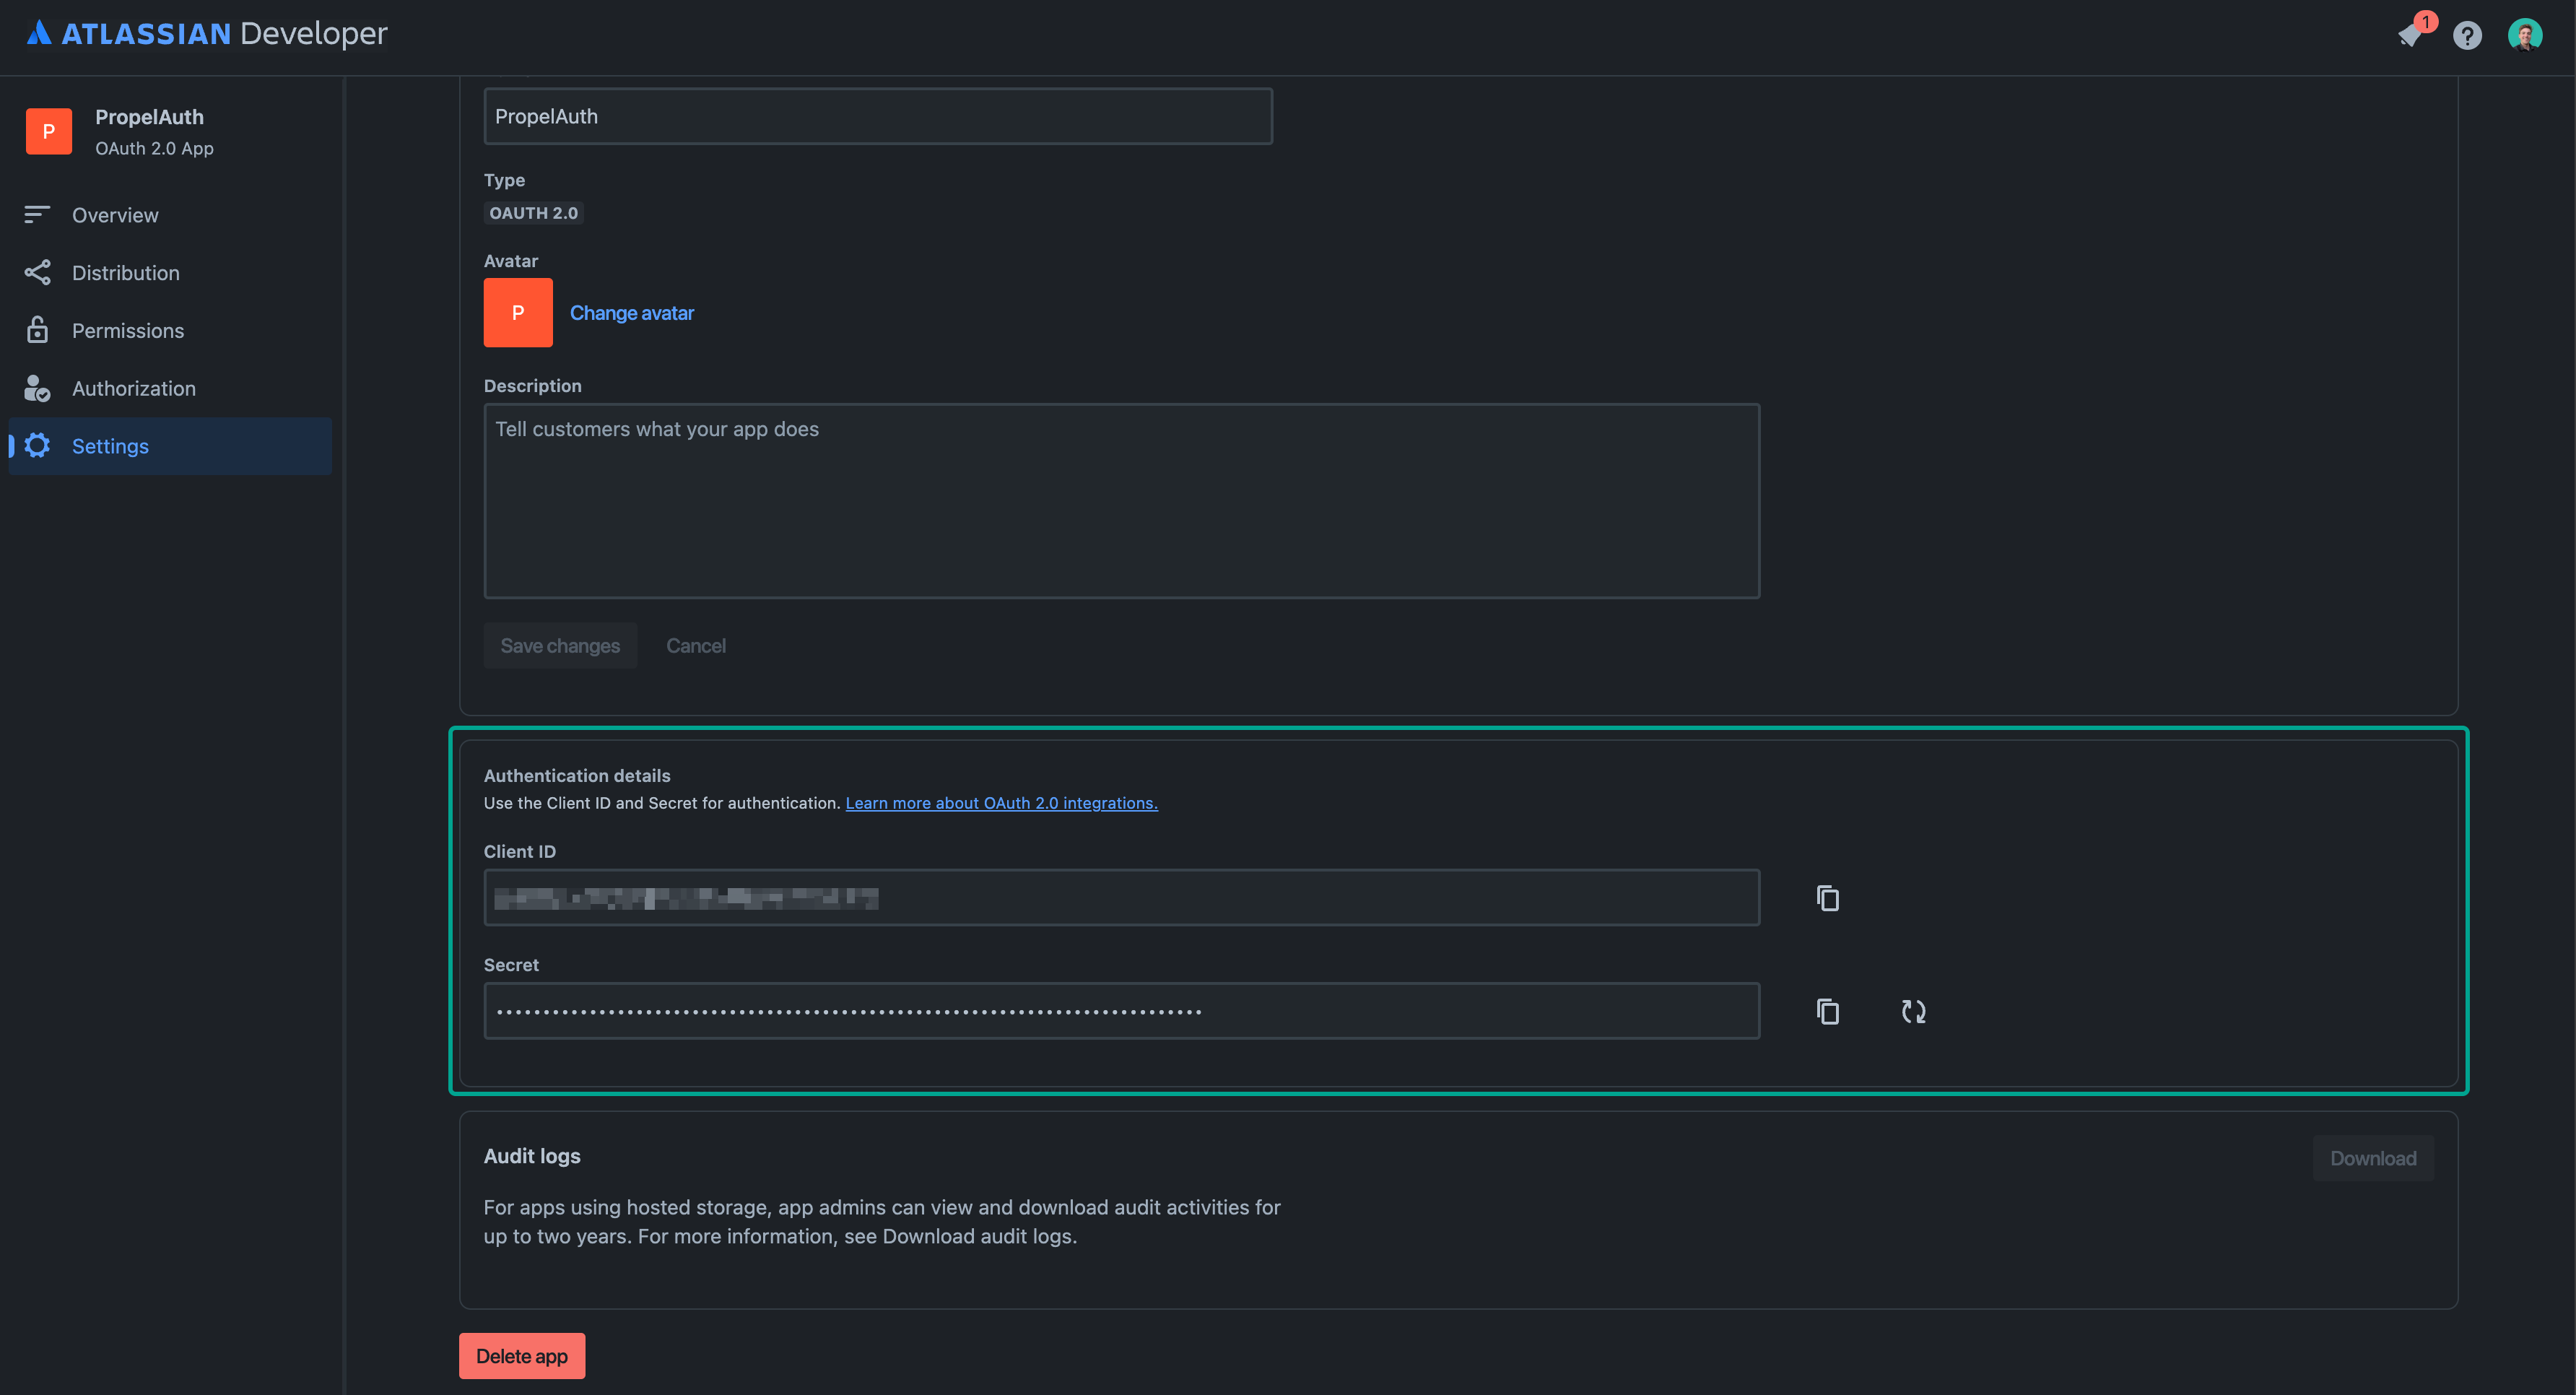
- Next, navigate to the Settings page and copy/paste the Client ID and Secret from Atlassian over to PropelAuth.
And that's it! When you go to your hosted authentication pages, you should see
the Sign in with Atlassian button.