Managing Roles & Permissions
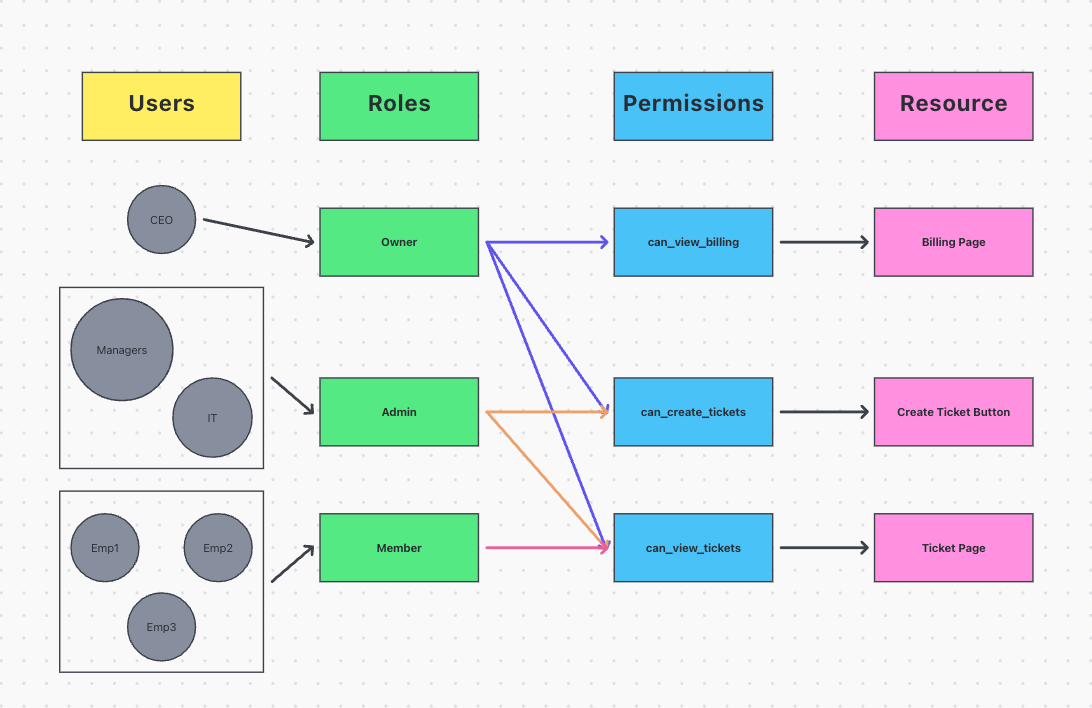
Put simply, authorization and RBAC are ways to control what users can see and do in your product. We do this by assigning users roles and permissions, which are set at the org level.
Authorization
You can use PropelAuth to authorize access to your product via both your frontend or backend. For example, you can display information to your users based on their permissions, or create a backend route that is scoped to users in a certain Organization.
Roles vs. Permissions
Roles are something that your users will see. When your users invite their coworkers to your product, they specify a role for you after you join.
Permissions are something that only you will see. They are optional, but can be helpful if you’d rather write code that says “Show the billing page if this user has the CanViewBilling permission” instead of “Show the billing page for users with the role Admin“.
Managing Roles & Permissions within PropelAuth
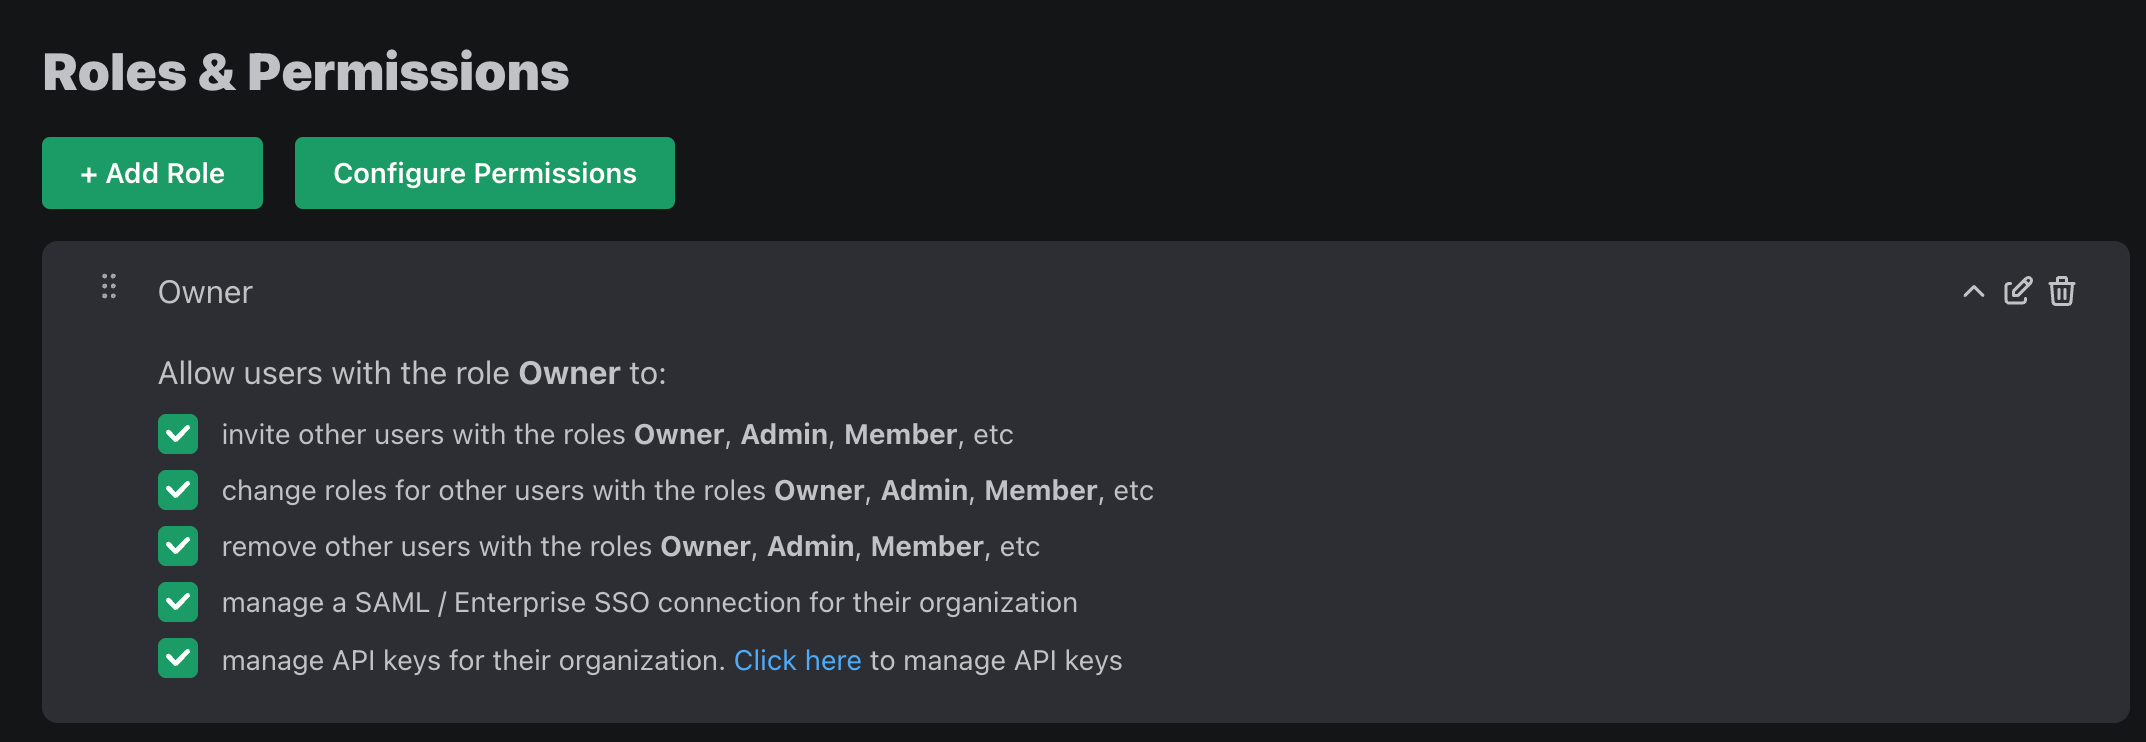
All roles and permissions can be managed from the Roles and Permissions page within the PropelAuth admin dashboard.
You can create multiple Role Mappings that contain different mappings of roles to permissions. By default, your project will start with just one.
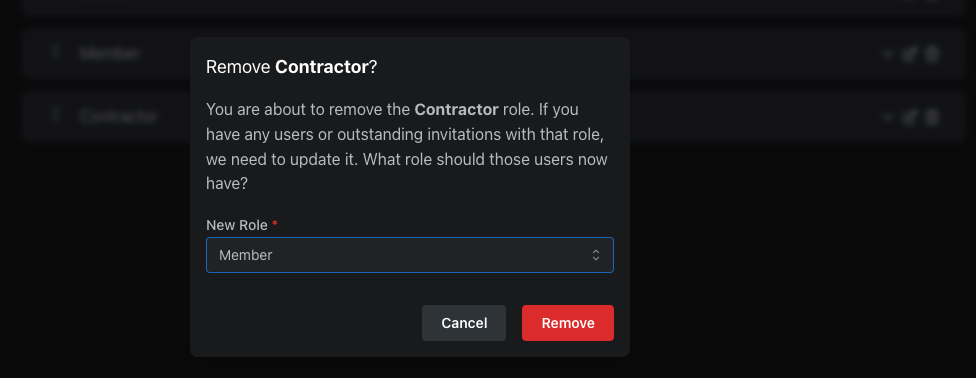
When you change your roles, if the change is backwards incompatible (removing a role, for example), we’ll automatically migrate existing users/invitations with that role.
Internal Roles
Internal roles allow you to add yourself or your employees to organizations without appearing to your users in the hosted pages. This allows for secure internal operations while maintaining a clean user experience for your users.
Create an internal role by navigating to the Roles and Permissions page, clicking on Roles, and then clicking on New Role. Then toggle the Internal Role option.

Here are some key features regarding internal roles:
- Members with internal roles are hidden to your users but are visible on the organization pages within the dashboard.
- The option to assign internal roles are not available to your users via the hosted pages and can only be assigned in your PropelAuth dashboard.
- Internal Users do not contribute to the overall Active Organizations in the User Insights page.
Multiple Roles Per User
By default, PropelAuth allows users to only have one role per Org. With Multiple Roles Per User, you can allow your users to have multiple roles within one organization.
You can convert your project to allow Multiple Roles Per User by navigating to the Roles & Permissions page in your PropelAuth Dashboard, clicking on Roles followed by Quick Actions.
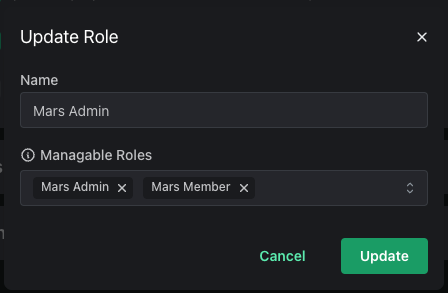
Allowing Roles to Manage Other Roles
Instead of the hierarchy of roles that we see with Single Role per User mode, roles can instead be set to manage other roles. For example, let's say we have three roles:
- Mars Admin
- Mars Member
- Earth Member
We can set Mars Admin to manage itself as well as Mars Member.
This allows you to then assign permissions to the Mars Admin role to:
- Send invitations for the Mars Member and Mars Admin roles.
- Provision/deprovision the Mars Member and Mars Admin roles.
- Remove other users with the Mars Member and Mars Admin roles.
However, they will not have any of these permissions for the Earth Member role.
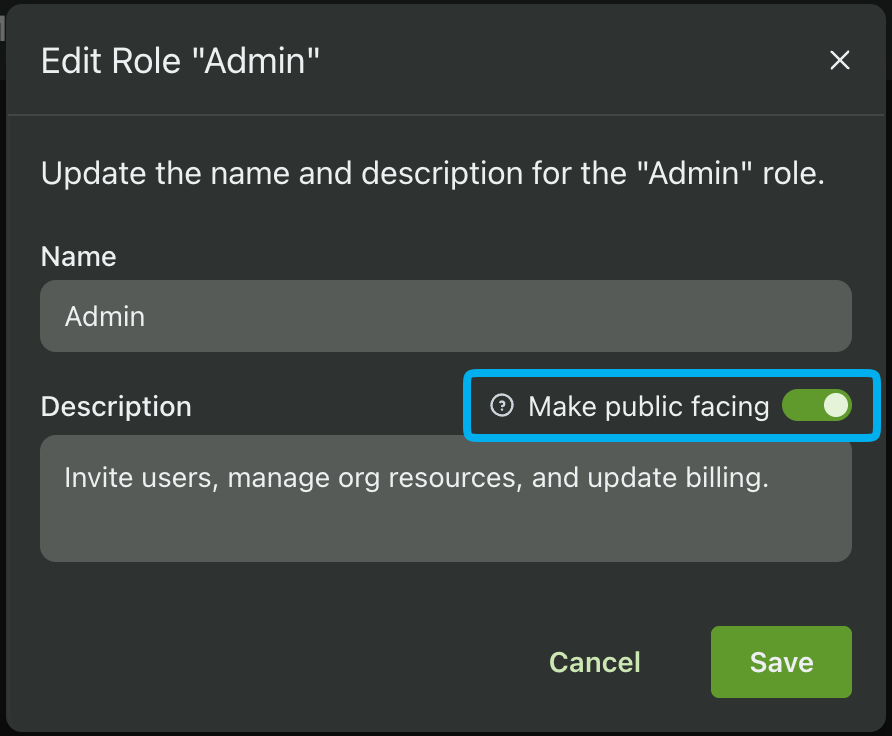
Role Descriptions
You can optionally provide a description for each role you create in your application. This description is not only useful for other team members to get an understanding of what each role does, but it can also be displayed to your users in the hosted pages as a tooltip.
