Roles and Permission Mappings
Roles and Permission Mappings allows you to create multiple role and permission configurations that you can assign to your organizations. Each Role Mapping can contain different mappings between roles and permissions. For example, you might have an app with a free plan with several features behind a paywall. With Roles and Permissions Mappings, you can:
- Create a Free Plan Mapping with limited permissions for each role.
- Create a Paid Plan Mapping that adds additional permissions for each role, as well as a new role that's disabled for your Free Plan.
Creating Role Mappings
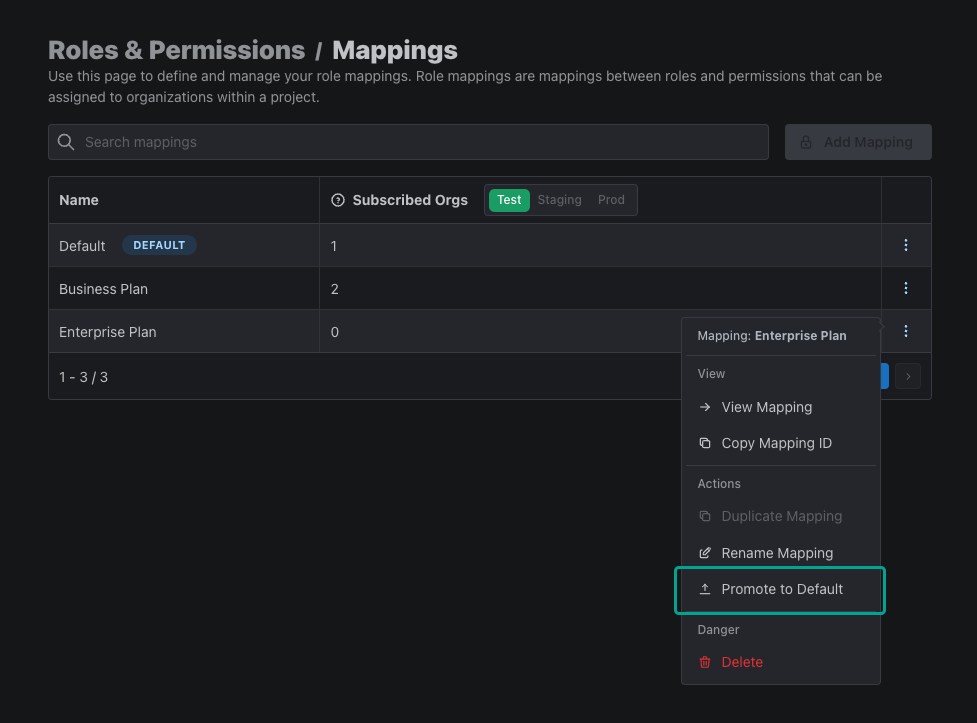
To create a new Mapping, head over to the Role and Permissions page in your PropelAuth dashboard and click on Mappings. Then, click on Add Mapping.
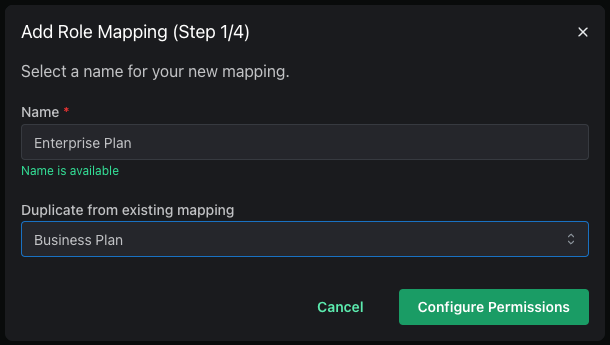
You'll then be guided through several steps to setup your new Mapping. In the first step, you can name your new Mapping as well as duplicate it from an existing one. This can be helpful if you're creating a Role Mapping that's similar to an existing one but with a few minor changes.
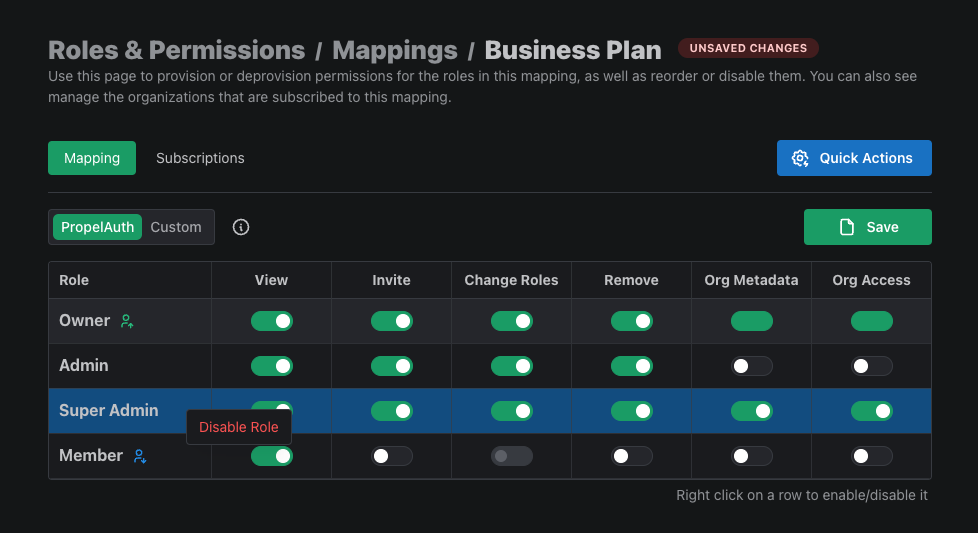
In the second step you can customize which roles will contain which permissions. If you have your own custom permissions, you can map these in the third step. Each change you make will be highlighted with a green box, making it easy to track how your new Mapping is different than the one you duplicated it from.

The last step before review is subscribing organizations to the Role Mapping. You can always add or remove organizations from Mappings later on.
Default Mapping
Your project will always have one default Role Mapping. This is the Mapping that new organizations will automatically subscribe to when they're created. A good example of this is a Mapping for your free tier.
To set a new Role Mapping as default, navigate to the Mappings page, click on the three dots next to the Mapping, and click Promote to Default.
Subscribing Organizations to Mappings
You can subscribe organizations to Mappings in several ways:
-
In the Organizations page, click on the organization you want to edit. Then, click on Settings. Under the Organizations Settings section, click on the cog next to Organization Role Config.
-
In the Roles and Permissions page, click on Mappings followed by the Role Mapping you want to subscribe an organization to. Click on Subscriptions and then Add Subscriptions.
-
Via the API. First, get the role mapping name using the Fetch Role Mappings request. Then, using the org ID and role mapping name, use the Subscribe Org to Role Mapping request.
Disabled Roles
If you want a Role Mapping to not include a specific role, you can disable it. When a role is disabled, your users will not be able to be assigned to that role. This can be useful when a certain role only exists for a paid plan.
To disable a role for a Mapping, navigate to the Mapping in the Roles and Permissions page. Then, right click on the role you would like to disable and click Disable Role.