User Properties
User properties can be any information you want to store about a user. PropelAuth makes it easy to collect and store this information, whether it's manually through our admin dashboard, collected directly from the user, or set via our APIs.
Default User Properties
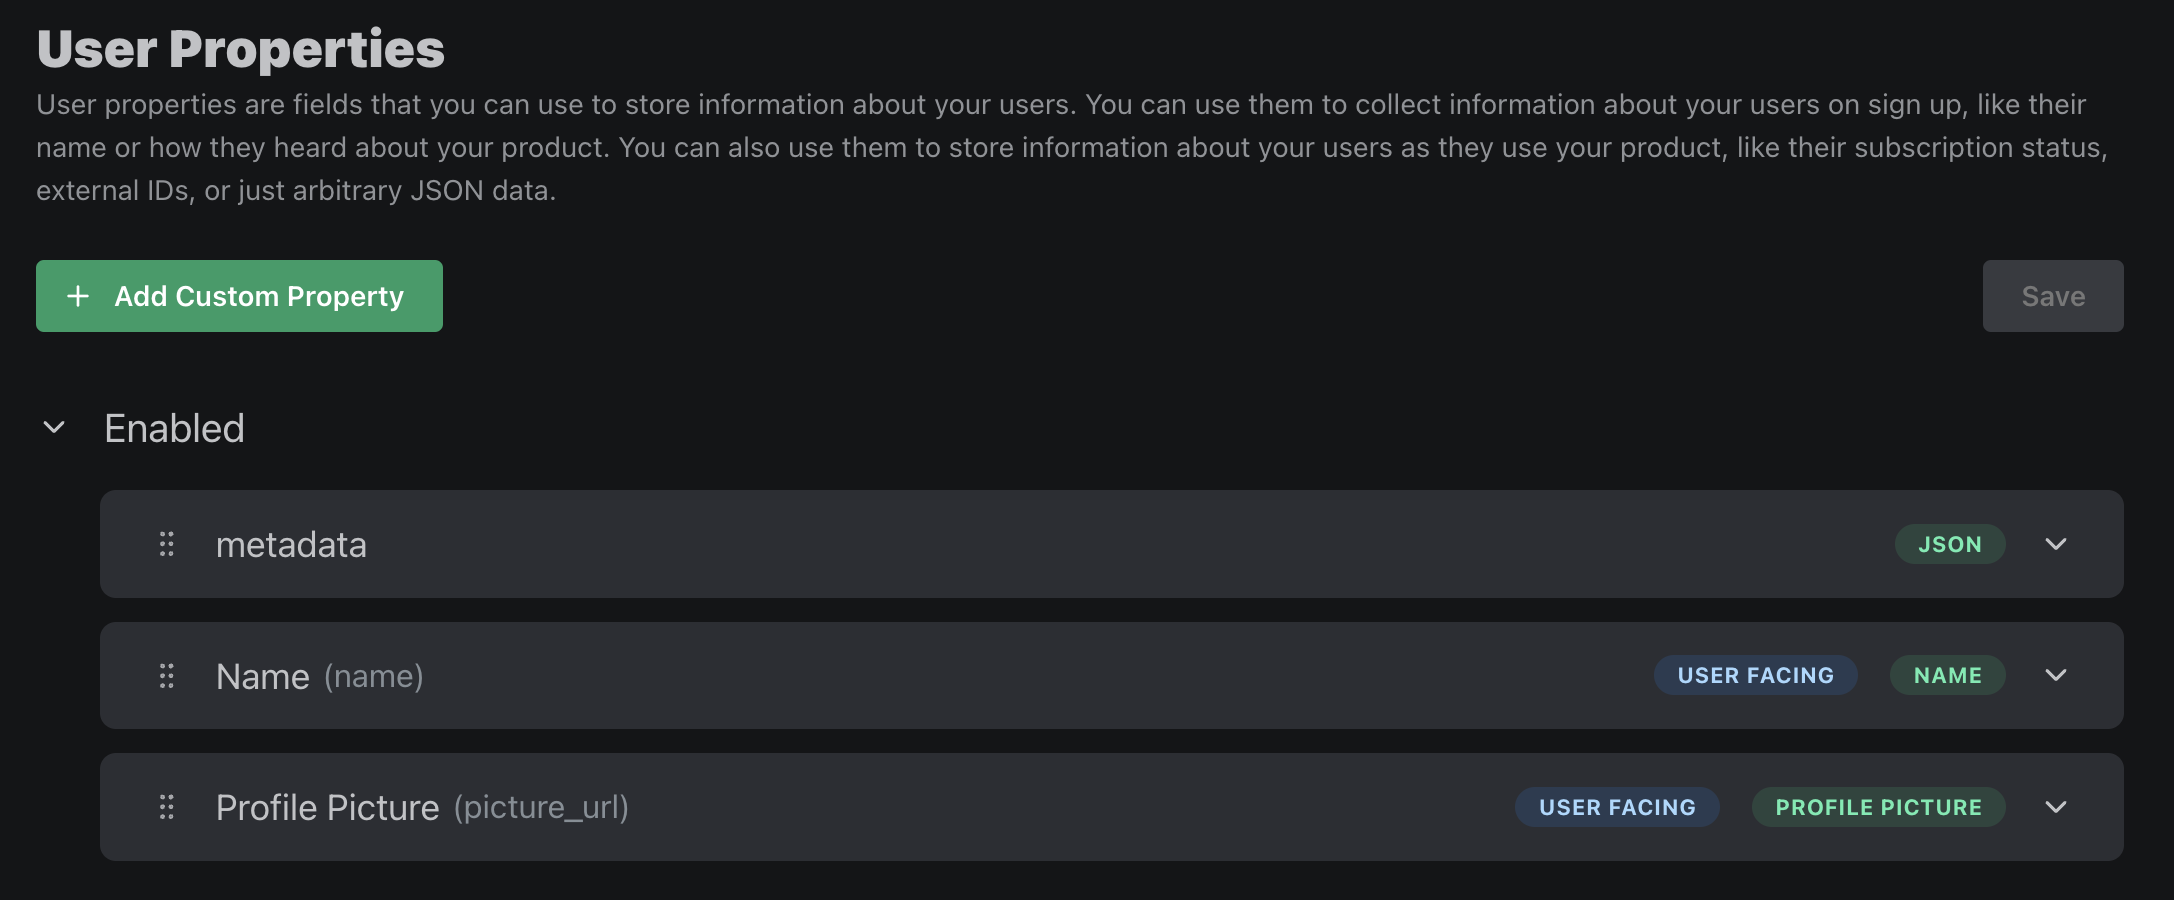
PropelAuth comes pre-configured with a set of default user properties. These are disabled by default, but can be enabled via the User Properties page of the dashboard. The default properties are:
| Property | Description |
|---|---|
| Name | Collect first and last name from your users. When you enable this property, first name and last name fields will be added to your Sign In flow and Account pages. These fields will be editable by the user. |
| Username | Enables your users to create a unique username. When you enable this property, your users will be prompted to create a username during your Sign In flow. This field will be editable by the user in the hosted pages. |
| Profile Picture | Adds a Profile Picture section on the Account page where users can upload a picture. If your users sign in via a login method that sends over a profile picture (such a Google SSO), then that will be set at the time of signup. |
| Terms of Service | Upload a Terms of Service (or Privacy Policy, etc) URl and add a checkbox to your Sign Up flow that requires users accept the terms. |
| How did you hear about us? | Adds an enum field to your sign in flow where users can select how they heard about you. You can configure which dropdowns are selected, and you can also choose to have it show on the Account Page. |
| Metadata | An internal-only property that allows you to set arbitrary JSON associated with the user. |
Custom User Properties
PropelAuth users on a paid plan can create their own custom properties to store information about a user.
There are two types of user properties:
- Managed by your users - These are fields that can be viewed and edited by your users. Some examples of these are name, profile picture, terms of service, etc. You and your team can also edit these fields on behalf of your users through the dashboard or our APIs.
- Managed by you - These are fields that your users cannot view or edit. Some examples of these are Stripe customer id, user group, A/B testing group, etc.
There are also a variety of input types to select from when you create a custom property, such as text, enum (dropdown selection) and date.

Configuration Options
Each user property has a set of options that you can configure. These options include:
| Option | Description |
|---|---|
| Name | The name of the property. This will be used as the key in your user object. |
| Label | The label of the property. This will be used as the label in your signup page and account page. |
| Type | The type of the property (e.g. Text, Date, Enum, etc). Date must be in format YYYY-MM-DD. |
| Collect on Signup | Whether or not this property should be collected on signup. If enabled, your signup page will automatically update to collect this field. |
| Show in Account Page | Whether or not this property should be shown in your users' account page. If enabled, your users will be able to view and optionally edit this field. |
| Required | Whether or not this property is required. See the section below for more information. |
| Can Users Edit? | Whether users can edit this property. Options include: Yes, Yes, but only once and No (Read-only) |
| Include in Token | Enabling this option will include this property in the access token (JWT). This means you can access it on your backend without making an external request to us, however, this should not be enabled for sensitive data. |
| Collect via SAML | For your users that are setting up SAML SSO, this option will allow them to set up an attribute mapping to collect this field automatically. |
When do required properties get collected?
When setting up a required property, you can choose between it being required for all users or only new users.
If you choose all users, then all of your existing users will be prompted to fill out this property the next time they log in.
If you choose only new users, then only users who sign up after this property is required will be prompted to fill out this property.
Login Method Property
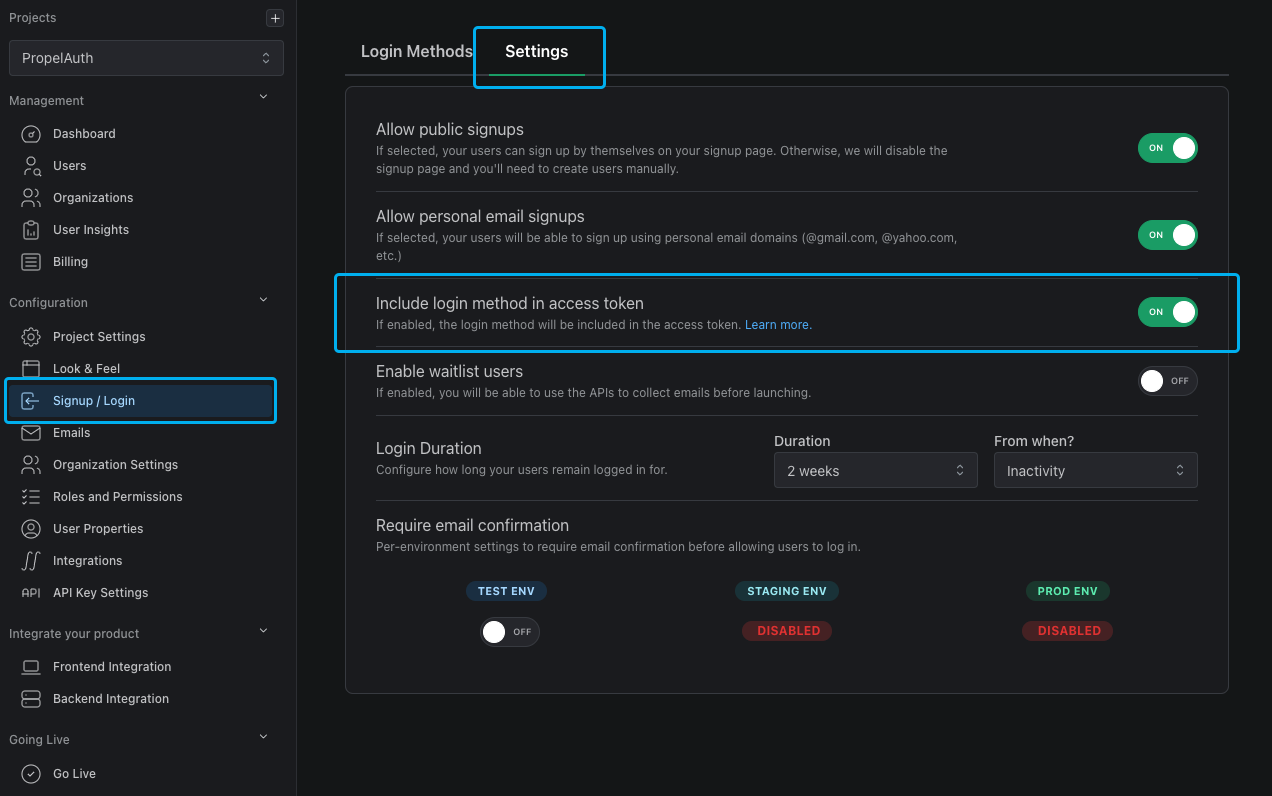
PropelAuth provides the ability to see how your users are logging in with the login_method property - useful when enforcing users of an org to only log in via Google SSO, knowing which SAML provider a user logged in with, etc.
To enable the login_method property, head over to Signup / Login method page and click on Settings. Then, toggle the Include login method in access token setting.
Getting the Login Method Property
Each backend SDK provides a way to get the login_method property. Here's an example using the Node library which uses middleware to enforce a specific SSO provider is used for an organization:
const requireSso = async (req, res, next) => {
  const user = validateAccessTokenAndGetUser(req.headers.authorization);
  const org = user.getOrg(req.params.orgId);

  if (!org) {
    return res.status(404).json({ message: "Org not found", status: 404 });
  }

  const isGoogleSsoRequired = await isGoogleSsoRequiredForOrg(org.orgId);

  if (!isGoogleSsoRequired) {
    return next();
  } else if (user.loginMethod.loginMethod === "social_sso" && user.loginMethod.provider === "Google") {
    return next();
  } else {
    return res.status(401).json({
      message: "Google SSO is required for this org",
    });
  }
};

export default requireSso;
The login_method property is an object that always contains the login_method key. In some instances, such as when a user logs in via SSO or SAML, it will also include a provider property, like so:
{
  login_method: "social_sso"
  provider: "GitHub"
}
If the user logs in via an org's SAML connection, the login_method object will also contain the orgId of the org.
{
  loginMethod: "saml_sso"
  provider: 'OneLogin'
  orgId: "abh1h13..."
}
FAQs
What happens if I turn on a required user property after I've already started onboarding users?
If you turn on a property that's required for all users, then your users will be asked to enter the property the next time they log in. If you turn on a required property for all users going forward, then the property will only be collected on sign up, though existing users will see the property and be able to edit it from their Account pages (if the property is set to appear there).
How do I edit a property on behalf of a user?
You can edit a property on behalf of a user via the Users page in the PropelAuth dashboard. You can also edit it via API (see API reference for details).