Github - Social login (SSO) configuration
Enabling Sign in with Github only requires two fields: Client ID and
Client Secret. Both of these are provided by Github, and these steps will
help you create them.
Github provides two separate ways to integrate with PropelAuth. The OAuth App method is easiest, but is limited by only allowing one callback URL. This means that you'll only be able to integrate with one of your environments at a time.
If you want to add multiple callback URLs or want to add additional scopes than our integration requires, you should use the Github App method instead.
Users that sign up via Github look the same as users that sign up via any other method. Your code will handle both automatically.
OAuth App Instructions
- Start by going to https://github.com/ and signing in.
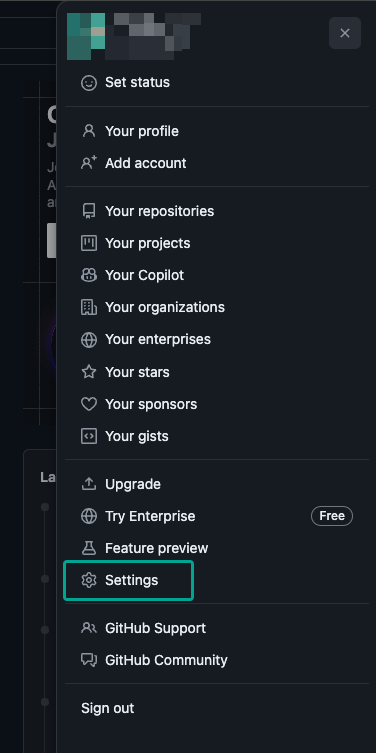
- In the top right corner, click on your avatar followed by Settings.
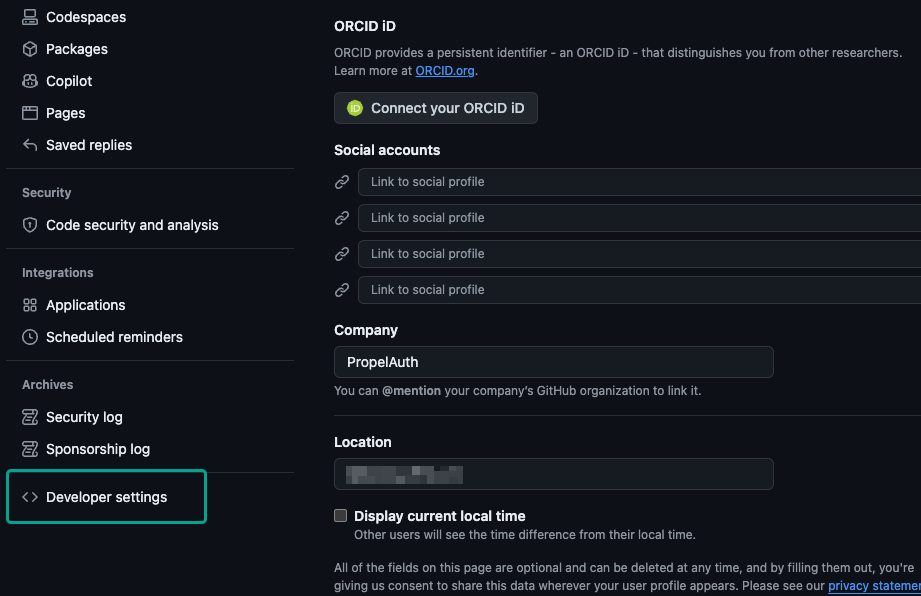
- In your settings page, navigate to the bottom of the left navbar and click on Developer Settings.
- Make sure to click on OAuth Apps followed by New OAuth App.

- Name your app and provide a homepage URL. For the Authorization callback URL, copy/paste the Authorized Redirect URL from PropelAuth.
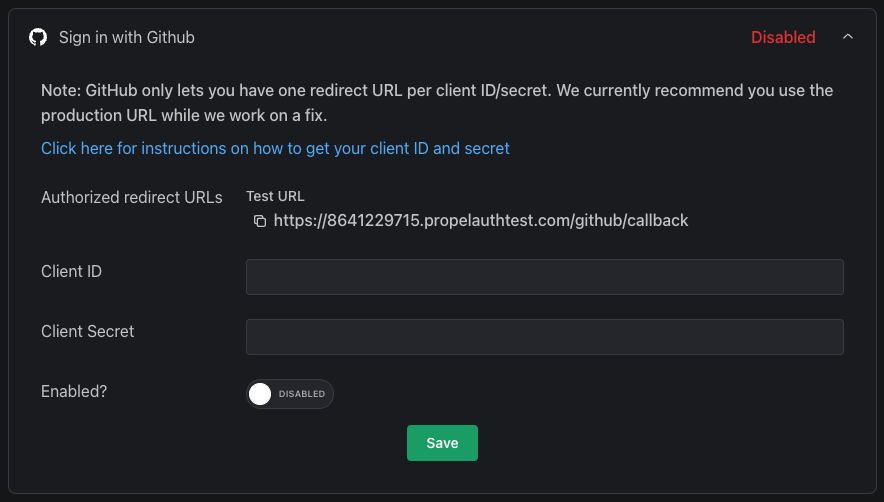
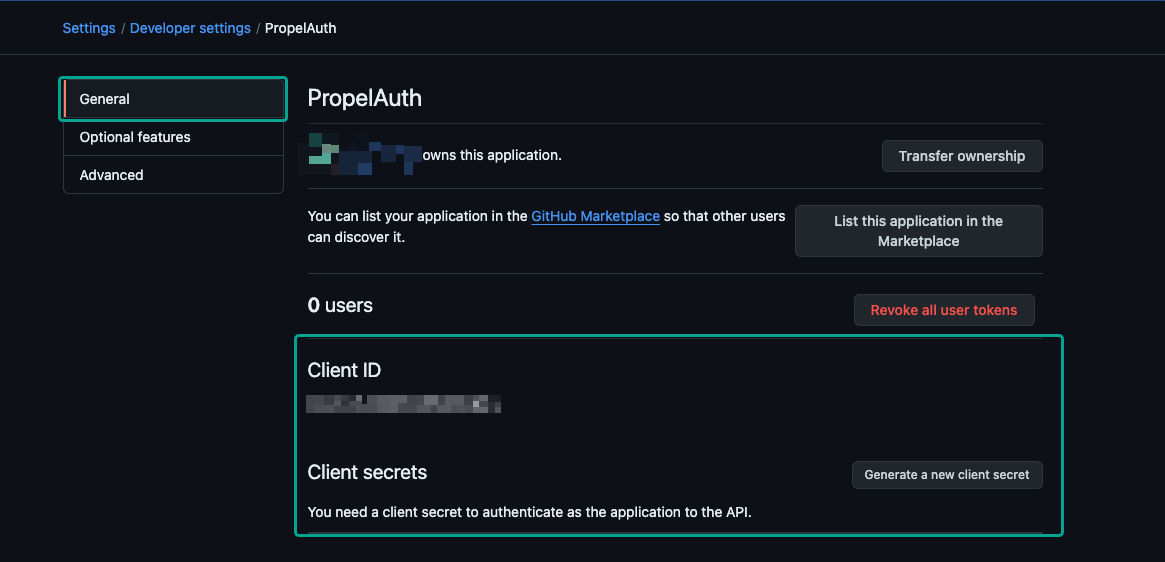
- Copy the Client ID and Client Secret from Github into PropelAuth.
Once you have gone live, do not forget to add your Production URL as the Authorization callback URL.
And that's it! When you go to your hosted authentication pages, you should see
the Sign in with Github button.
Github App Instructions
- Start by going to https://github.com/ and signing in.
- In the top right corner, click on your avatar followed by Settings.

- In your settings page, navigate to the bottom of the left navbar and click on Developer Settings.

- Make sure to click on Github Apps followed by New Github App.

- Name your app and provide a homepage URL. For the Callback URLs, copy/paste the Authorized Redirect URLs from PropelAuth. You can add more by clicking on Add Callback URL.

-
Select both Request user authorization (OAuth) during installation and Expire user authorization tokens.
-
Under Permissions, select Account permissions. For Email addresses select Read-only.
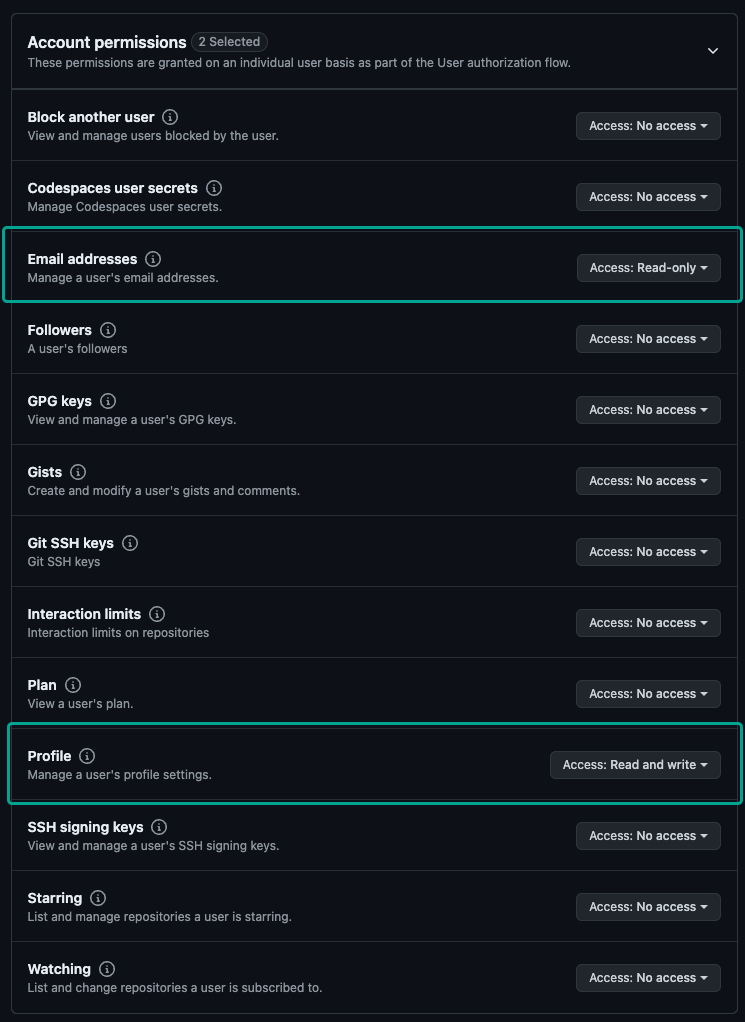
-
Towards the bottom, select Any account under Where can this GitHub App be installed and click Save.
-
Copy the Client ID and Client Secret from Github into PropelAuth.
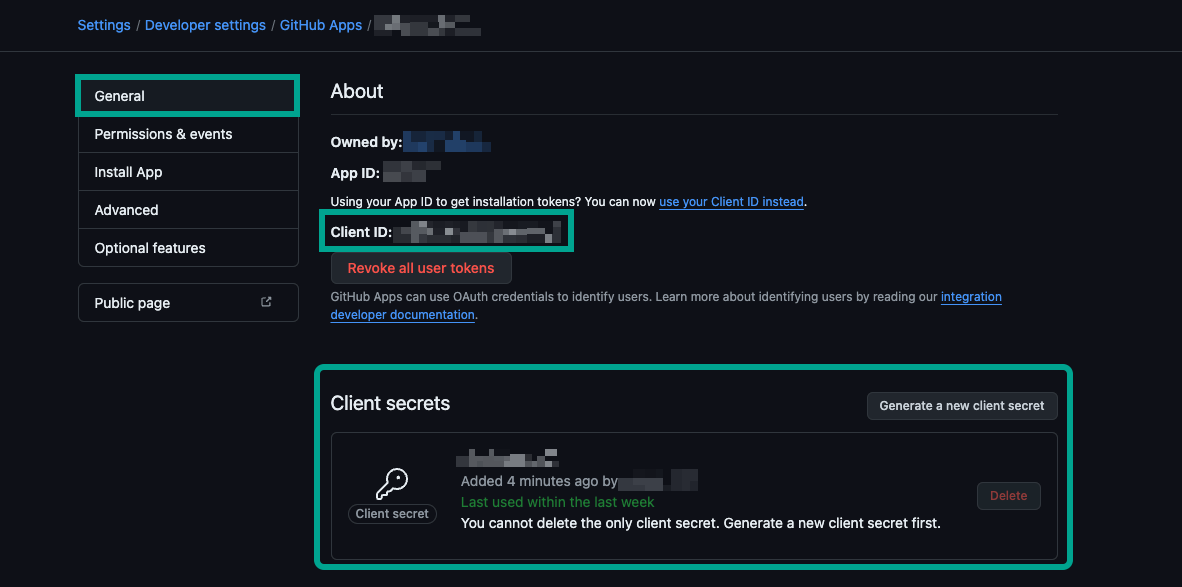
Once you have gone live, do not forget to add your Production URL as the Authorization callback URL.
And that's it! When you go to your hosted authentication pages, you should see
the Sign in with Github button.
