Model Context Protocol (MCP) Python Example
This guide will walk you through how to implement MCP authentication in Python using PropelAuth's MCP support. We'll be using the popular FastMCP framework to create a simple MCP server that authenticates users using PropelAuth. We'll also create a tool in the MCP server that returns the logged in user's information.
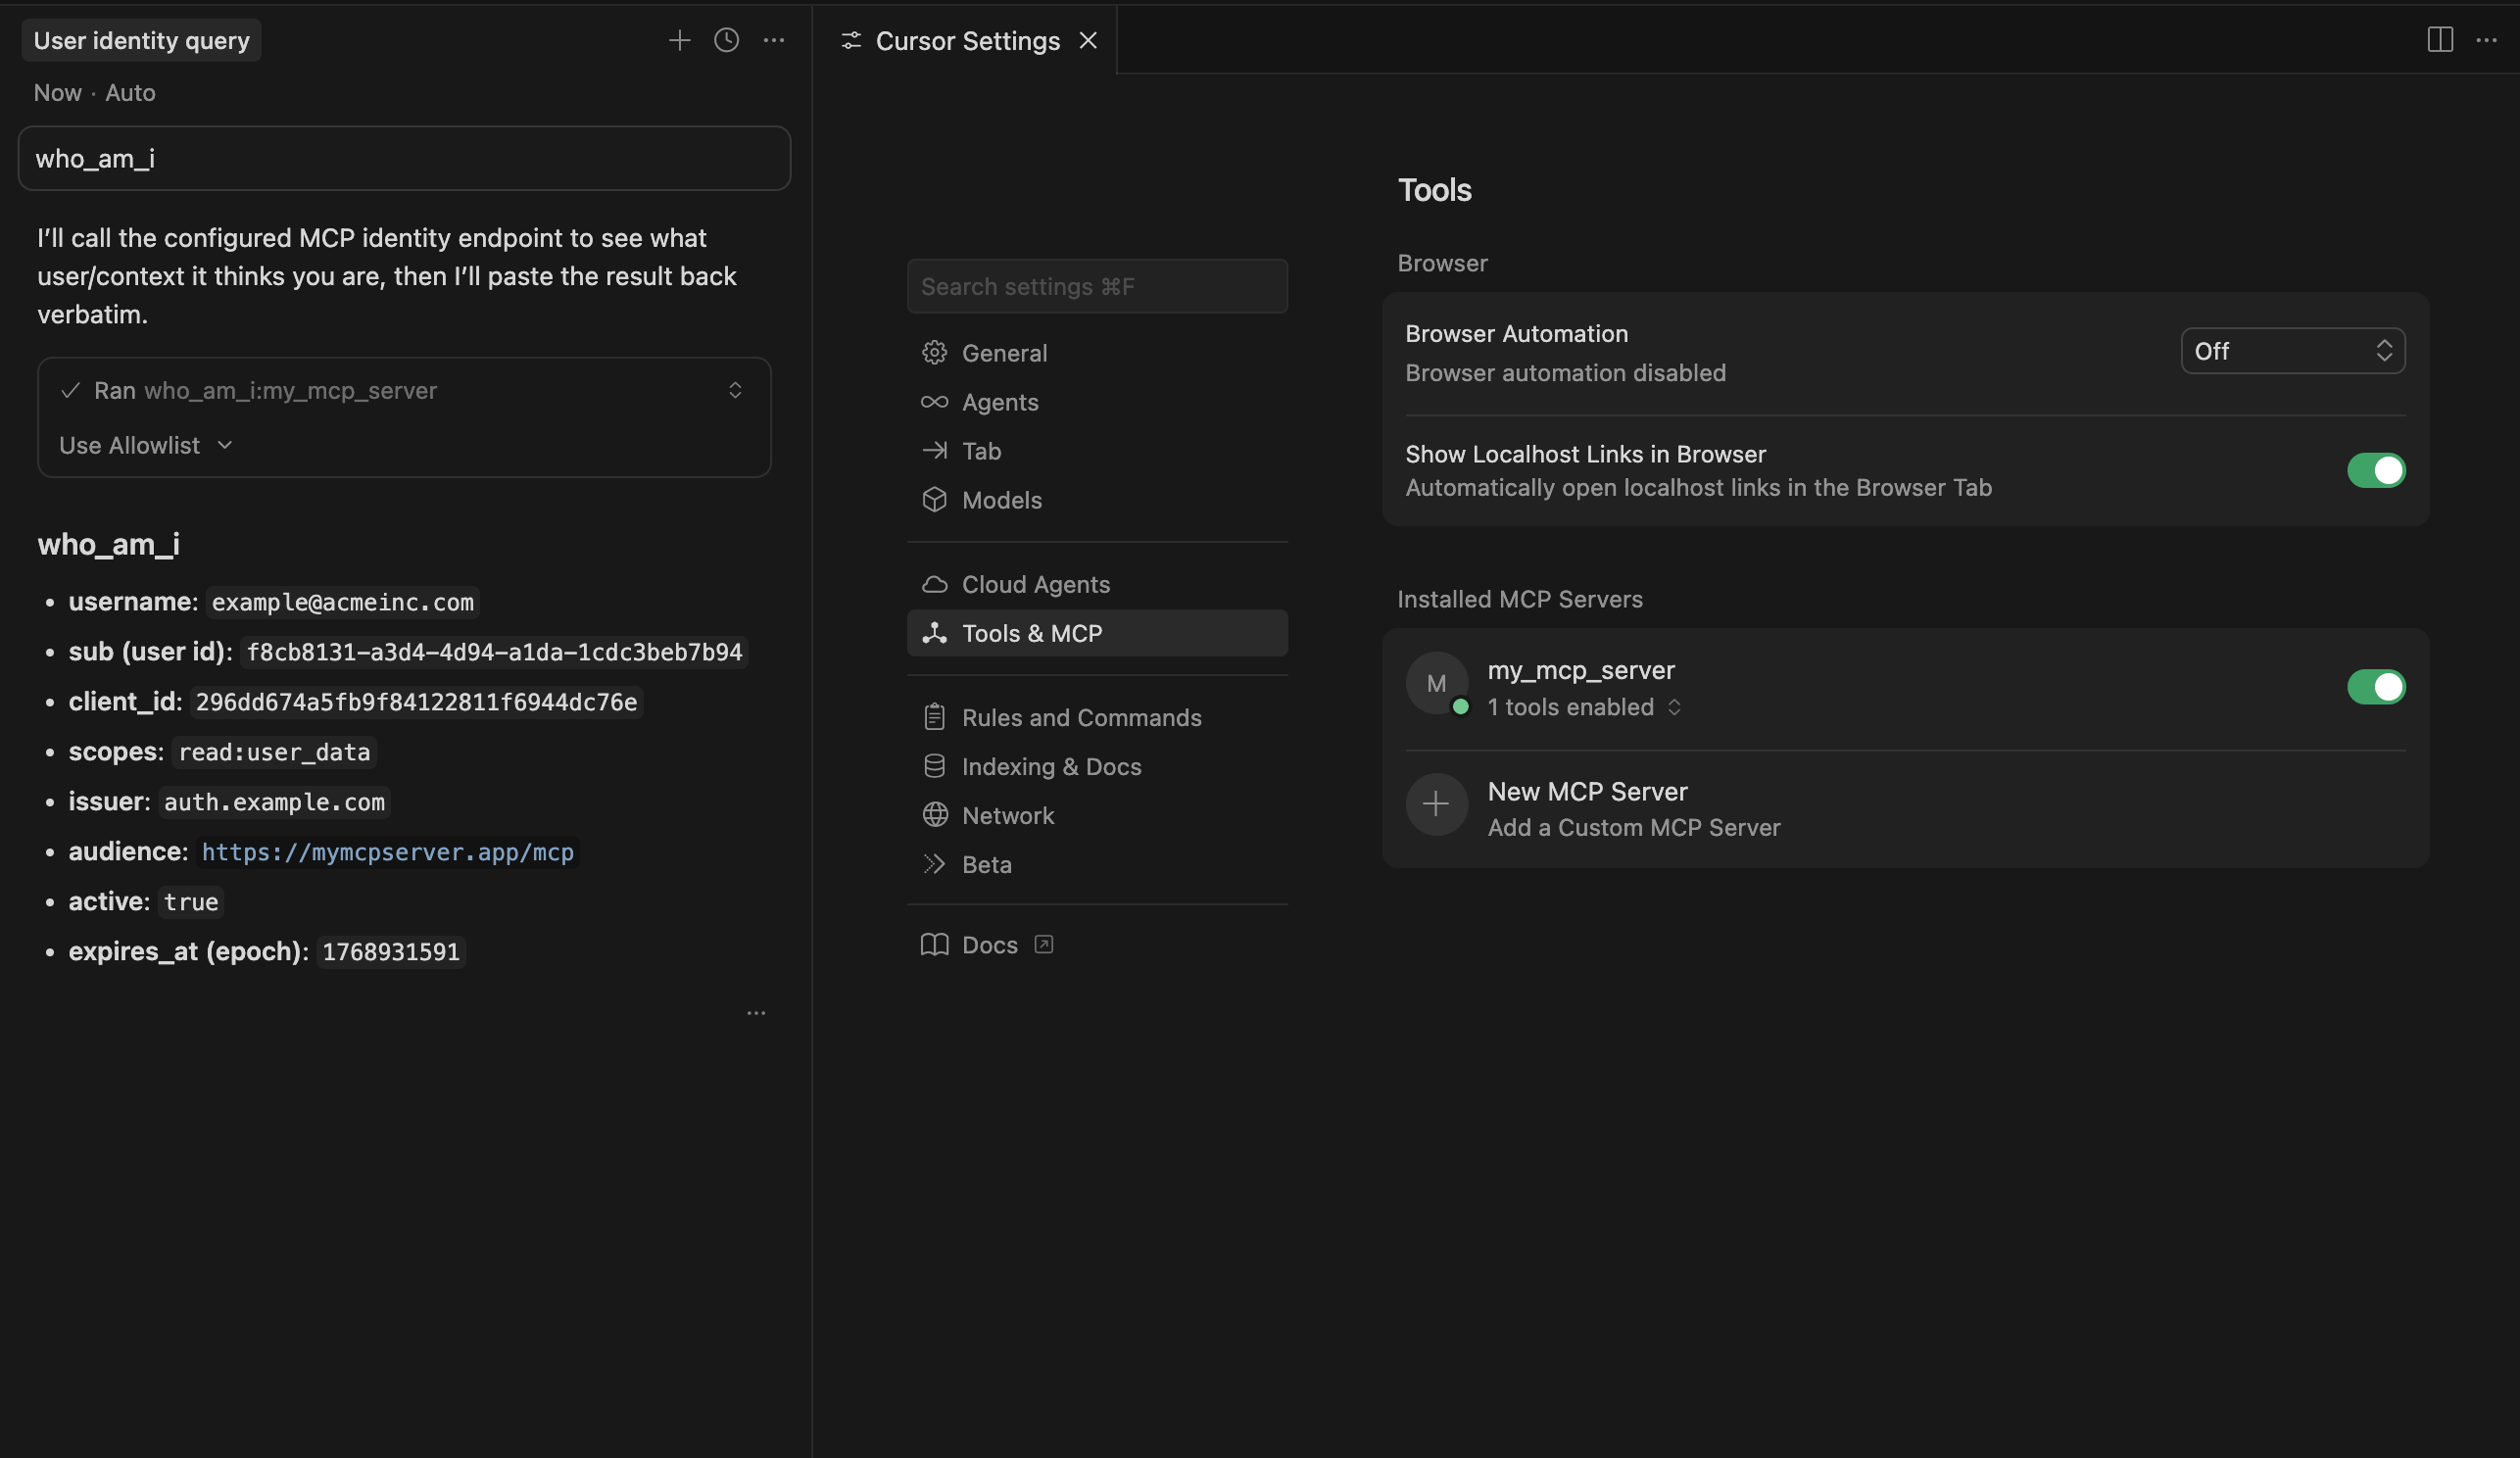
By the end of this guide you'll have a working MCP server that you can use with the majority of AI services, such as Cursor:
Enabling and Configuring MCP Authentication
Begin by navigating to the MCP page in the PropelAuth Dashboard and enabling MCP authentication. Once enabled globally, you'll be able to enable it for any of your environments, such as test, staging, or prod.

The next step is to add a Redirect URI to the Allowed MCP Clients. This is the URL that your users will be redirected to after successfully logging in. We include several templates for the most common AI tools, including Claude Desktop, ChatGPT, and Cursor. In this guide we'll be using the template for Cursor.

Creating Scopes
Let's move onto scopes. With MCP auth, scopes define the specific permissions and access levels granted to an AI service, allowing servers to restrict what resources or operations the AI service can access. PropelAuth offers two types of scopes: User Scopes and Organization Scopes. Check out the docs here for more information on org scopes and user scopes.
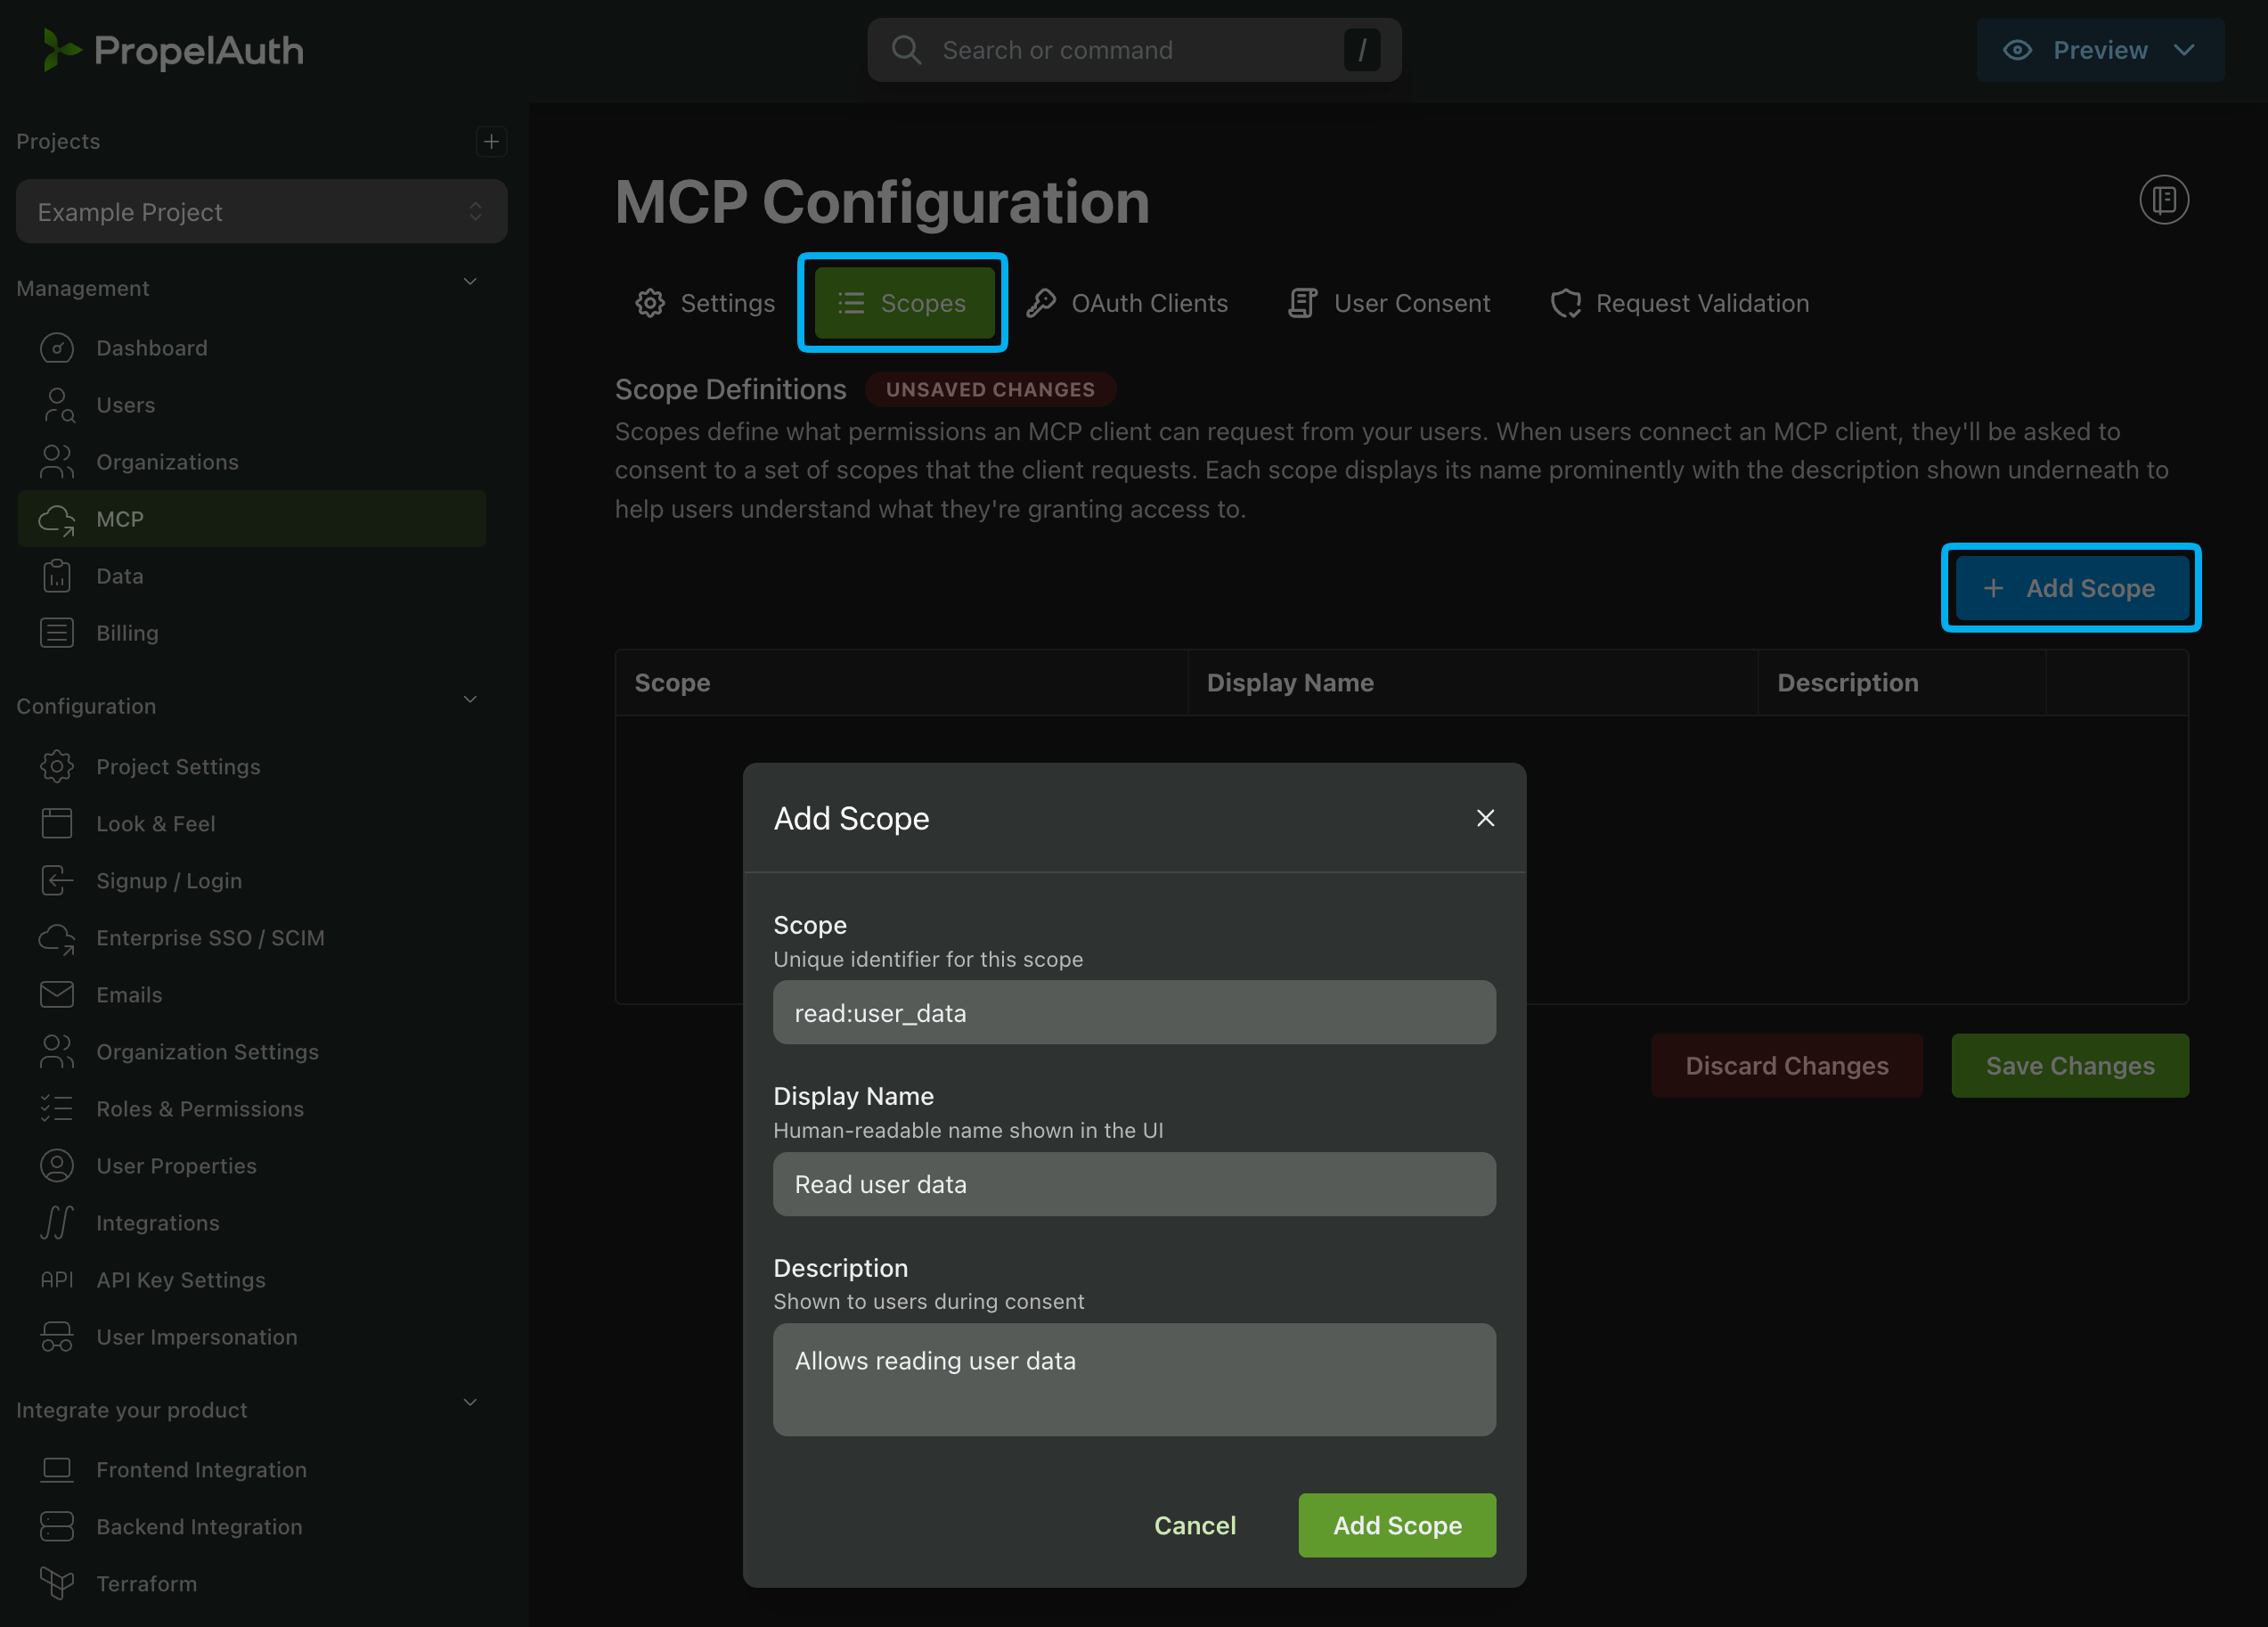
For this example we'll create a user scope called read:user_data. We can add this scope by navigating to the User Scopes section of the MCP page and clicking Add Scope.
Creating Request Validation Credentials
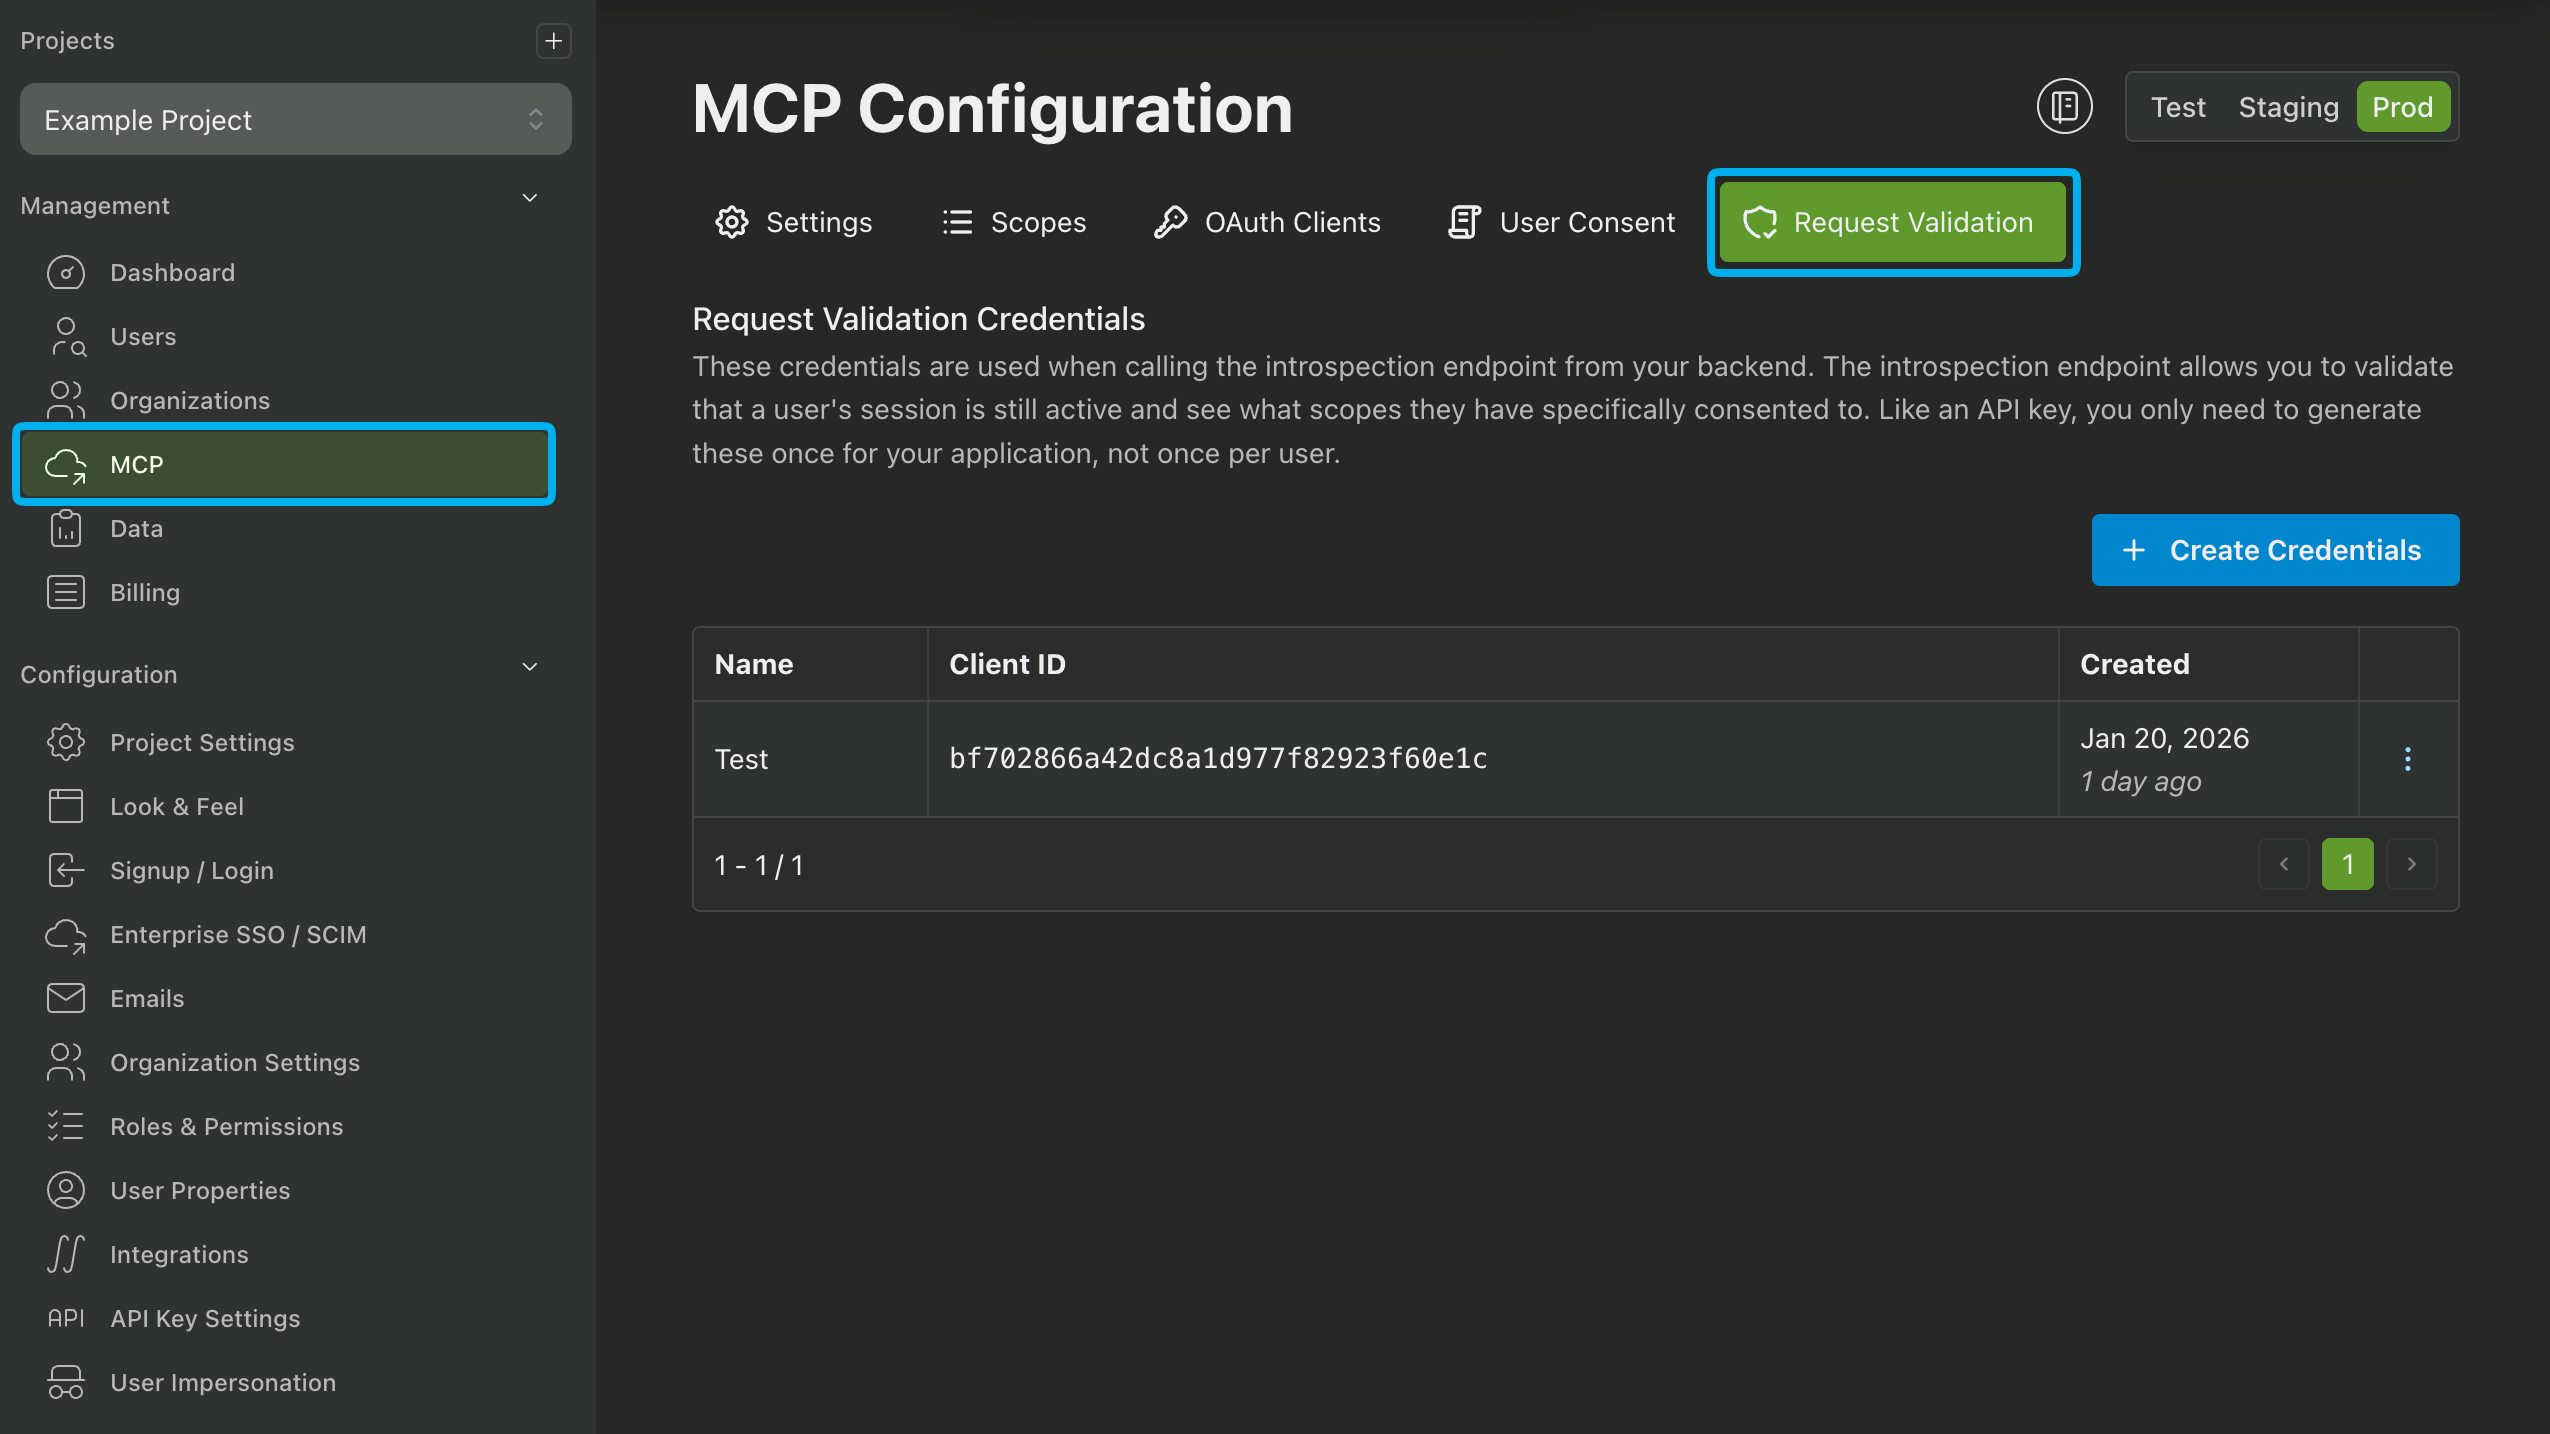
The last step before we start coding is to generate credentials for request validation. These credentials are used in the Introspection Endpoint to verify your user's access tokens that are sent by the AI tool to your MCP server. See the documentation here for more information.
Generate a new set of credentials by clicking the Generate Credentials button. Make sure to save the Client ID and Client Secret for the next step.
Creating a Python MCP Server
Let's create a simple MCP server. We'll use the FastMCP framework for this example. Begin by installing FastMCP:
pip install fastmcp
We'll be using FastMCP's built in PropelAuthProvider to do most of the heavy lifting for us. All we have to do is configure it with the necessary information, such as our Auth URL (found in the Backend Integration page of the PropelAuth Dashboard), the Client ID and Client Secret that we generated in the previous step, and the Scopes that we created earlier.
We also need to include the URL of the MCP server. In this example we'll be using http://localhost:8000 since it's the default port when running FastMCP locally.
import os
from fastmcp import FastMCP
from fastmcp.server.auth.providers.propelauth import PropelAuthProvider

auth = PropelAuthProvider(
    auth_url=os.environ["PROPELAUTH_AUTH_URL"],
    introspection_client_id=os.environ["PROPELAUTH_INTROSPECTION_CLIENT_ID"],
    introspection_client_secret=os.environ["PROPELAUTH_INTROSPECTION_CLIENT_SECRET"],
    base_url=os.environ["SERVER_URL"],
    required_scopes=["read:user_data"],
)

mcp = FastMCP("My MCP Server", auth=auth)

if __name__ == "__main__":
    mcp.run()
The PropelAuthProvider handles both authorization server configuration and token introspection automatically. See our MCP Reference Docs for more information.
And that's it! We have successfully set up our MCP server with authentication. But let's create a client and hook it up to Cursor to test it out.
Creating an MCP OAuth Client
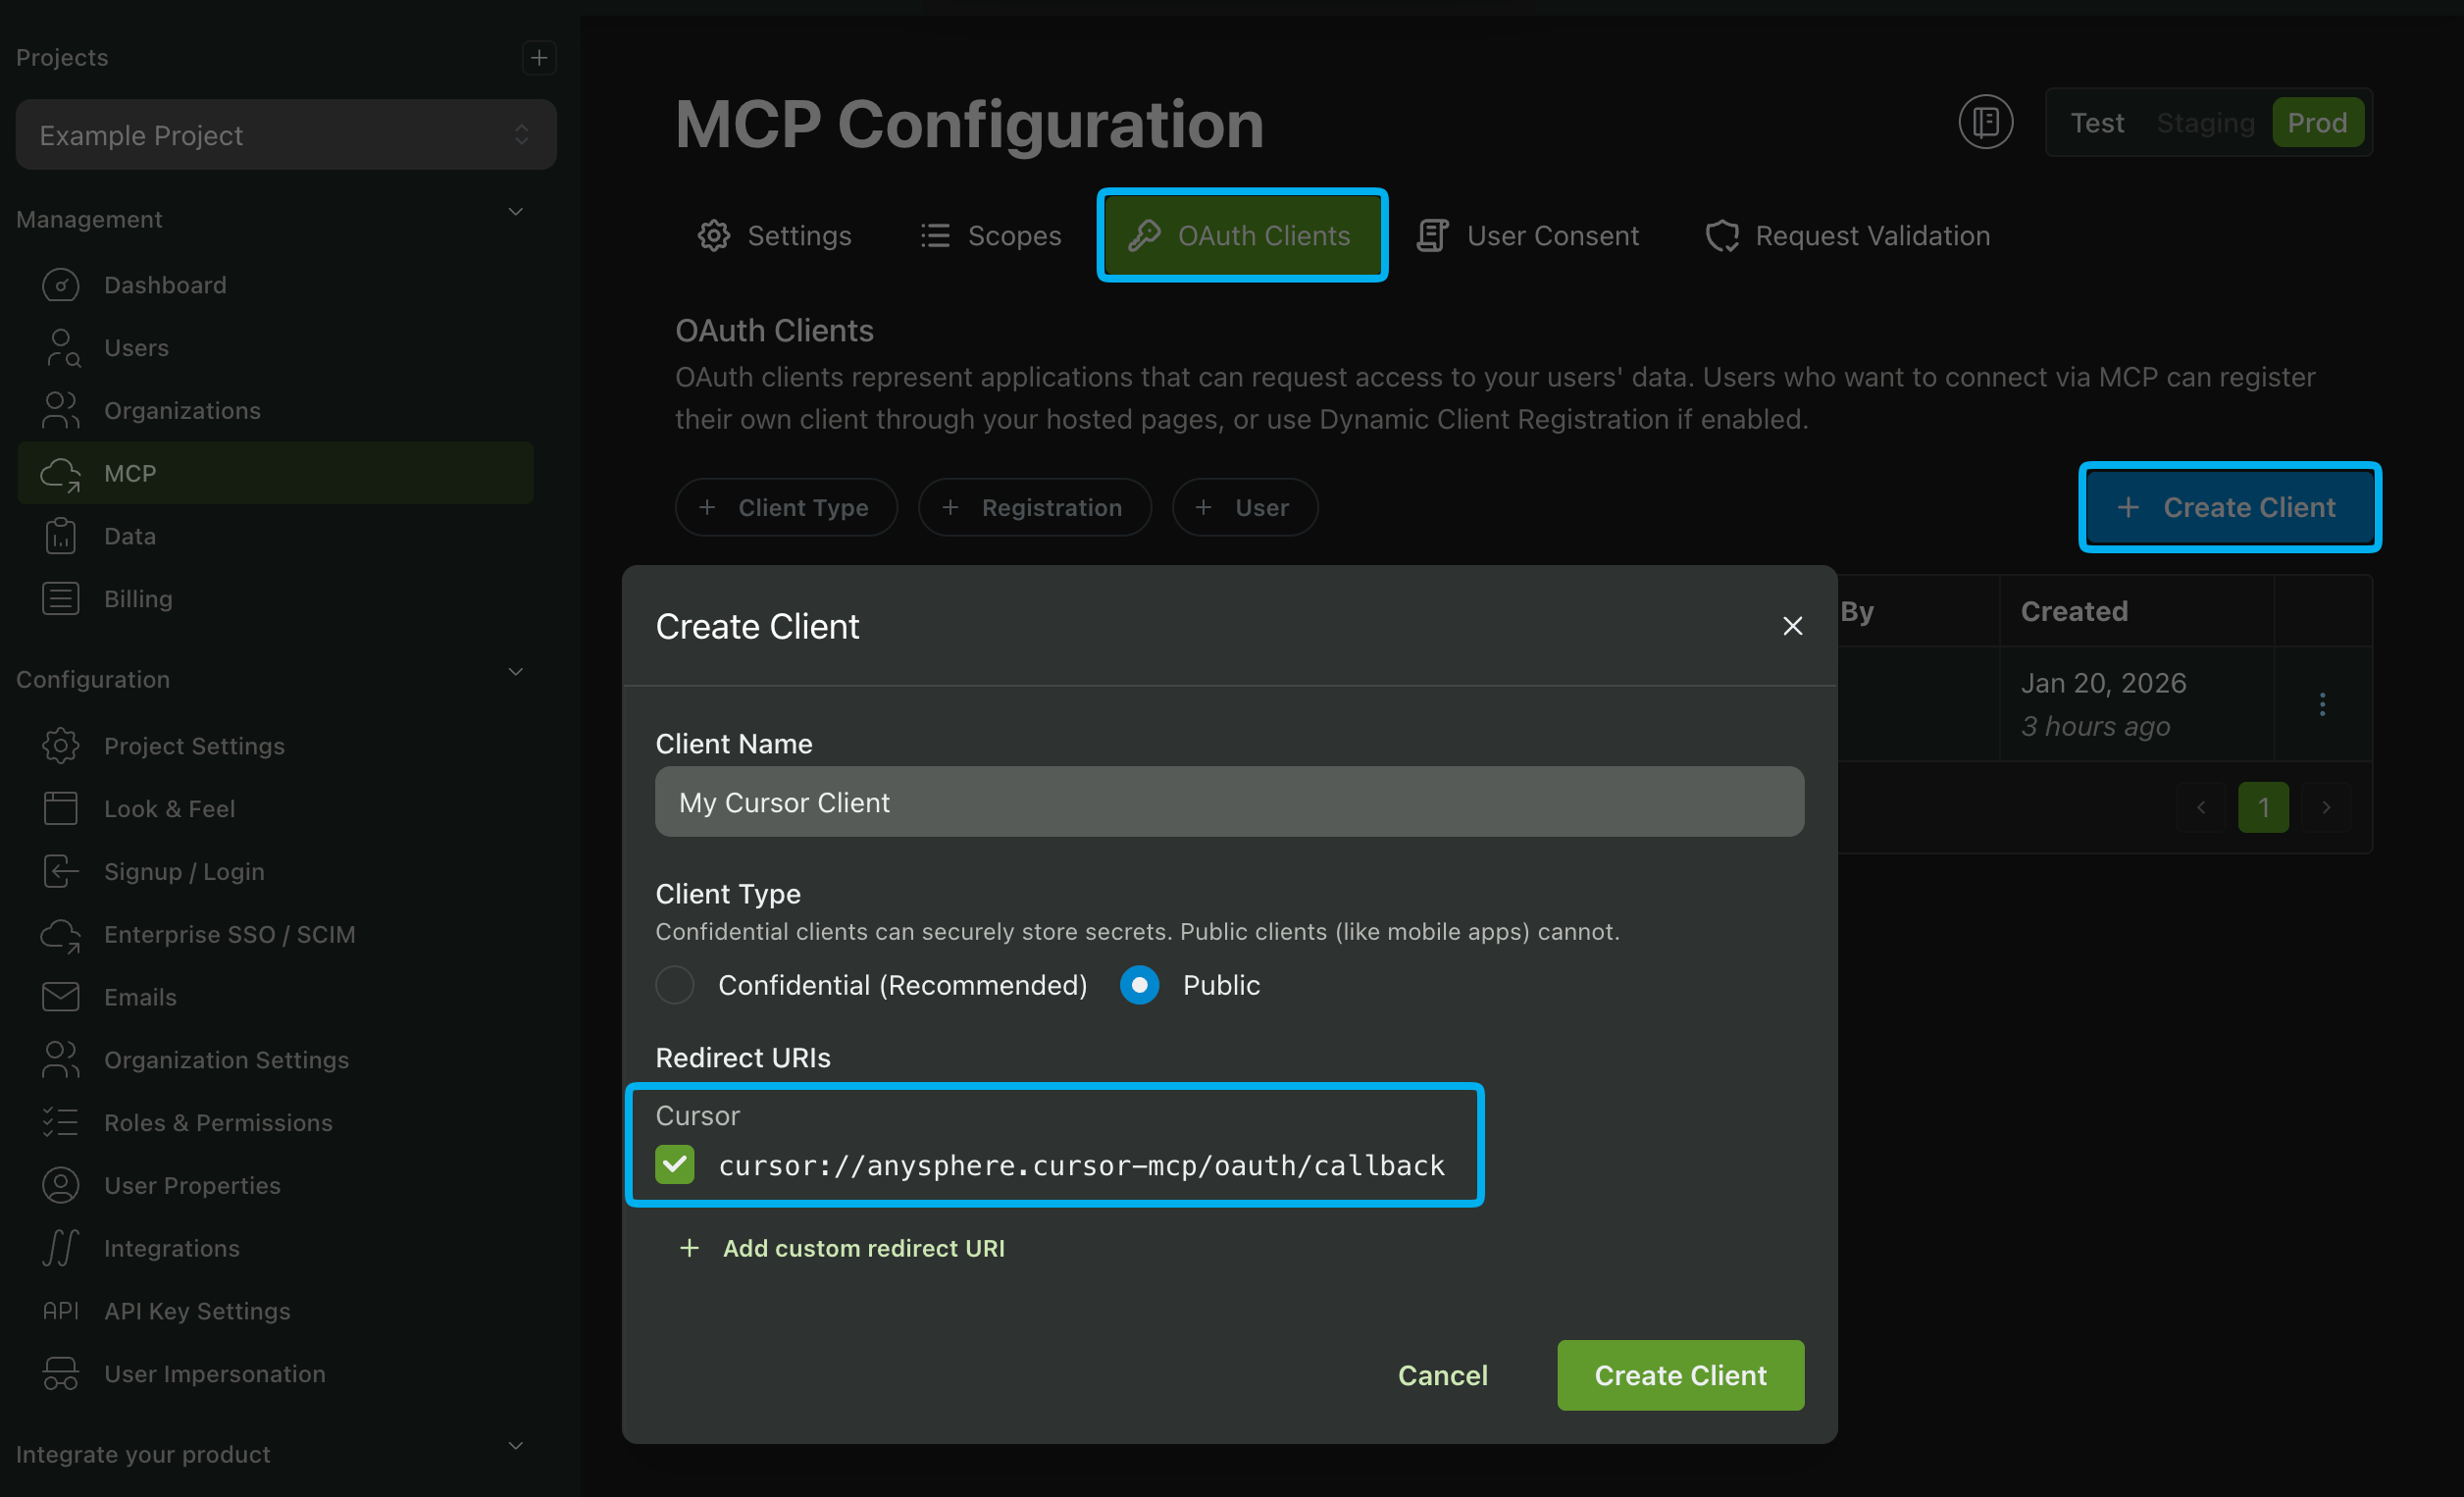
In a previous step we set an available Redirect URI that can be used for MCP clients. Now we have to make the client itself by navigating to the OAuth Clients section of the MCP dashboard and clicking Create Client.
Select the Redirect URI that we added earlier, set Client Type to public, and select Create Client.
You'll then get back a Client ID and Client Secret. We'll use these when installing our MCP client in Cursor.
Installing the MCP Client in Cursor
Now that we have our MCP client set up, we can install it in Cursor. Navigate to the Tools & MCP section of the Cursor app and click Add Custom MCP.
This will open a mcp.json file. We'll use this file to configure our MCP client. Use the following template and replace the placeholders with your actual Client ID and Client Secret.
{
  "mcpServers": {
    "my_mcp_server": {
      "url": "http://localhost:8000/mcp",
      "auth": {
        "CLIENT_ID": "{YOUR_CLIENT_ID}",
        "CLIENT_SECRET": "{YOUR_CLIENT_SECRET}",
        "scopes": ["read:user_data"]
      }
    }
  }
}
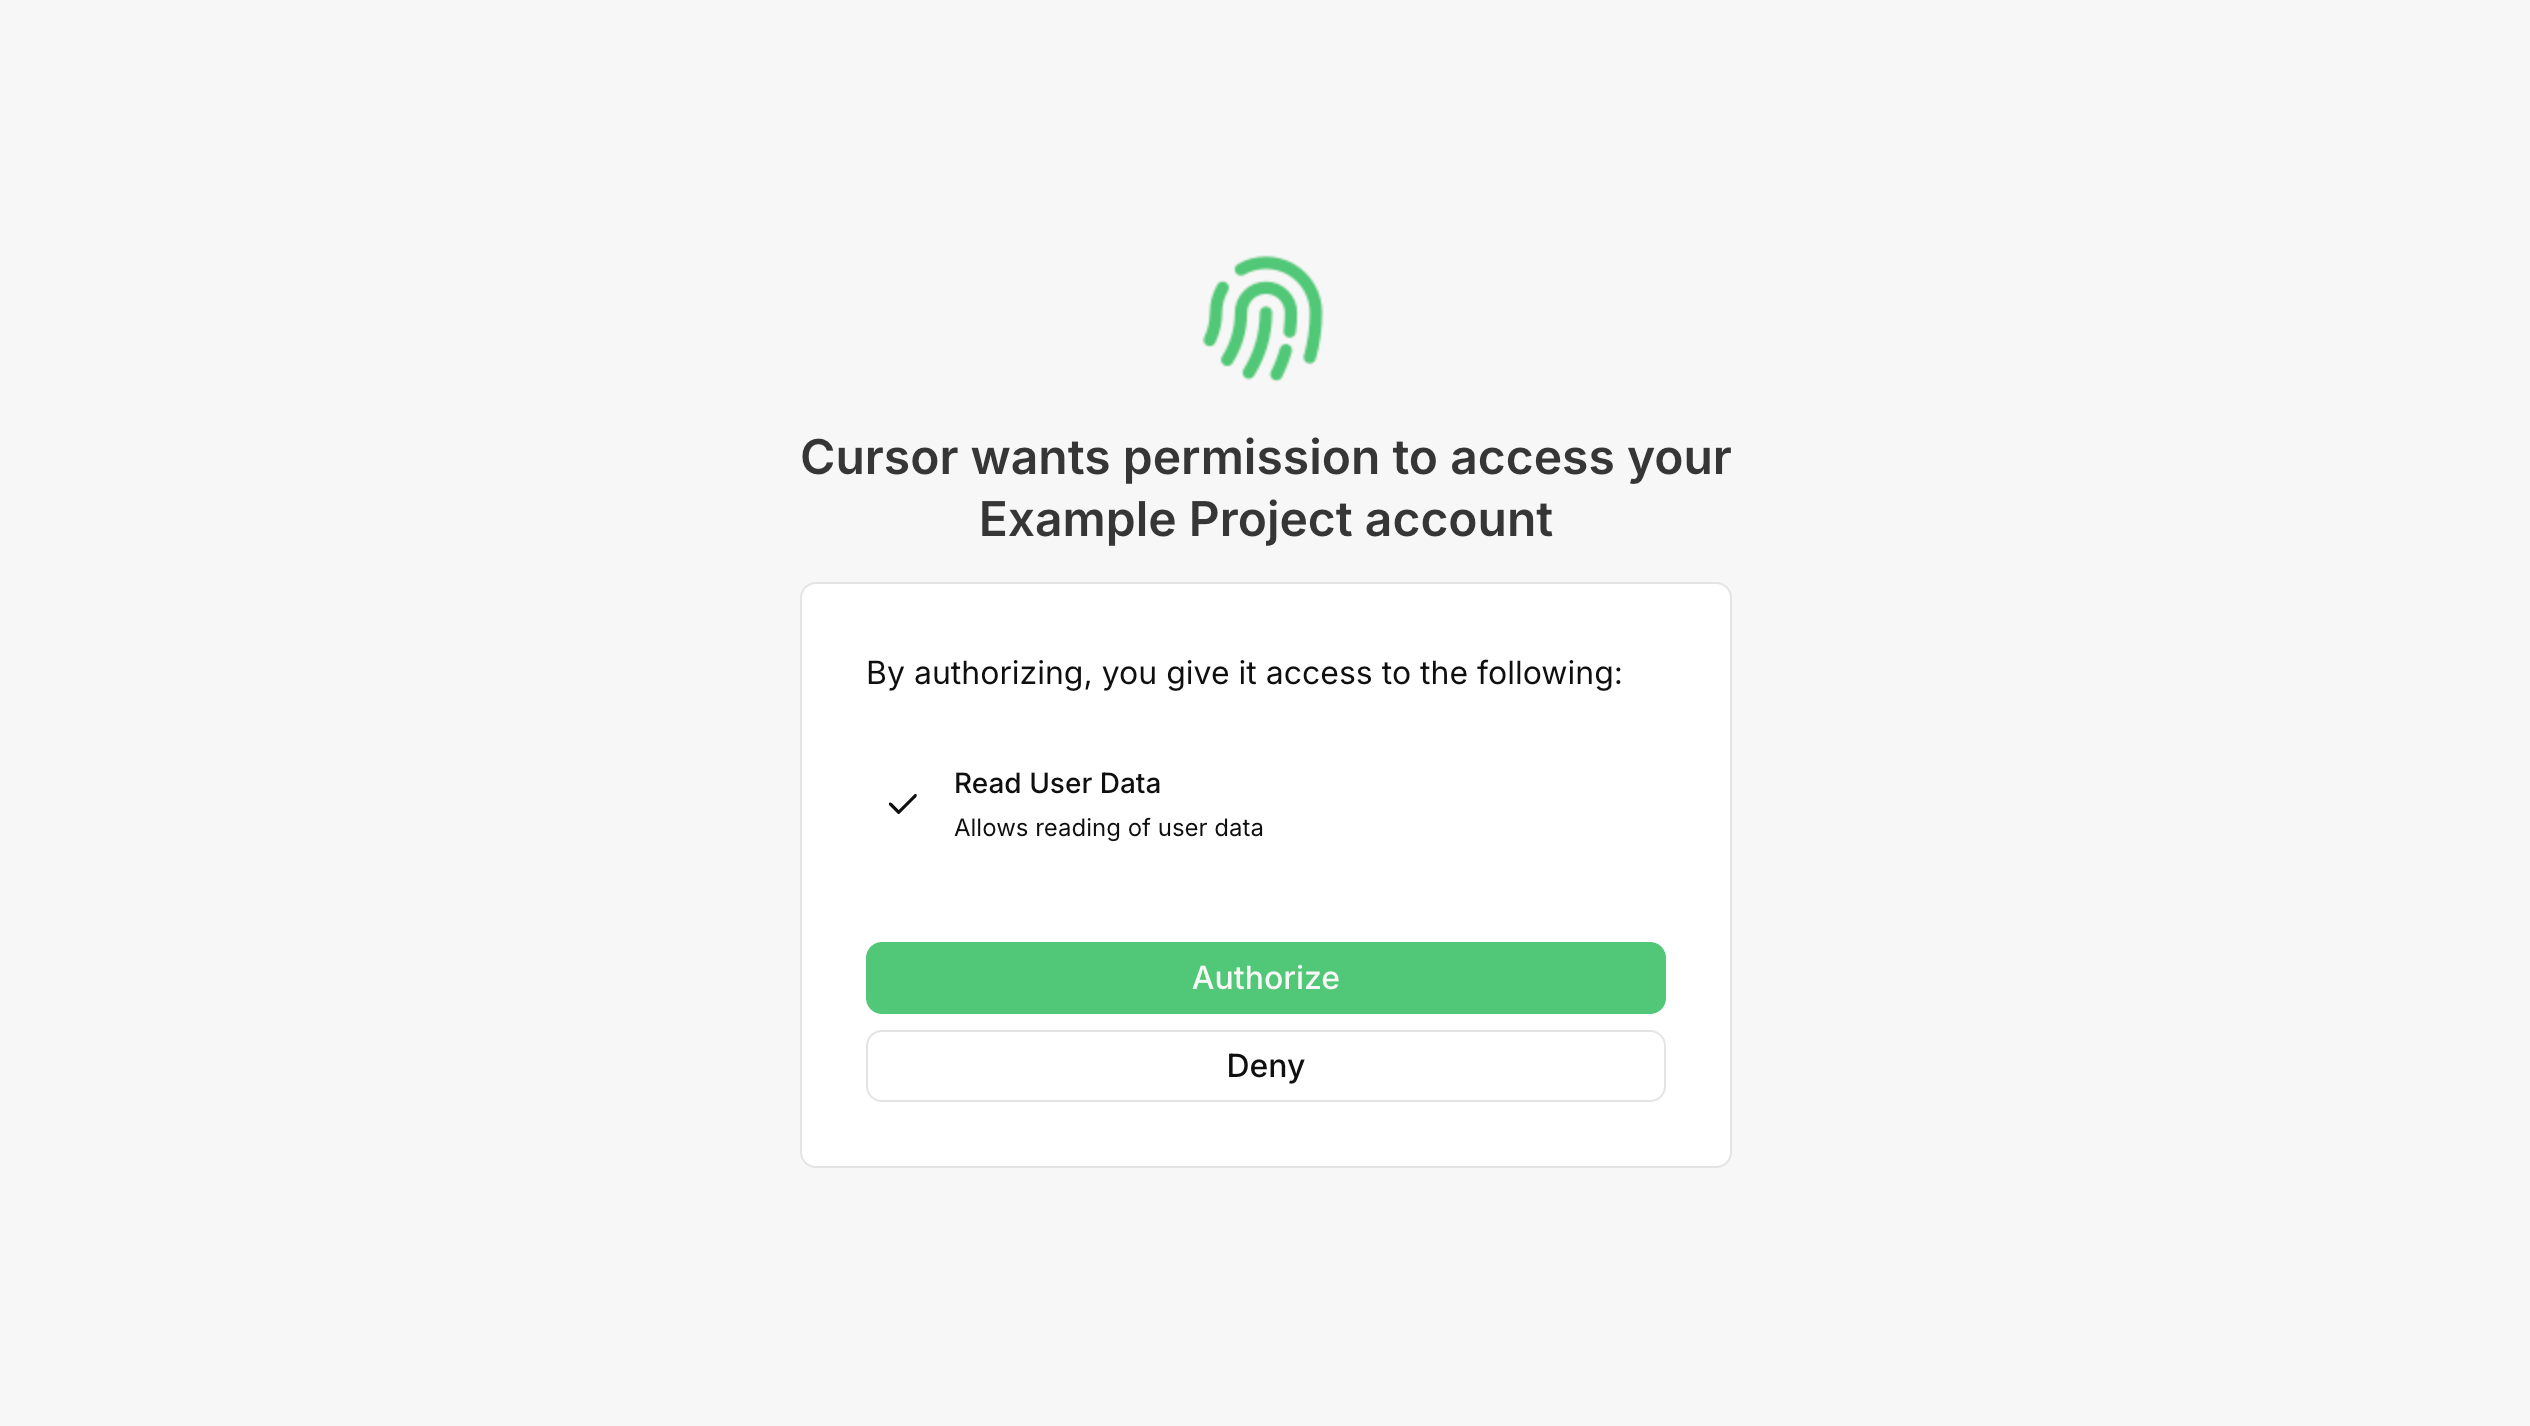
Save your changes and navigate back to the Tools & MCP section. A MCP server will now be listed. Click the Connect button and proceed through the authentication process by logging in. You should then see a page to authorize access to the requested scope that we created earlier:
And you're now logged in! Let's now create a tool in our MCP server to return the authenticated user's data.
Getting the Authenticated User's Information
FastMCP includes a built-in dependency called get_access_token() that can be used to retrieve the authenticated user's information. We can use this to create a tool called who_am_i in our MCP server.
from fastmcp.server.dependencies import get_access_token, AccessToken

@mcp.tool
async def who_am_i() -> AccessToken | None:
    token: AccessToken | None = get_access_token()
    if token:
        user_id = token.claims["sub"]
    return token
When we connect to our MCP server in Cursor, we can call the who_am_i tool to retrieve the authenticated user's information.
If you require more information about the user, such as their organization membership, you can use the Fetch User By User ID API by passing the sub value from the token response as the user_id parameter.
And that's it! You've now added authentication to your MCP server and created a tool that returns the authenticated user's information.
If you have any questions or need further assistance, feel free to reach out to our support team at support@propelauth.com.