SCIM Support
SCIM (System for Cross-domain Identity Management) simplifies user account management, particularly in large organizations. It ensures that when enterprise customers add a new employee, their account is automatically created in your application. But it doesn’t end there — when customers update or remove an employee, those changes are seamlessly reflected in your app. This automation streamlines provisioning, reduces IT friction, and enhances security by eliminating manual processes and ensuring consistent data exchange across platforms.
No need to write any extra code
PropelAuth’s libraries have a concept of an organization. With SCIM, users are automatically added to these organizations.
One of the best things about our SCIM integration is that your code doesn’t need to change at all when you close your first enterprise customer. Any code you write that deals with organizations will work, regardless of the method that organization uses to manage its members.
Enabling SCIM
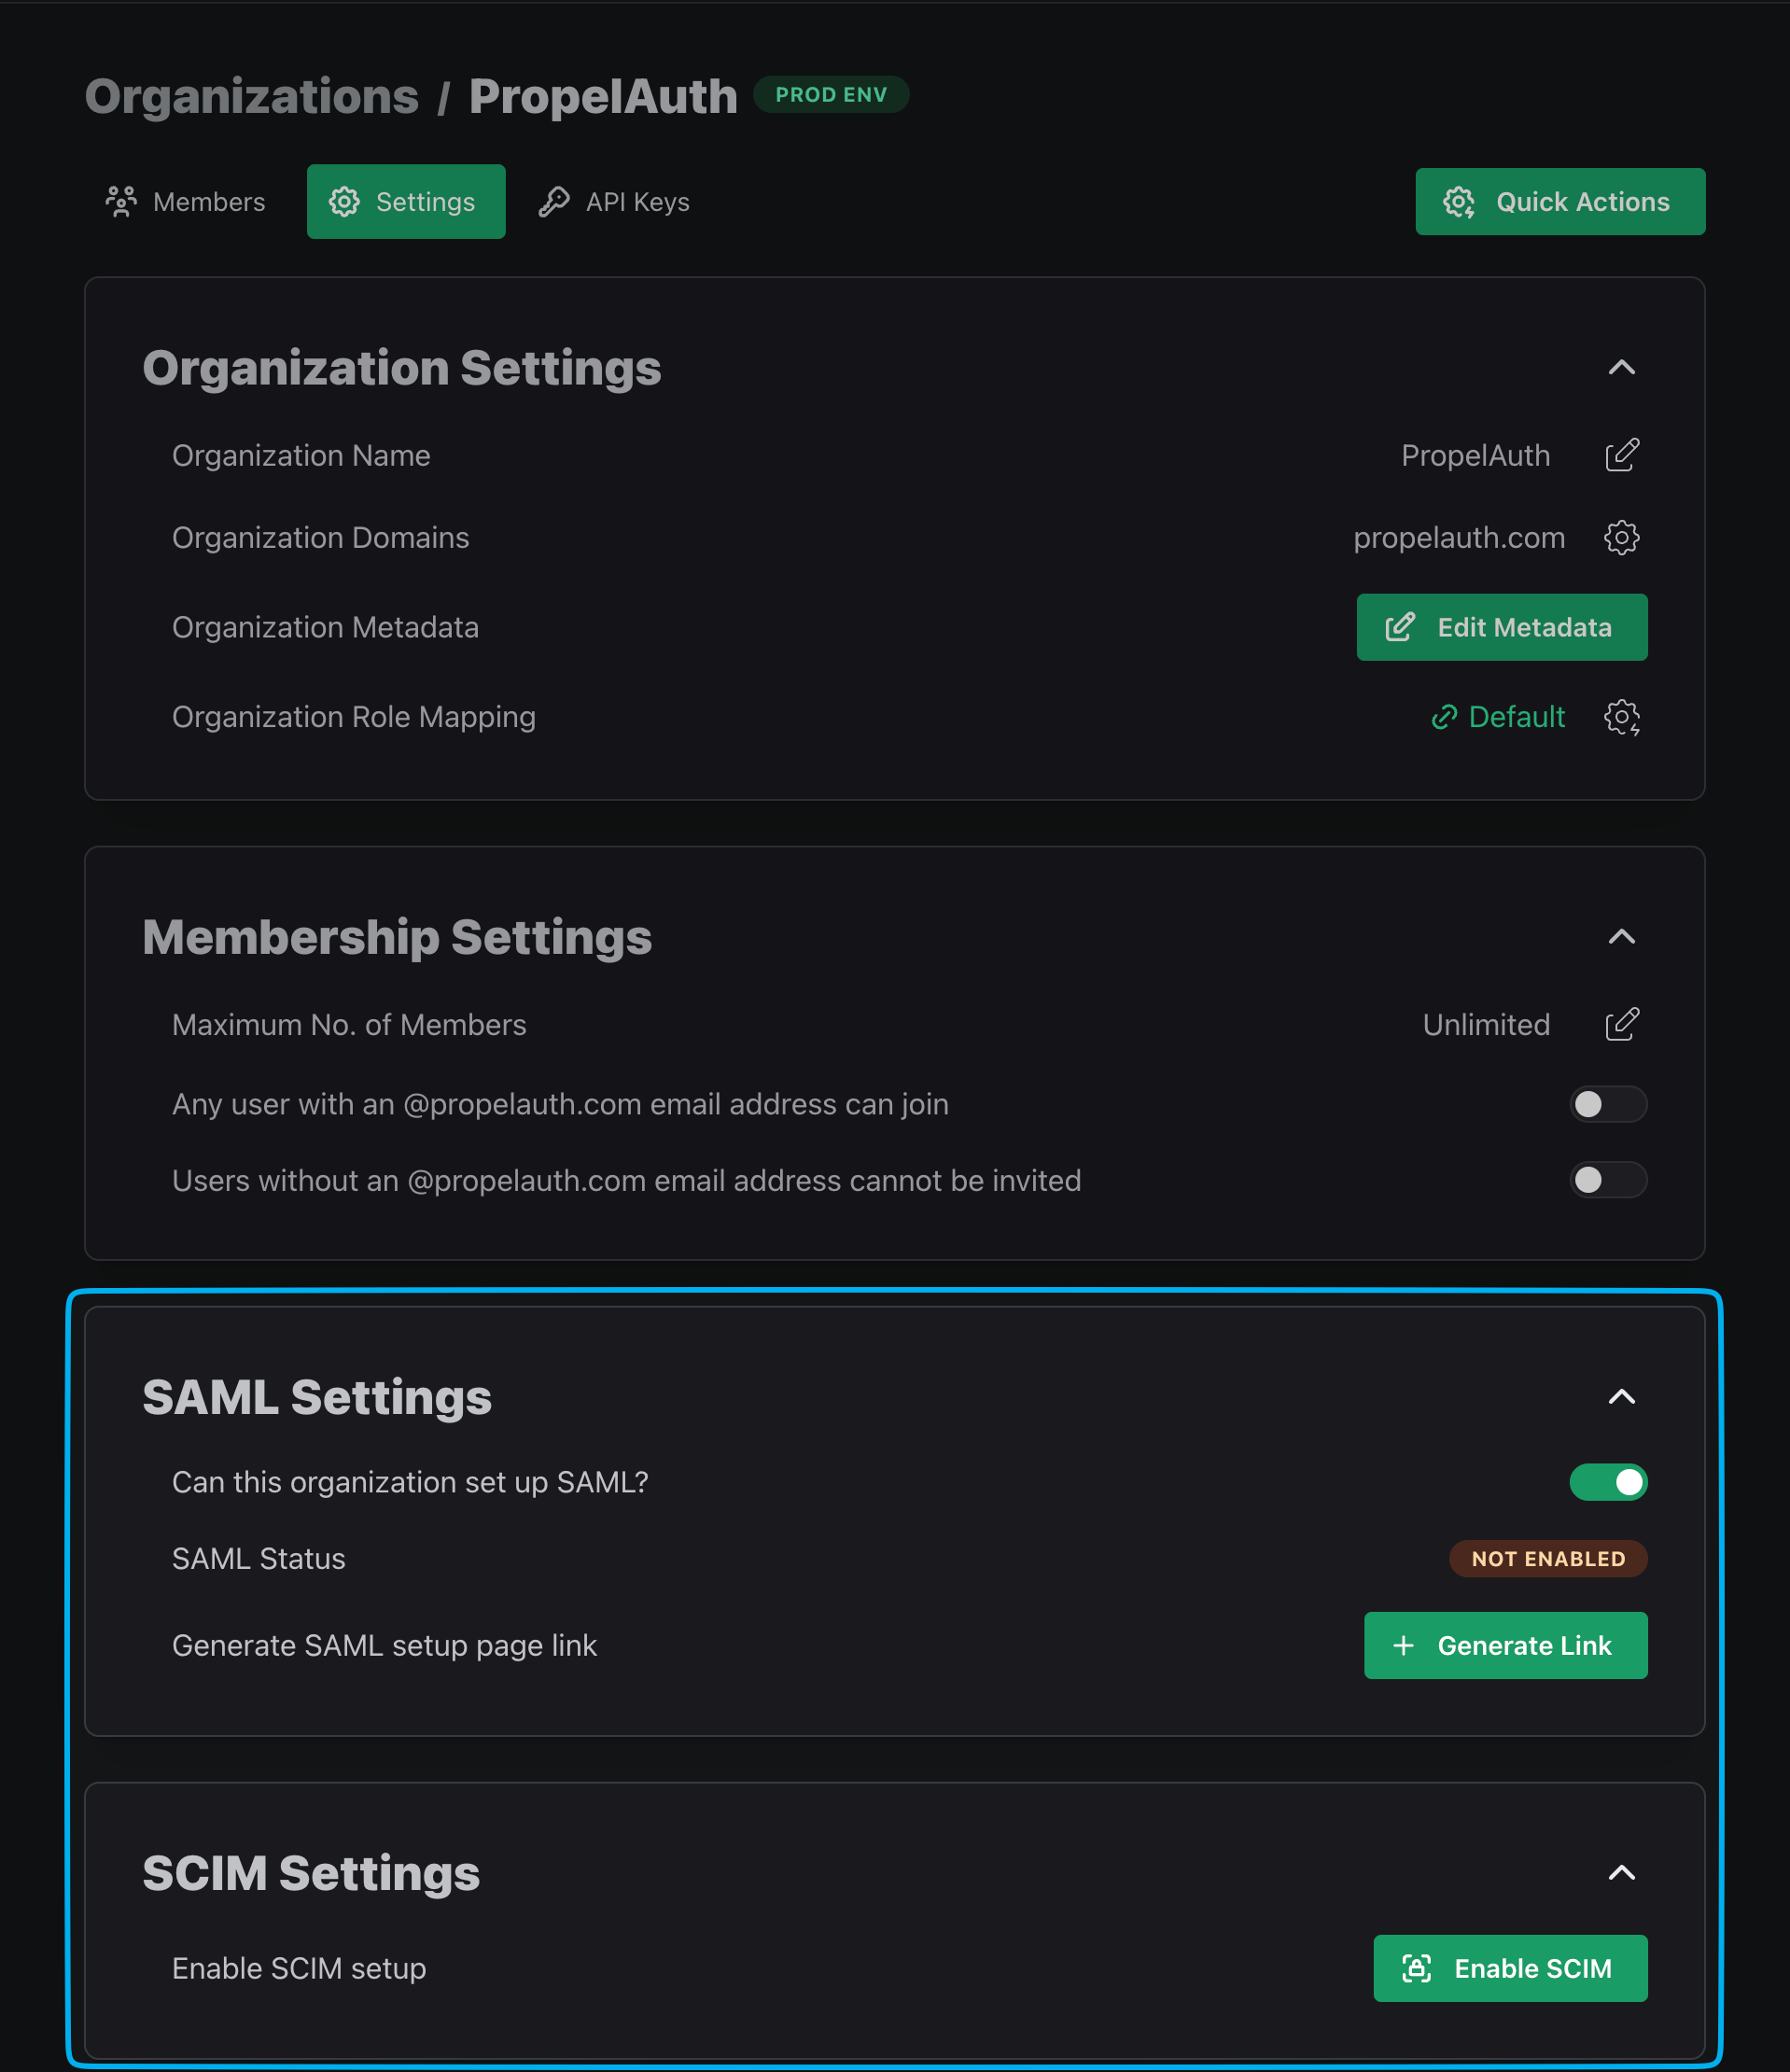
Our SCIM integration works alongside our Enterprise SSO support. This means that either SAML or OIDC must first be enabled for your organization before SCIM can be enabled. That starts with enabling Enterprise SSO for both your project and the organization itself.
You can turn on SAML and SCIM for your organization by navigating to the organization's page in your PropelAuth Dashboard followed by Settings.
User Guide to SCIM Setup
Once Enterprise SSO and SCIM are enabled for the organization, your customer can then follow our Enterprise SSO setup guides to get SAML/OIDC up and running for their organization.
Once your enterprise organization has completed the setup, they can start setting up SCIM with their identity provider.
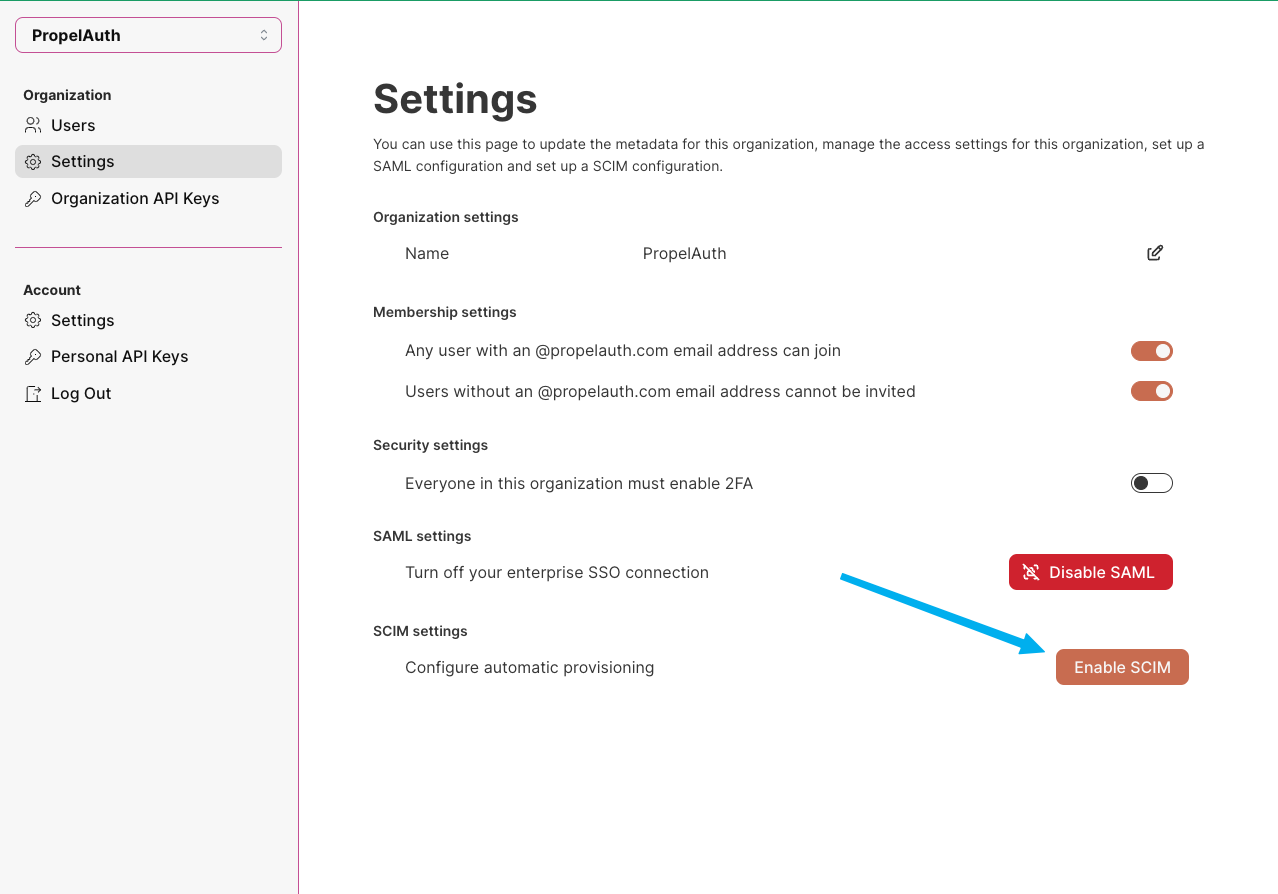
Any user with the SAML permission can then start the process of enabling SCIM with their identity provider. This starts in your user's account page in their organization's settings tab.
PropelAuth provides your users with detailed walkthroughs for each identity provider, ensuring they have a smooth and pain-free experience! See here for examples of our SCIM setup guides.
After completing the connection setup, PropelAuth will automatically start syncing with your user's IdP!
Signing in with SCIM
Signing in when SCIM is enabled is exactly the same as signing in with Enterprise SSO. Users can access your login page and click on Sign in with SSO to begin the SAML login flow, redirecting them to their identity provider.
Common Debugging Issues
An error occurred while sending this request (Entra) and Received Fatal Alert Protocol Version (Okta)
If your customer is reporting a An error occurred while sending this request error when setting up SCIM with Entra or a Error authenticating: Received fatal alert: protocol_version in Okta, this may be because Entra and Okta only supports TLS 1.2 - no other SSL/TLS versions are supported. Cloudflare, for example, by default only supports TLS 1.3. If you are using Cloudflare, visit the Cloudflare docs here to support TLS 1.2.
An account with that email already exists
If your customer is reporting a An account with that email already exists error when logging in after enabling SCIM, this may be because the account associated with that email address is in an 'unconfirmed' state. When a user's account is unconfirmed we're unable to merge it with other login methods, such as Enterprise SSO. The "An account with that email already exists" error occurs when the account exists but we cannot merge it since it's unconfirmed.
Confirming the account via the PropelAuth Dashboard will quickly resolve the issue for that user, but let's discuss a few reasons why the account was created in an unconfirmed state in the first place.
-
The user's email does not match the organization domain: A user's account will not be automatically confirmed if the user's email address does not match the organization domain. For example, if the organization domain is
example.com, but the user's email address isuser@example.org, the account will be created in an unconfirmed state. -
The user's account was created before SCIM was enabled: If a user's account was created before SCIM was enabled there is a chance that the account was never confirmed. If this is the case, you can confirm the account via the PropelAuth Dashboard.
-
The user's account was created via the PropelAuth API or Dashboard: If a user's account was created via the PropelAuth API or Dashboard, there is a chance that the account was created in an unconfirmed state. You can confirm the account via the PropelAuth Dashboard.