Getting Started
Welcome to PropelAuth's Backend API documentation! PropelAuth’s backend APIs allow you to manage users, organizations, and API keys programmatically.
Get started by heading over to www.propelauth.com to create an account if you haven't already.
Authentication
The backend API requires an Authorization header with your API key set as a bearer token.
{
  "Authorization": "Bearer {YOUR_API_KEY}"
}
You can find your API key by logging into the PropelAuth dashboard and navigating to the Backend Integration page. Select the environment you want to create the API key for (test, staging, prod) and click on Create New API Key.
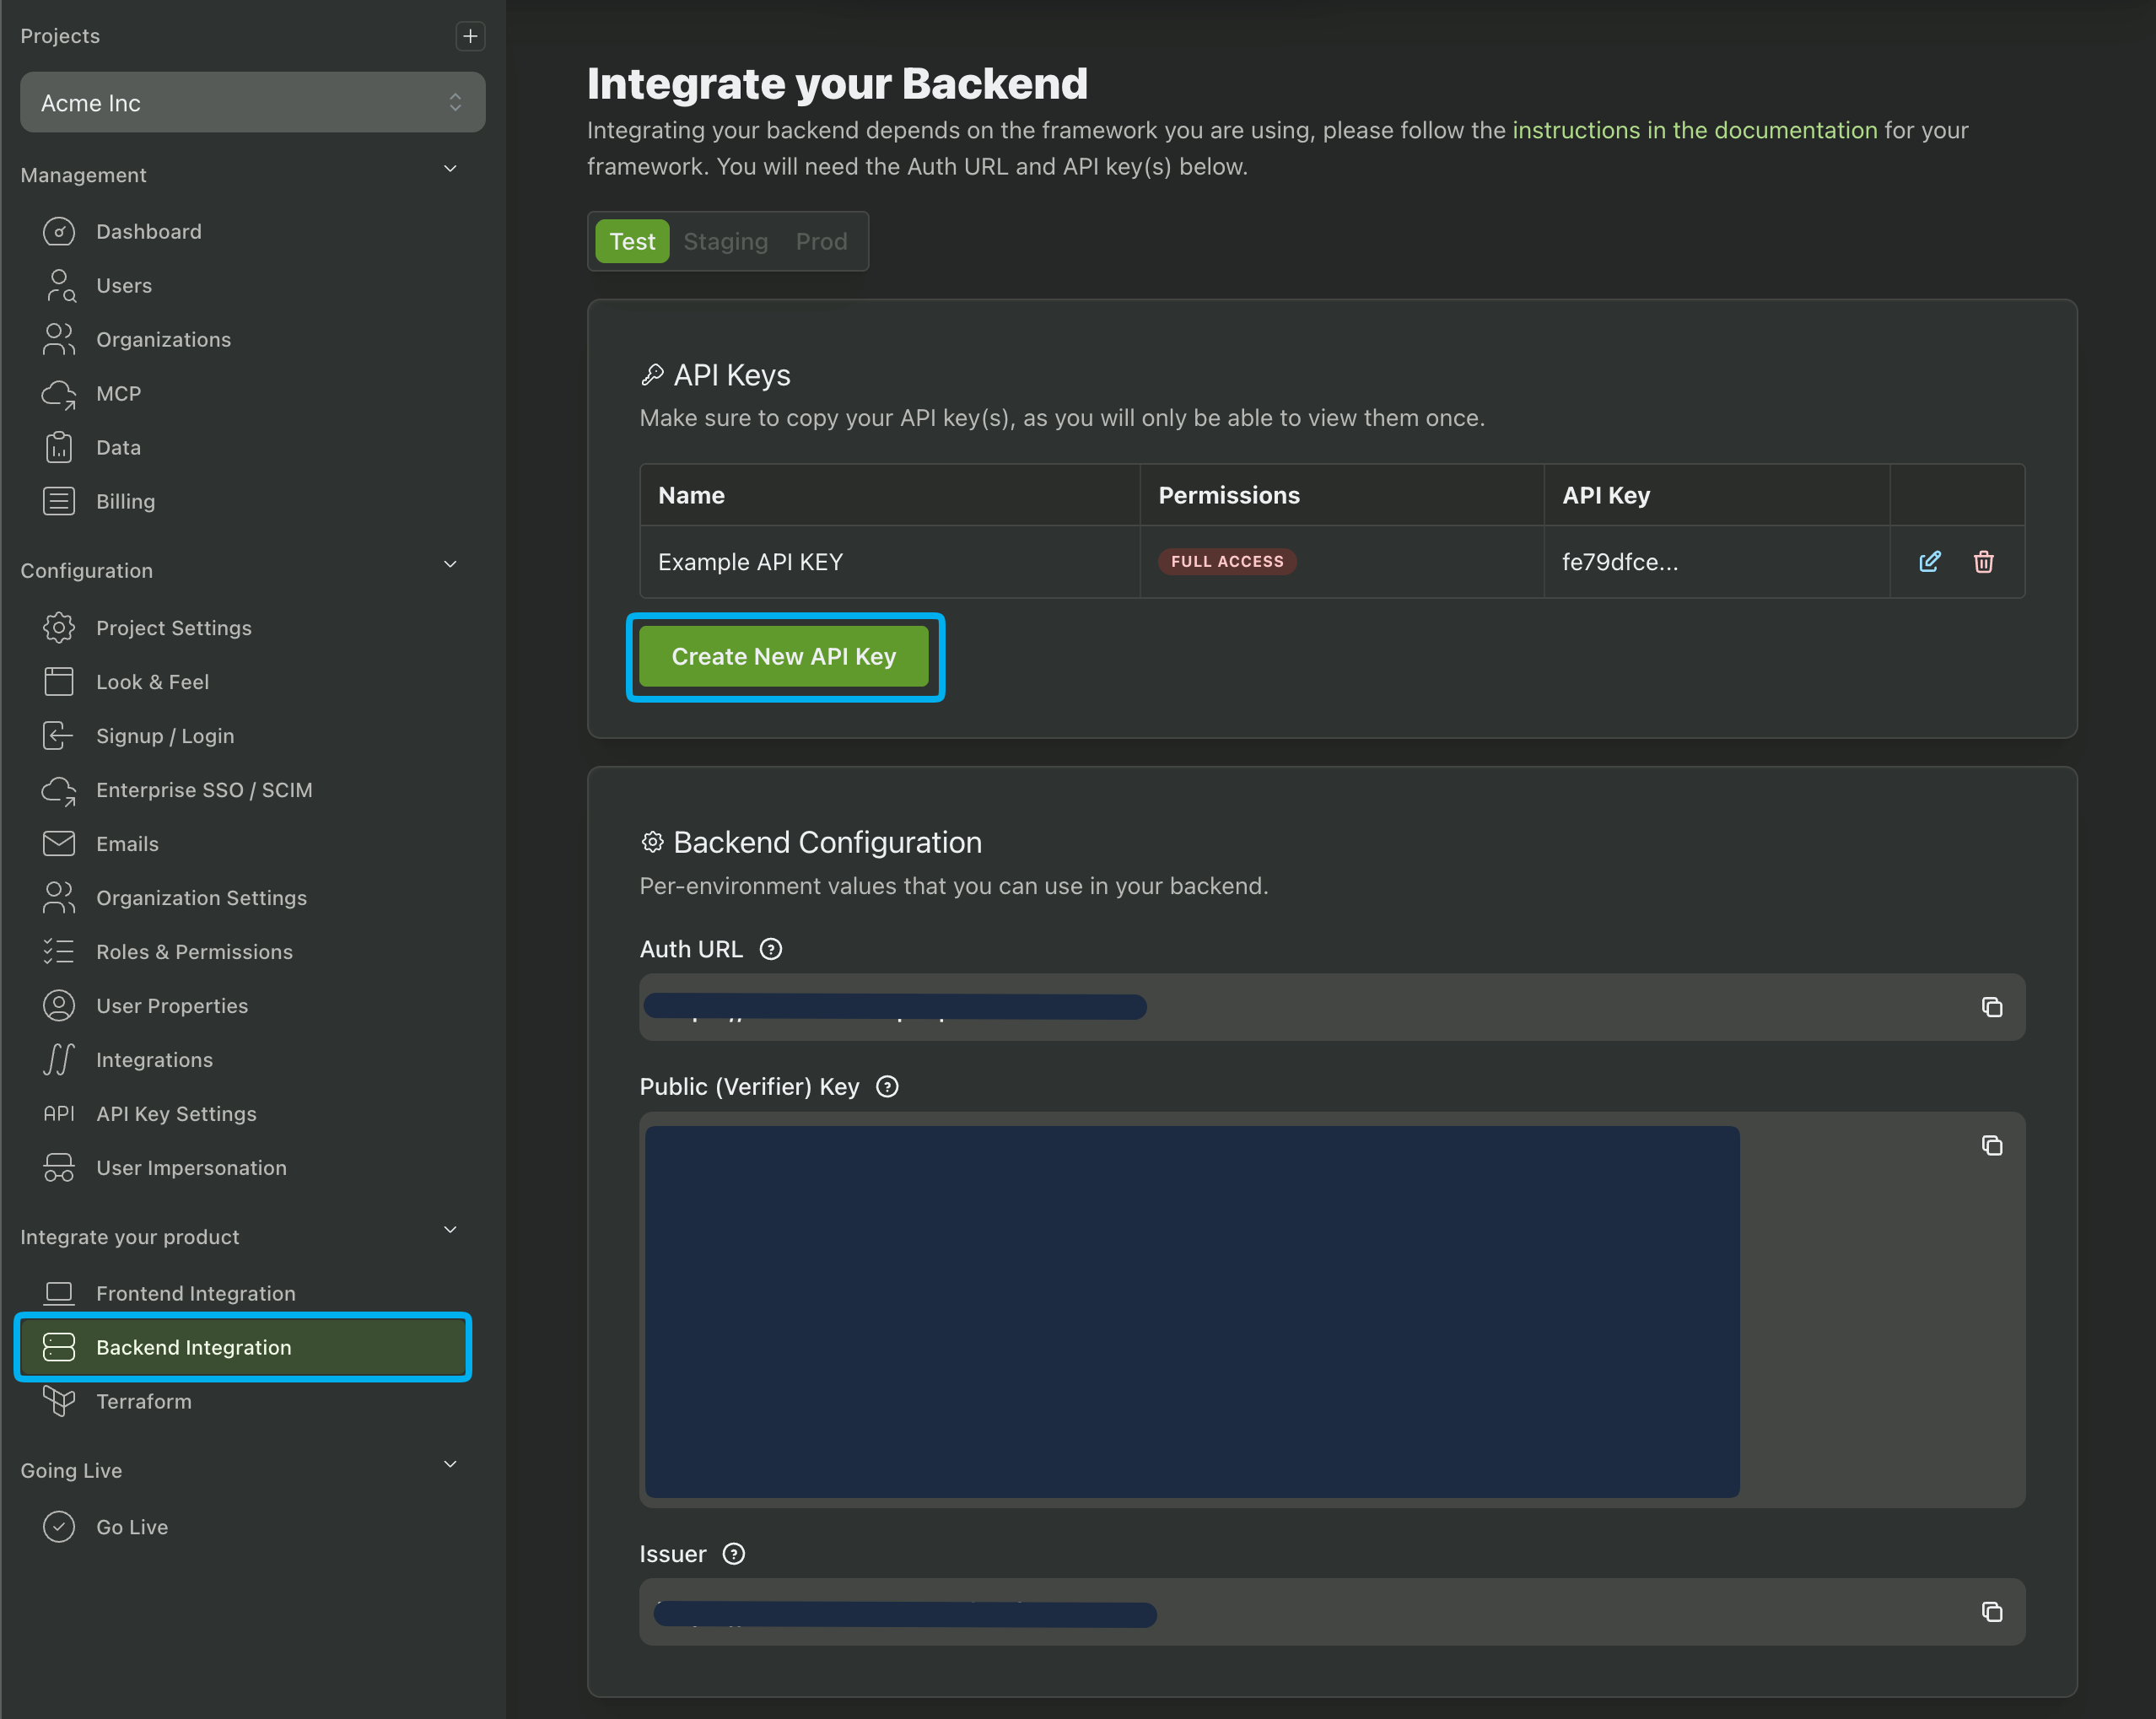
You'll then be presented with four options:
- Full Access: Can use any of our backend APIs
- Read and Validate: Can read org, user, and API key data as well as validate frontend requests and end user API Keys.
- Validation Only: Can validate frontend requests and end user API Keys.
- Custom: Pick which permissions the API key has access to. The reference documentation for each API endpoint lists the required permissions. Some APIs, such as Update Org, have optional permissions that are only required if updating specific fields.
Each of your environments is completely separate, meaning you'll need a different API key for each one.
Base URL
The base URL for the backend API is your environment's Auth URL. Head over to the Frontend Integration page in your PropelAuth dashboard to find yours.
Like API keys, each environment has its own Auth URL. Your test environment URL is automatically generated by PropelAuth (e.g., "https://1581439057.propelauthtest.com").
For staging and production environments, you define your own Auth URL. For example, if your app's domain is "https://acme.com", your Auth URL might be "https://auth.acme.com".
User API Keys
PropelAuth offers the ability for your users to create their own API keys. These API keys cannot be used in the Authentication header for this API. However, you can use the API KEY APIs to create, edit, delete, and validate these API keys for your own API.
Download the Postman Collection
View and test the PropelAuth backend API with our Postman Collection.
- Download our Postman Collection.
- Import the collection to your own Postman workspace.
- Click on the Variables tab, paste in your API credentials, and click Save.